pizzelle
Pizzelle is a fun to make and delicious cookie!
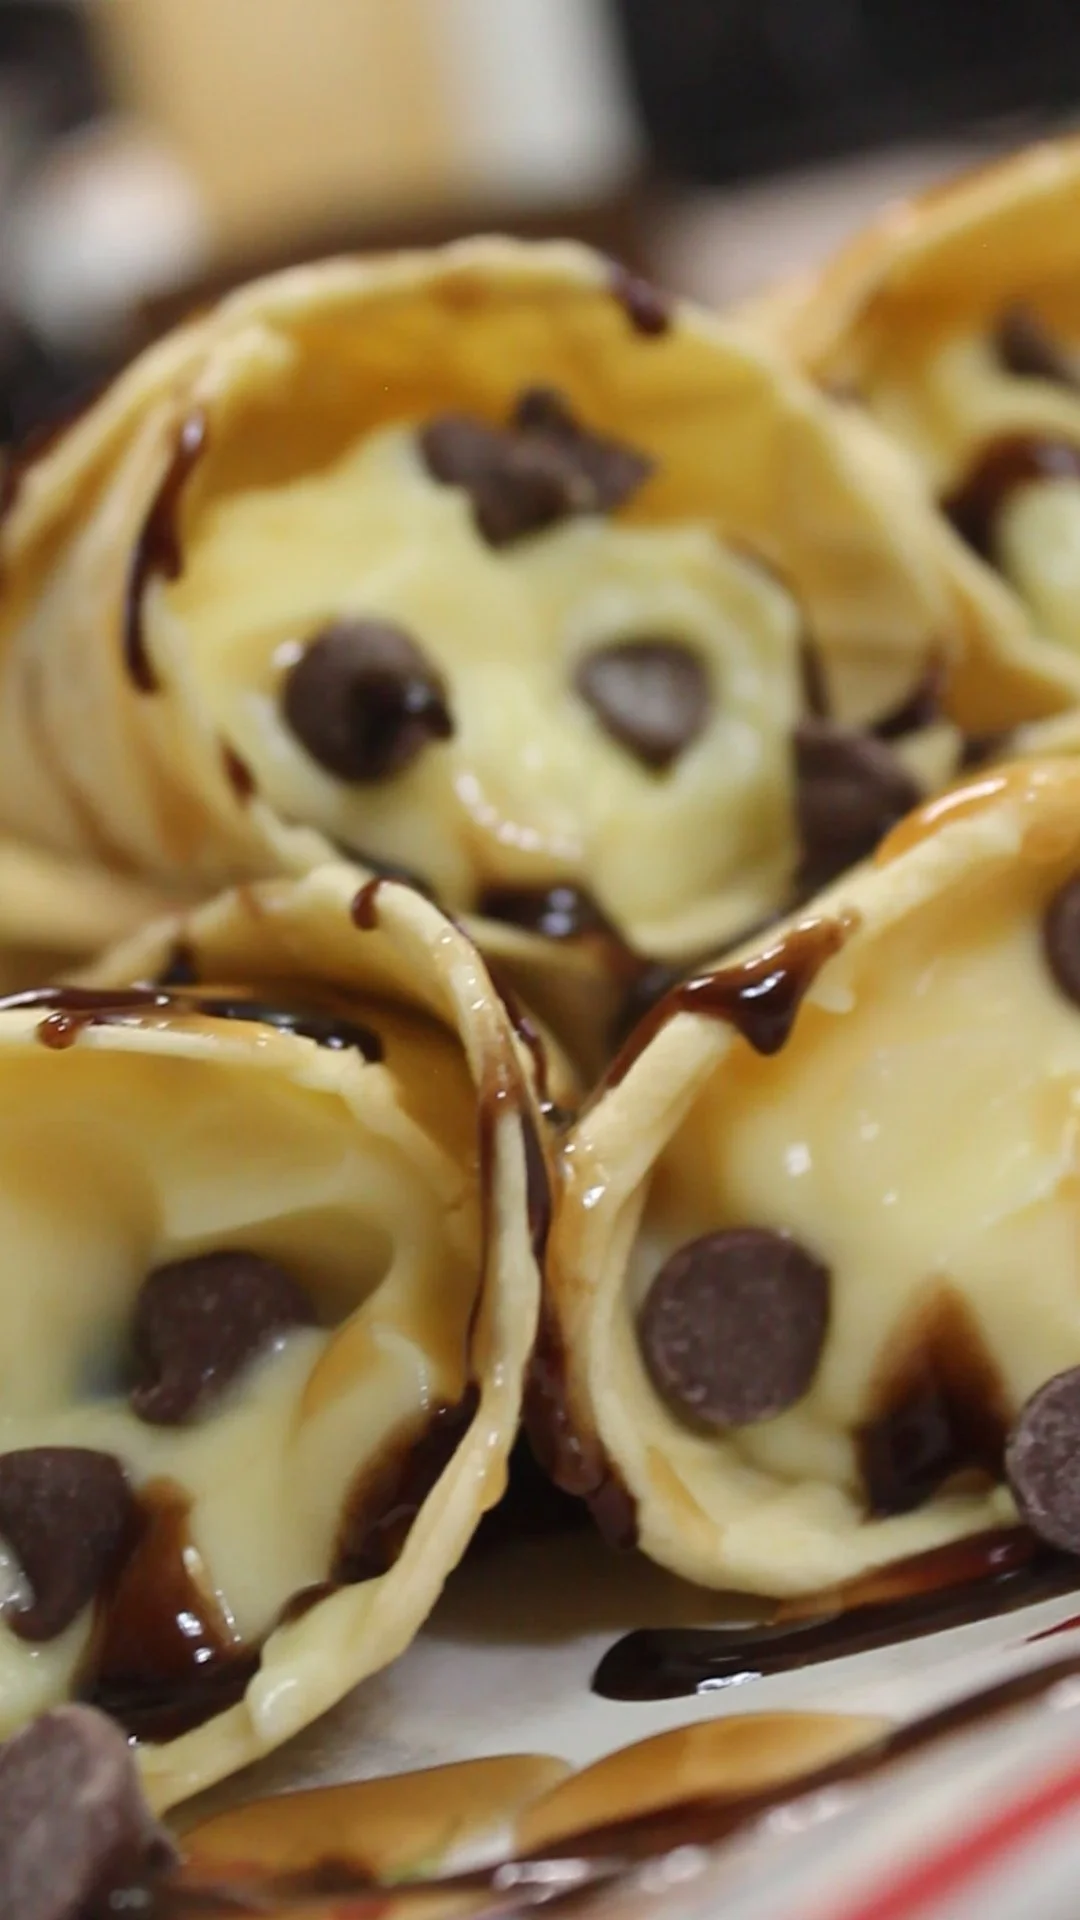
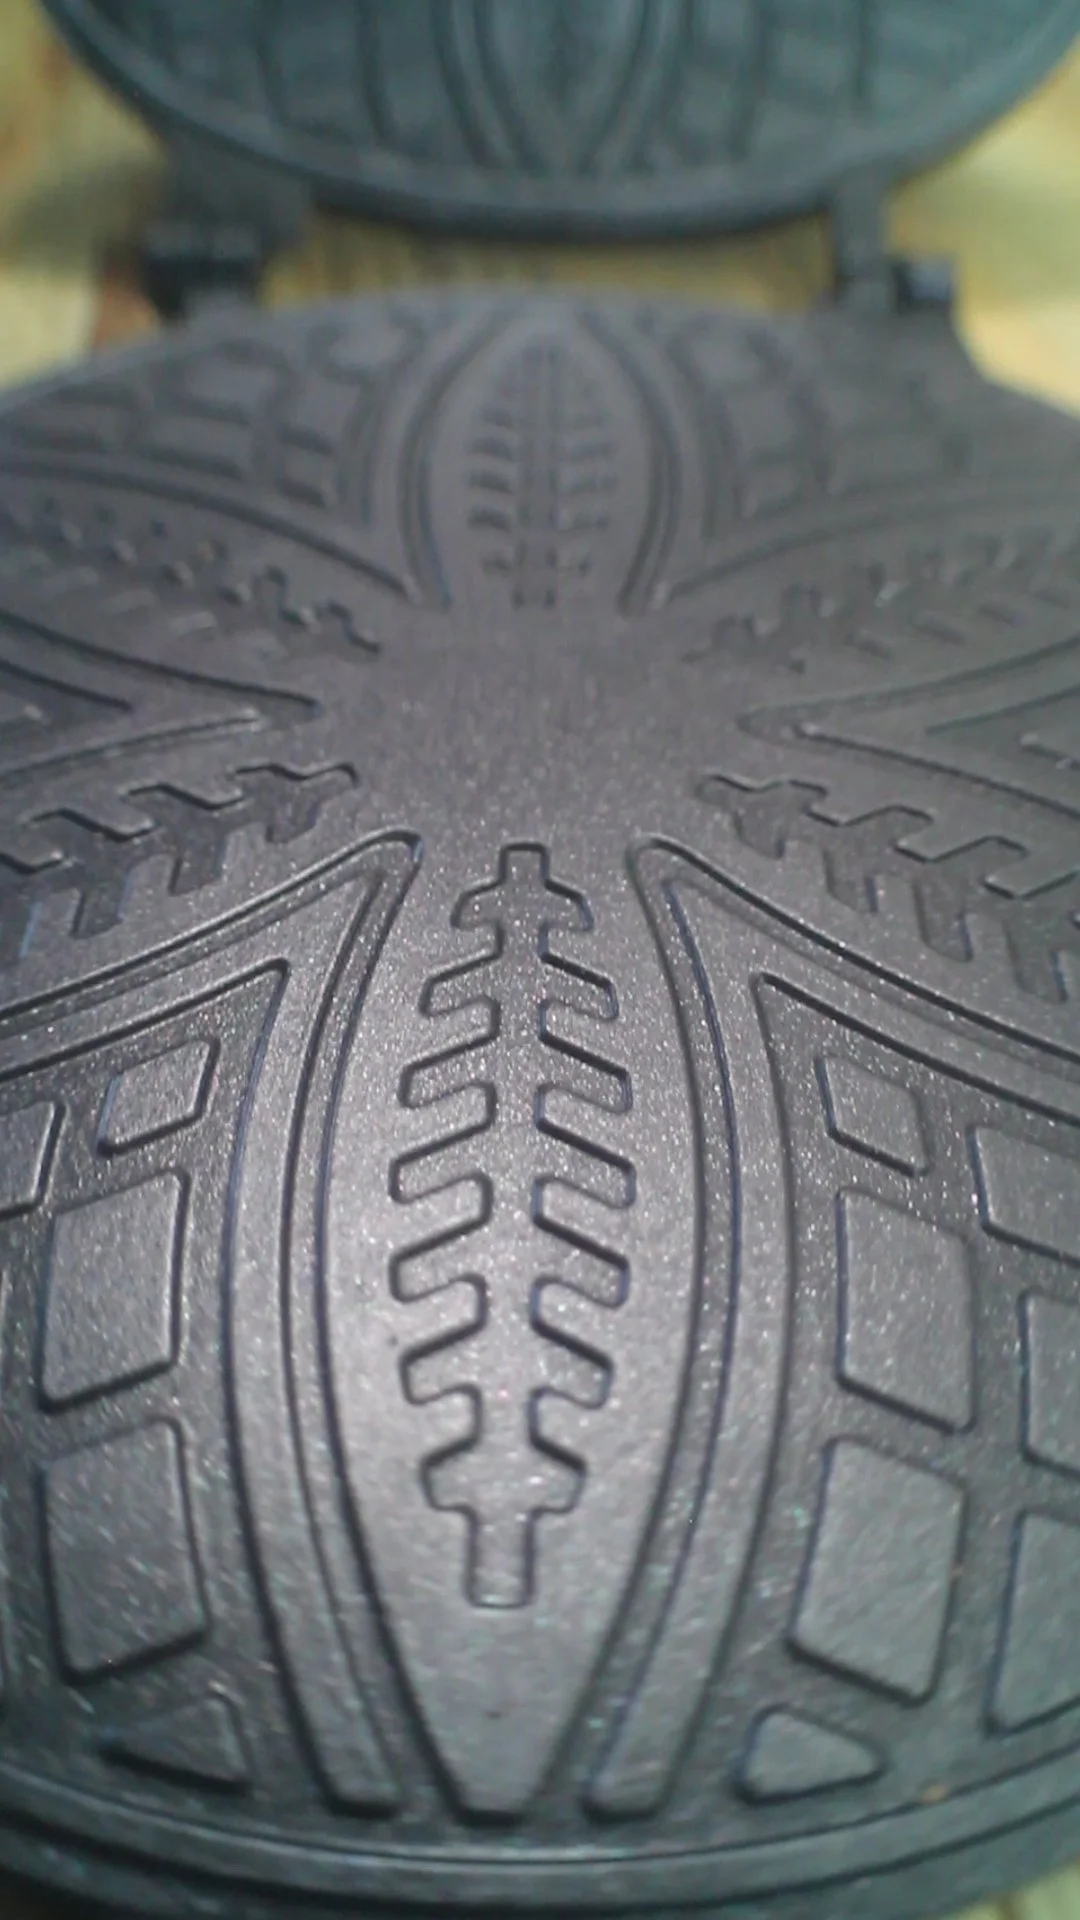
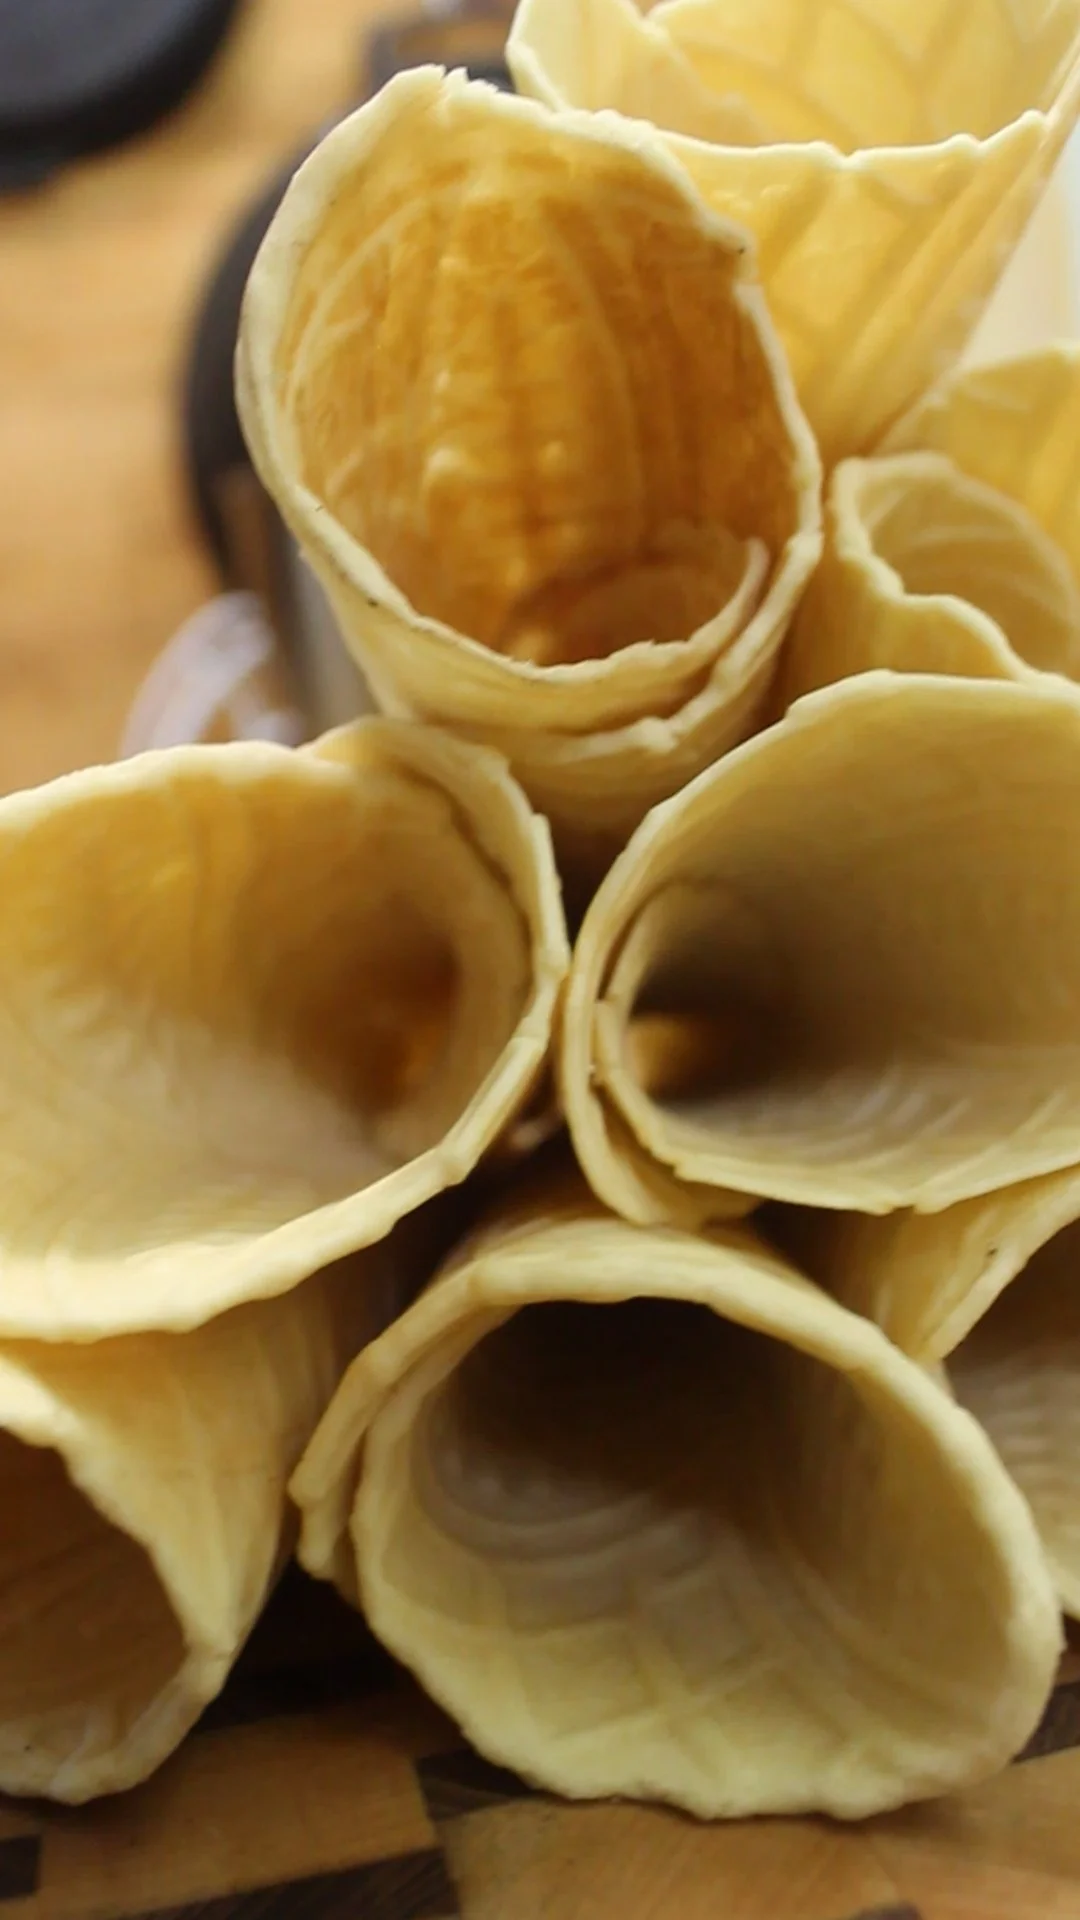
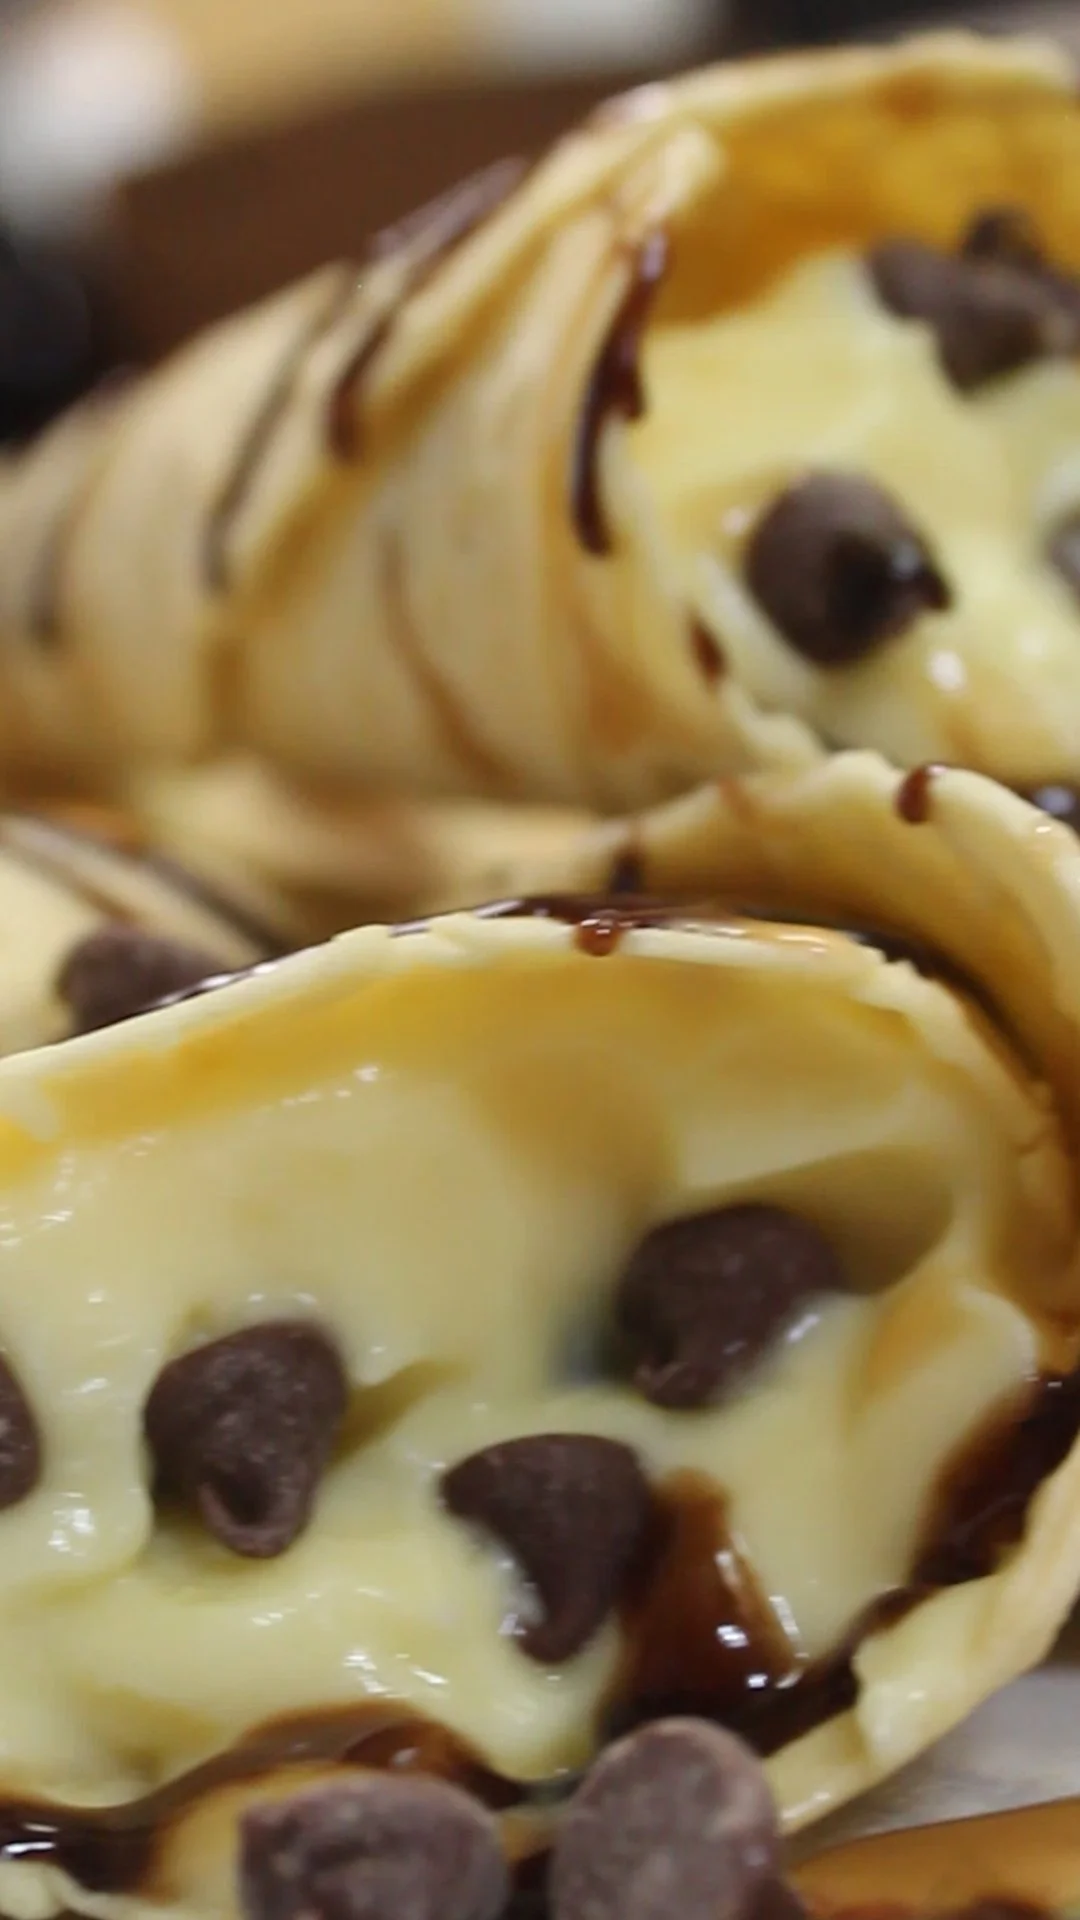
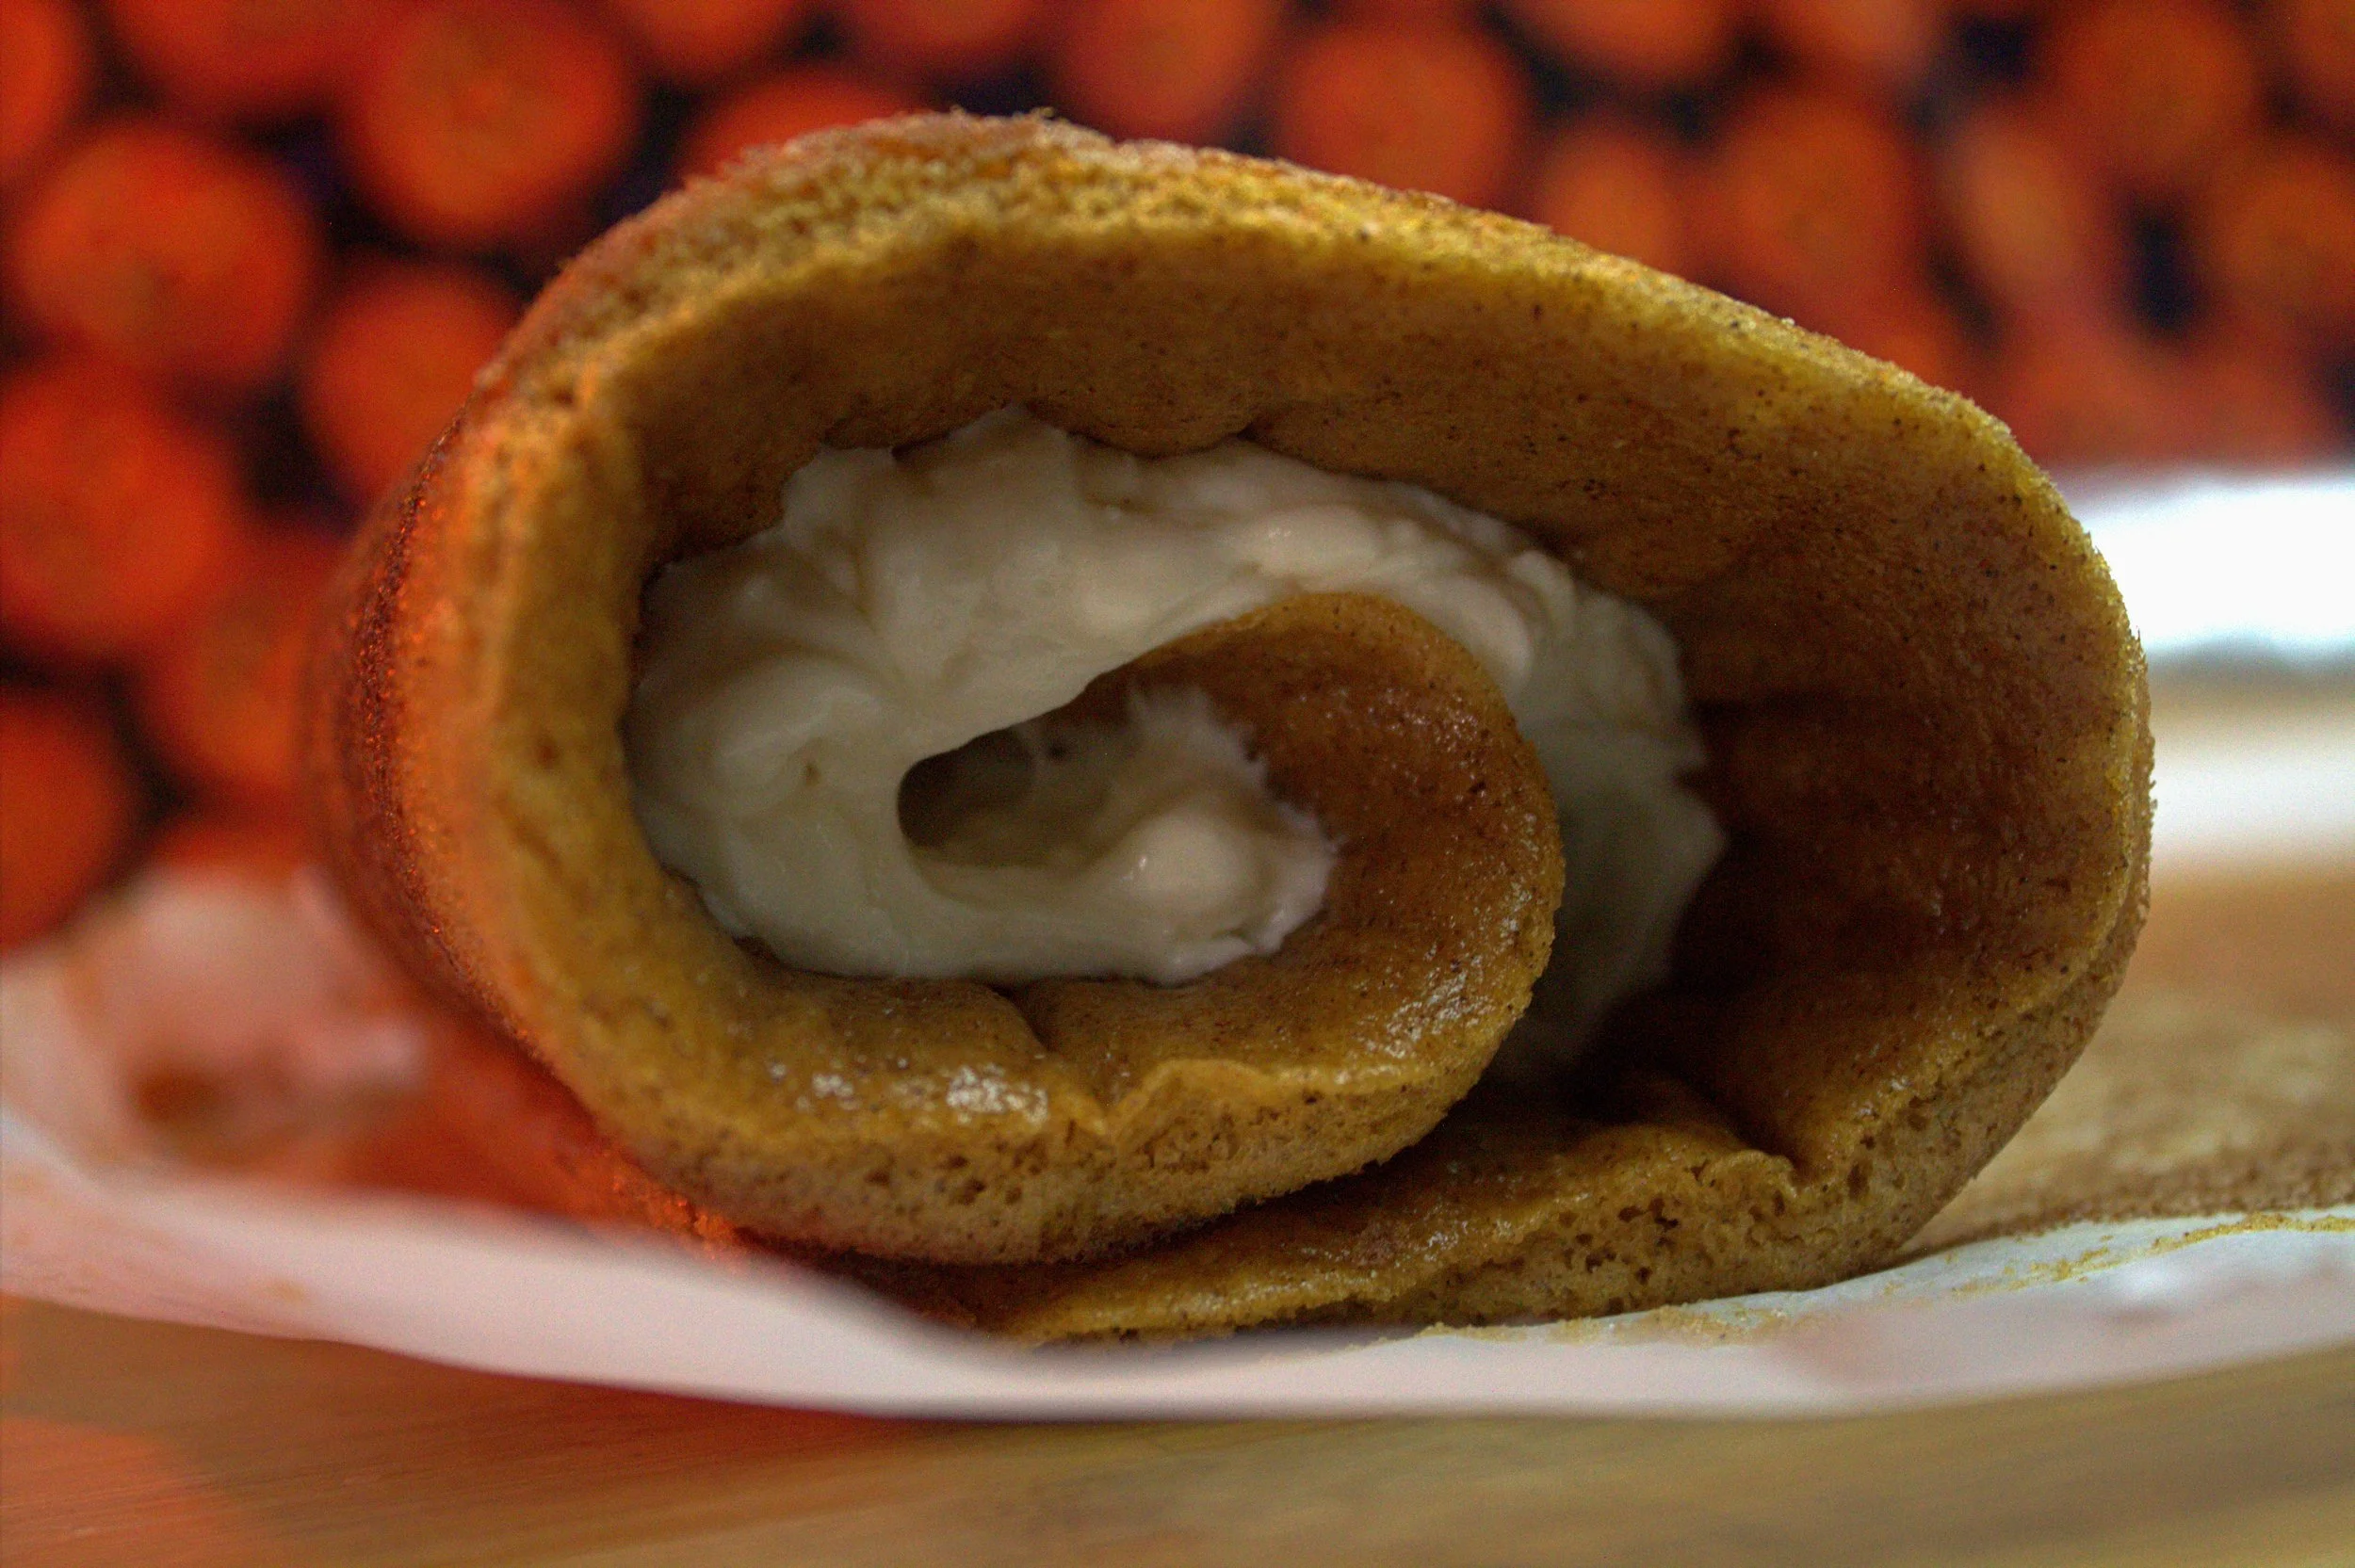
I had no idea what these were not that long ago until I saw video on them and thought they seemed so fun to make! So, we got a pizzelle iron and tried it out, and it took a couple goes to figure out the amount for the press and how quickly to roll them up without cracking if you wanted cones. (I still crack them sometimes) A traditional pizzelle uses anise in the recipe, and anise is a flowering annual herb that has a very rich flavor, and from what I understand a very little goes a long way. Now I don’t have anise on hand so i just use vanilla, but if you have it and want to try it, I would add a quarter of a teaspoon at a time and slowly increase to get an idea of the flavor. These can be served flat as a cookie topped with some powdered sugar or roll into a cone or cannoli shape to fill, I like to go with cone shaped to fill with pudding or ice cream! The filling part is where you get to have all the fun and be as creative as you like.
*Check out the kitchen gadgets page for the iron I use to make these!
Makes 15 7 ½ inch pizzelles
Ingredients:
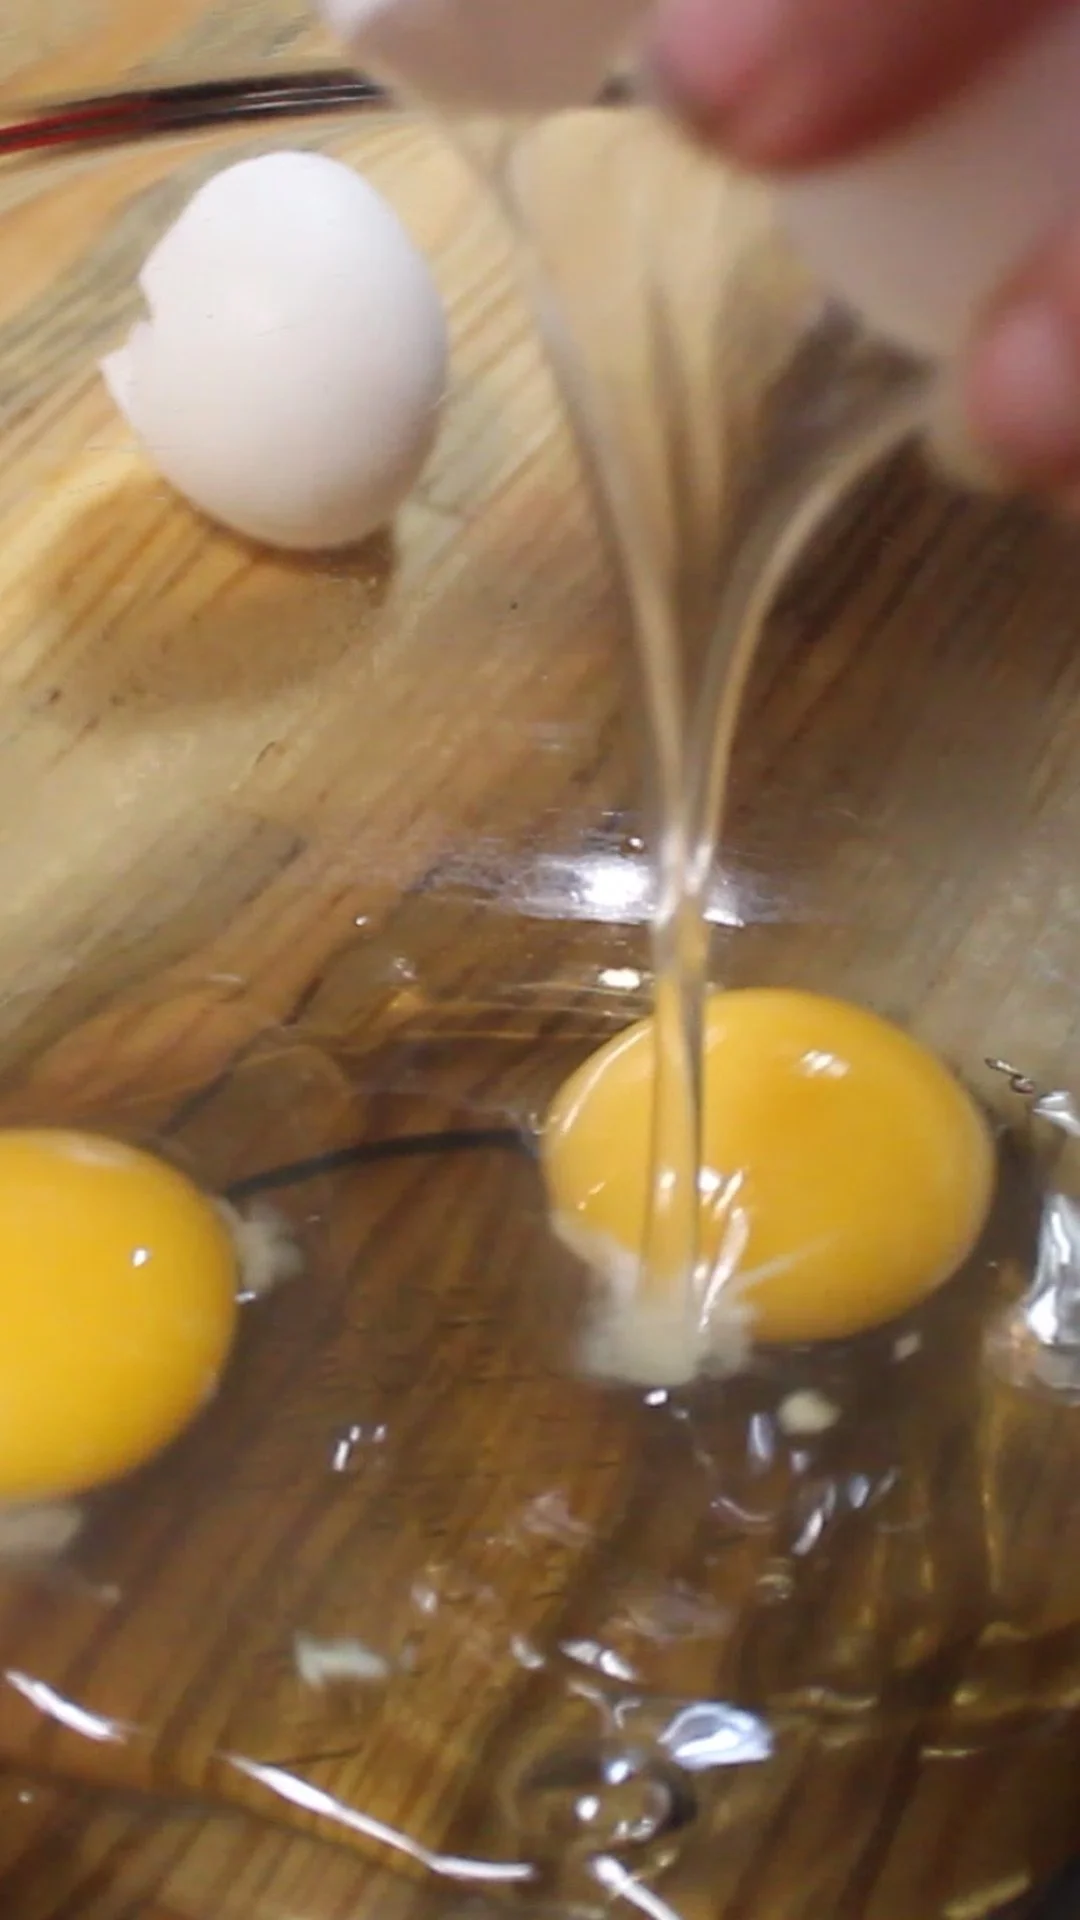
3 eggs
¾ cup of sugar
1 ¾ cup of all-purpose flour
2 teaspoons of baking powdered
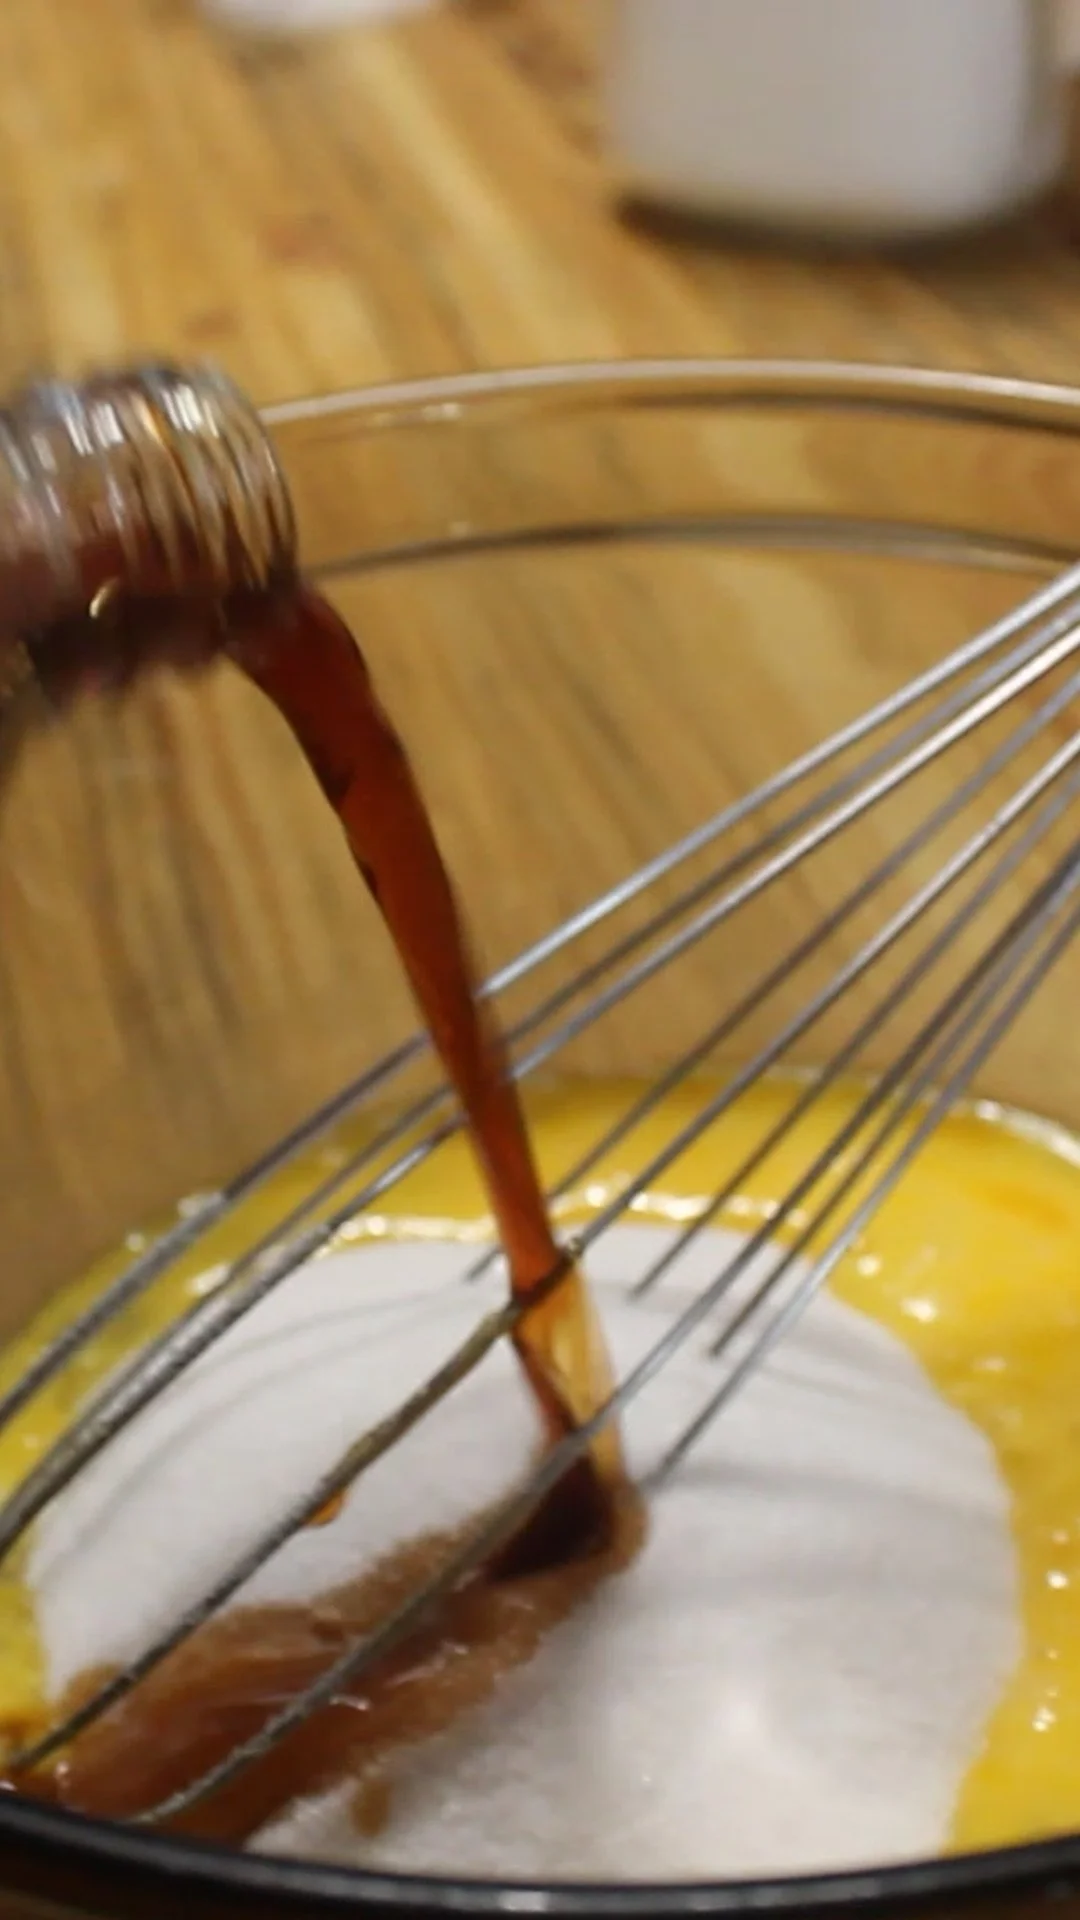
2 teaspoons of vanilla extract (if using anise, 1 ½tsp vanilla and ½ tsp anise)
8 tablespoons of melted butter
Directions:
whisk together the eggs, sugar, and vanilla (and anise if you are using it)

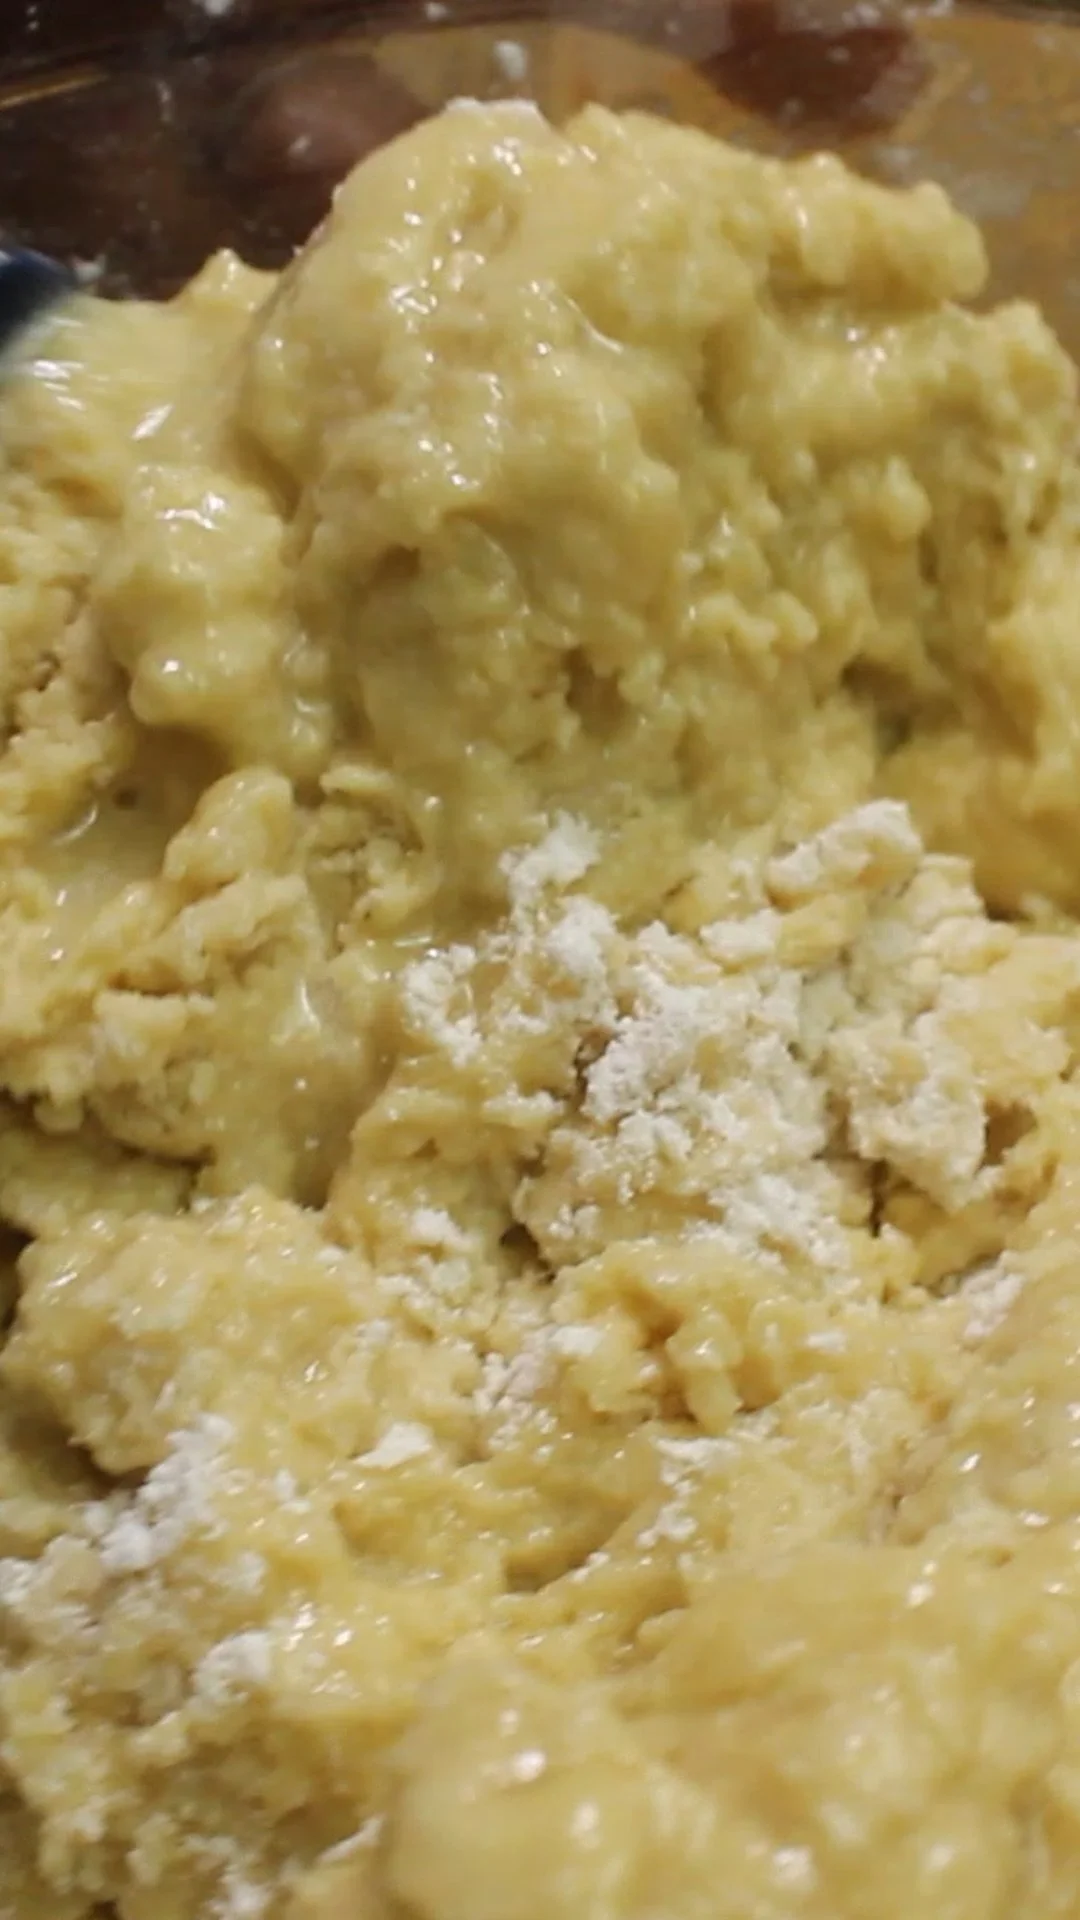
add flour and baking powder and mix well till smooth and there are no lumps
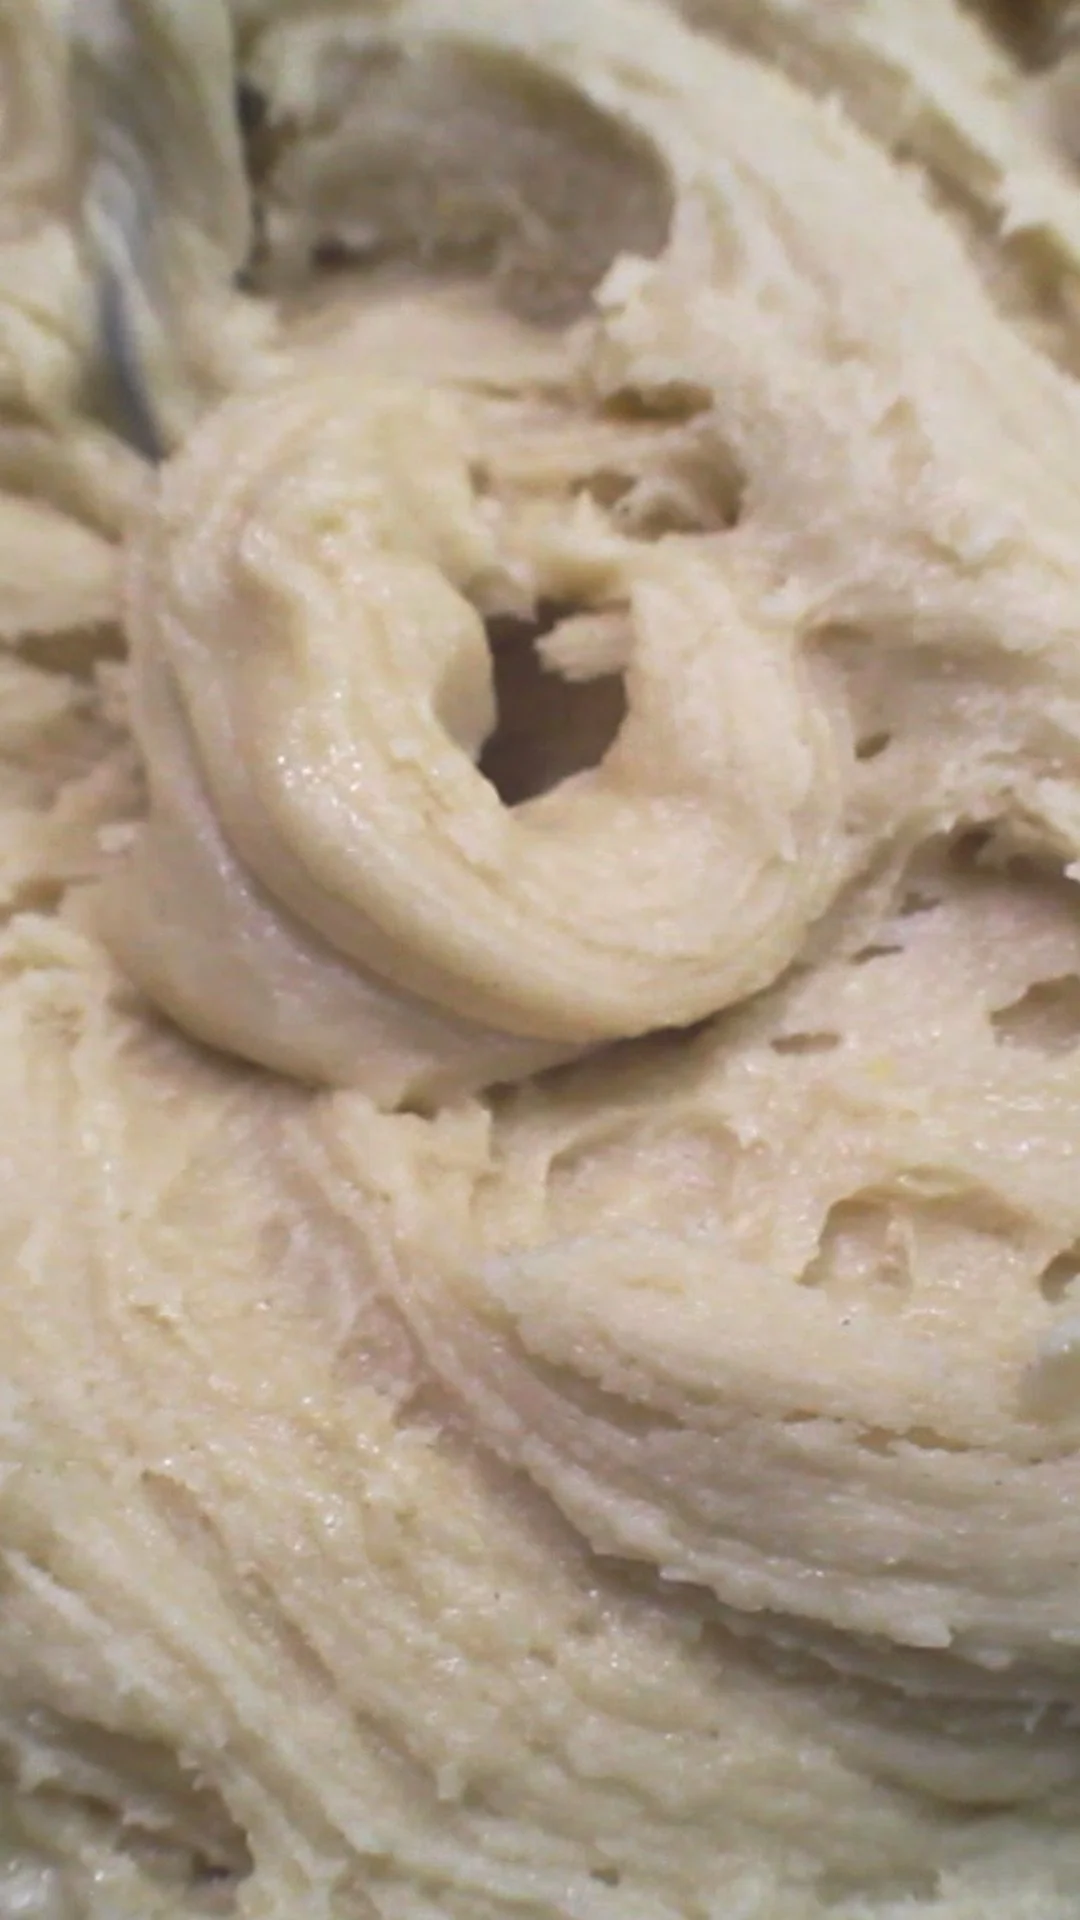
and add your melted butter and mix in well, you should have a nice thick sticky dough
heat your pizzelle iron (they are all different from stove top ones to electric ones so follow your instructions for yours) and
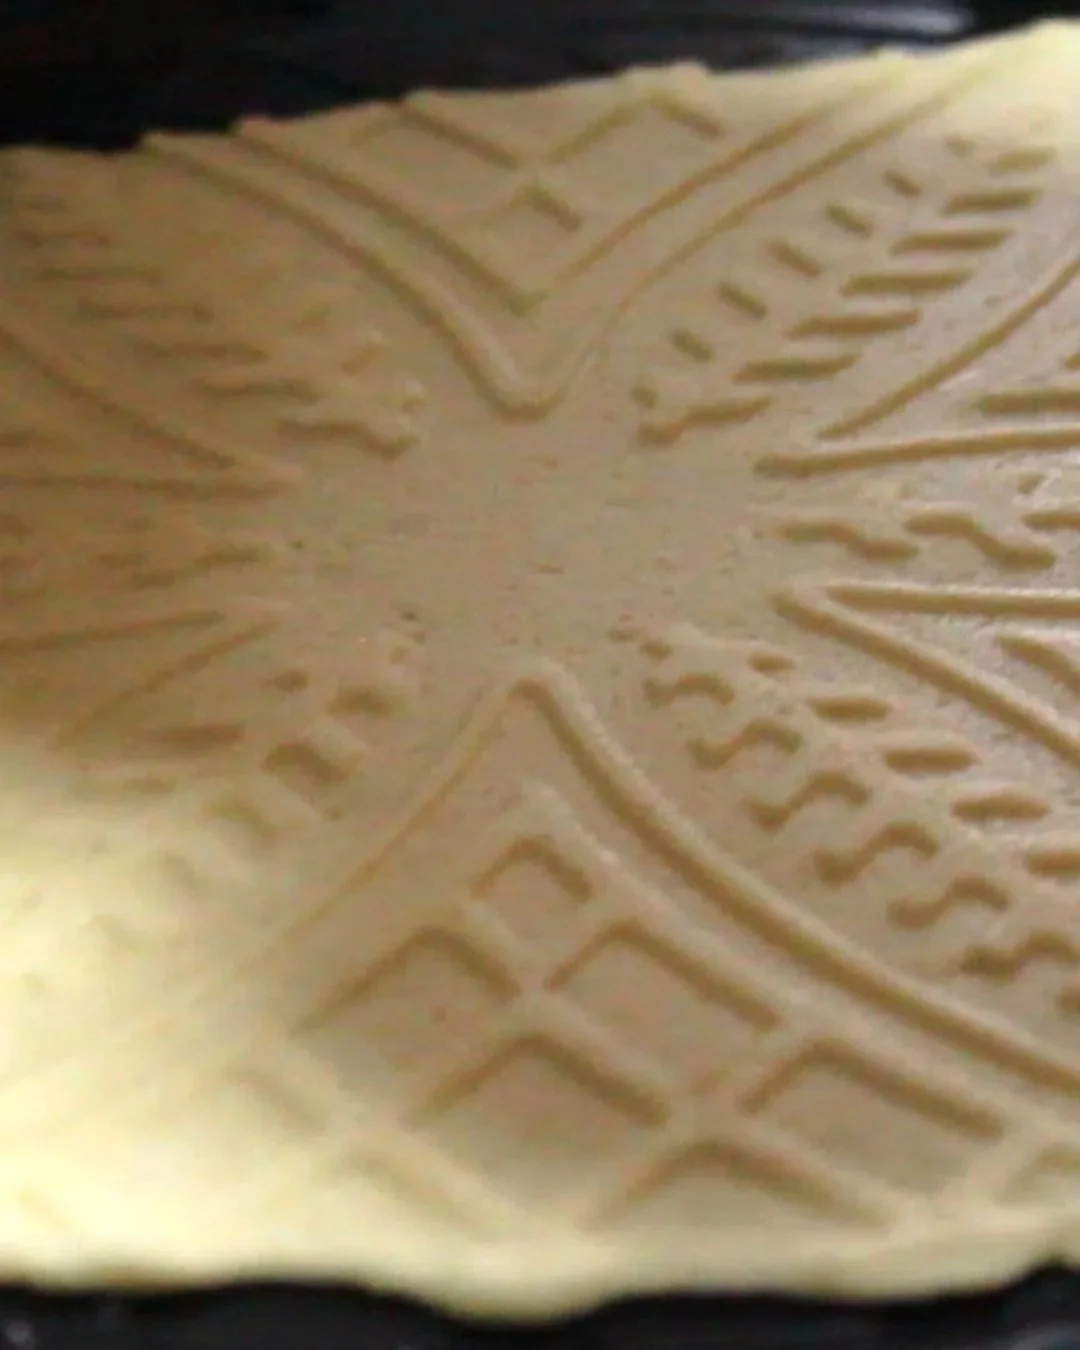
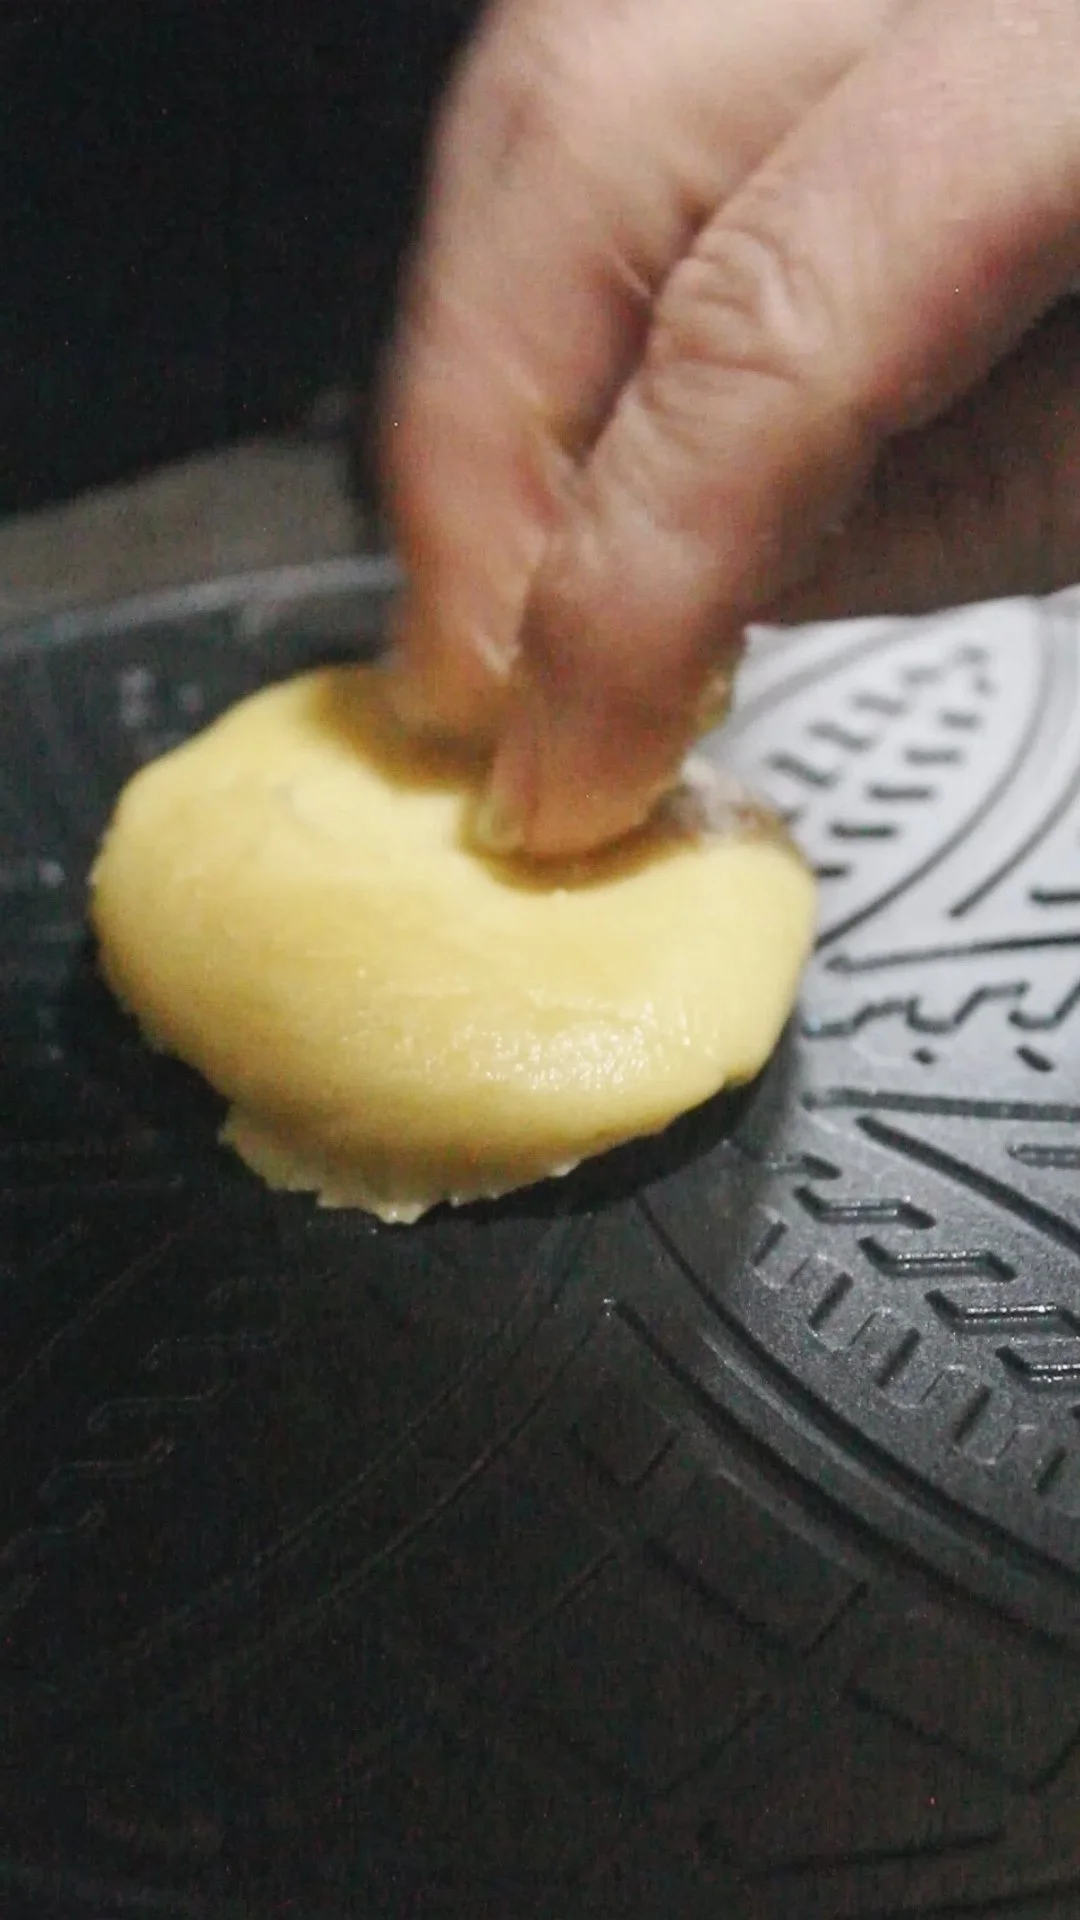
divide your sticky dough into 15 even sized balls (lightly coat your hands in oil to help prevent to much sticking) you can also just take spoonfuls rate onto your pizzelle iron but I like to divide them first as evenly as I can.
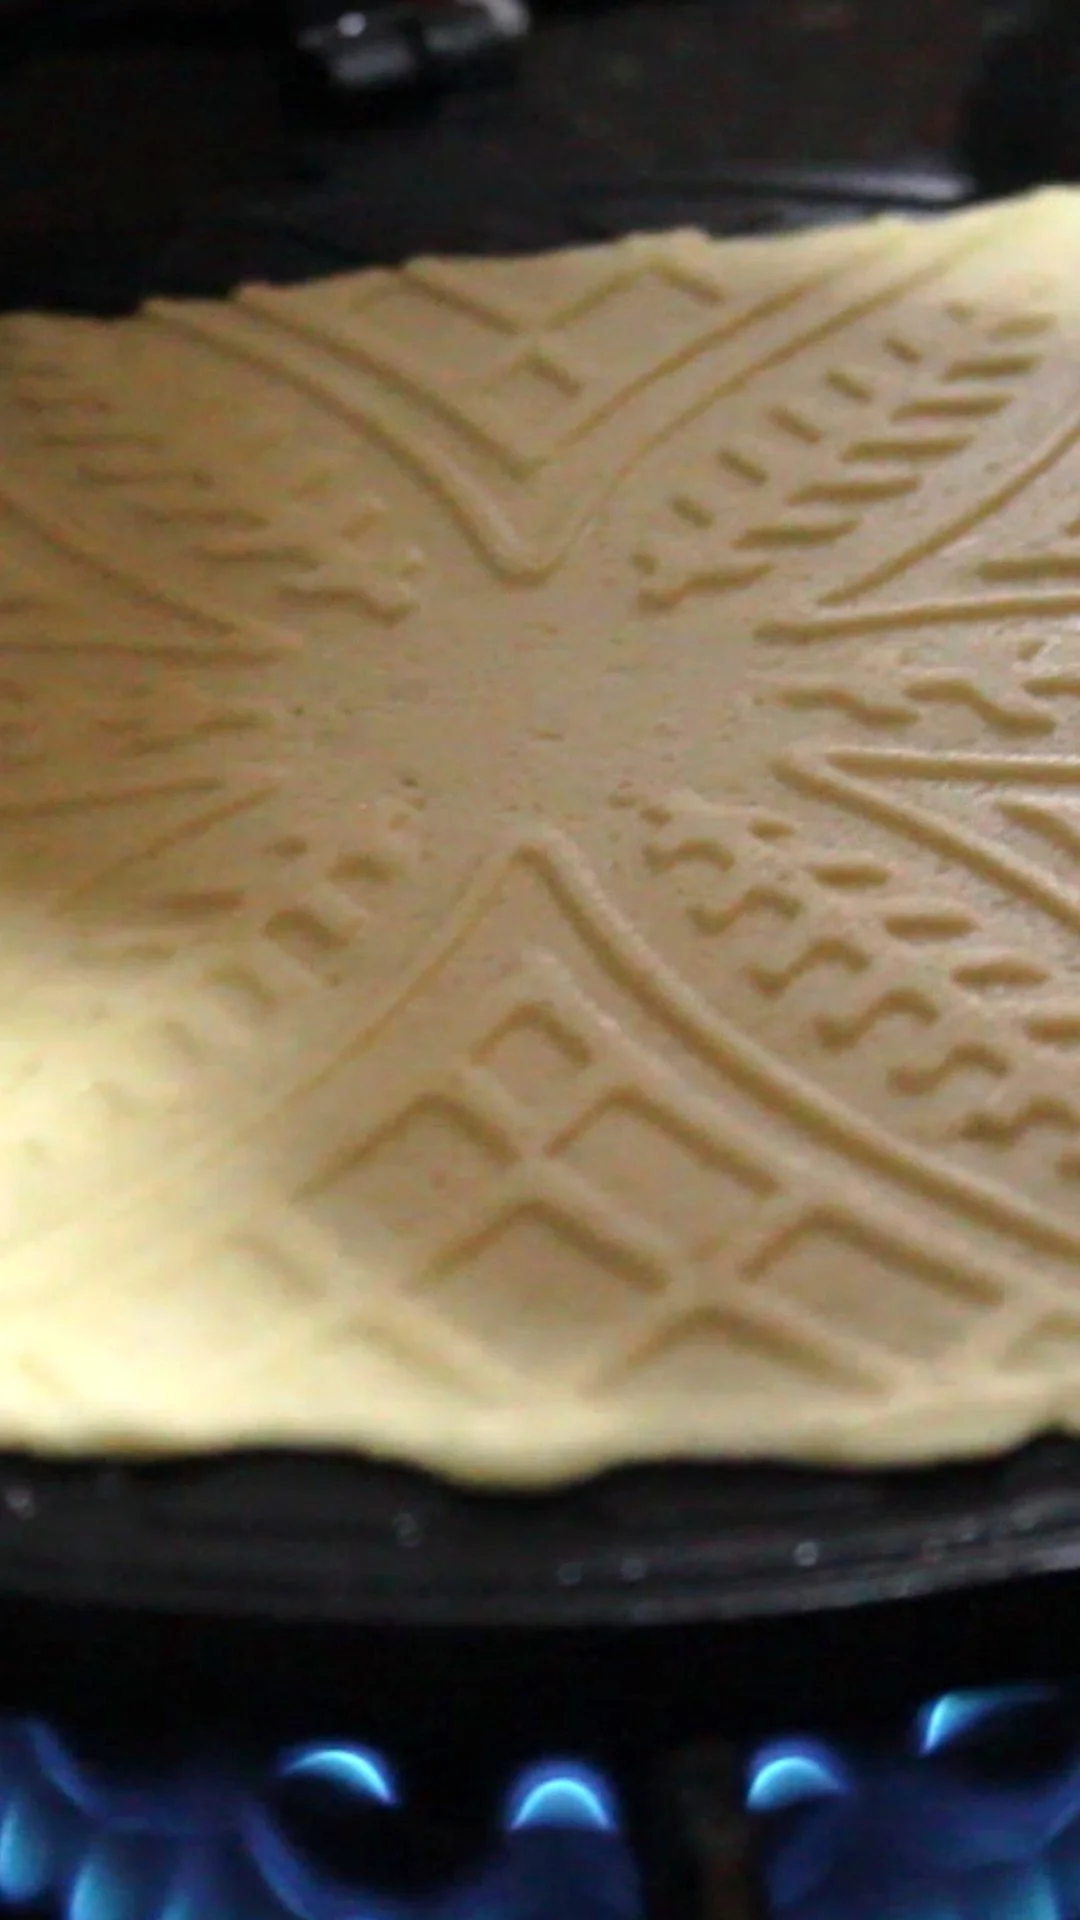
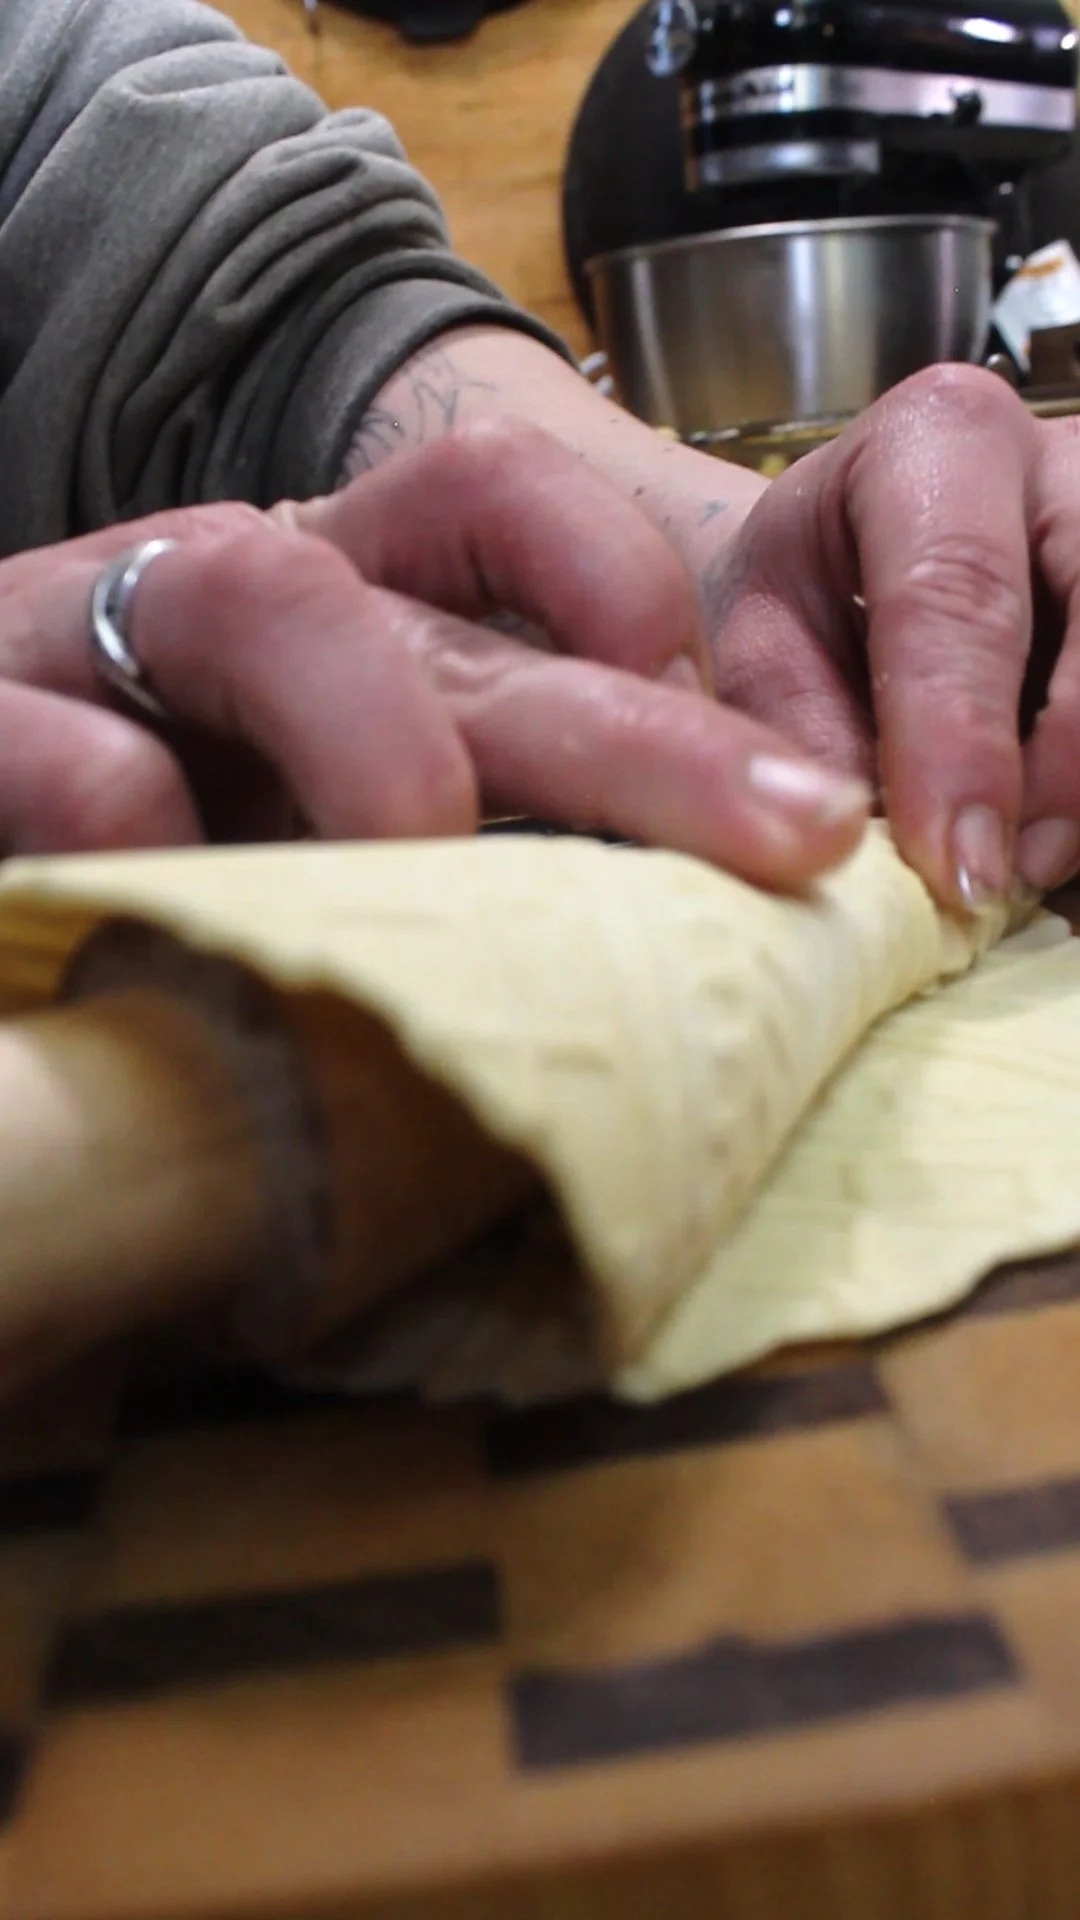
When your iron is ready take one of your balls and slightly press it flat before placing it on the iron (this helps with mine to keep it from slipping) when you place it on the iron place it a little off center more towards the hinge, and slowly close the iron and hold shut or lock it and flip the iron over after about 30 seconds (if you don’t have an electric one, I do not I use my gas stove top) and when the steam starts to subside slowly open the iron in case it sticks and if it is slightly browned then you can pull off the iron. It will harden quickly after if it comes off the heat so if you are going to roll these you need to do so when it comes off the heat so it will harden in shape.
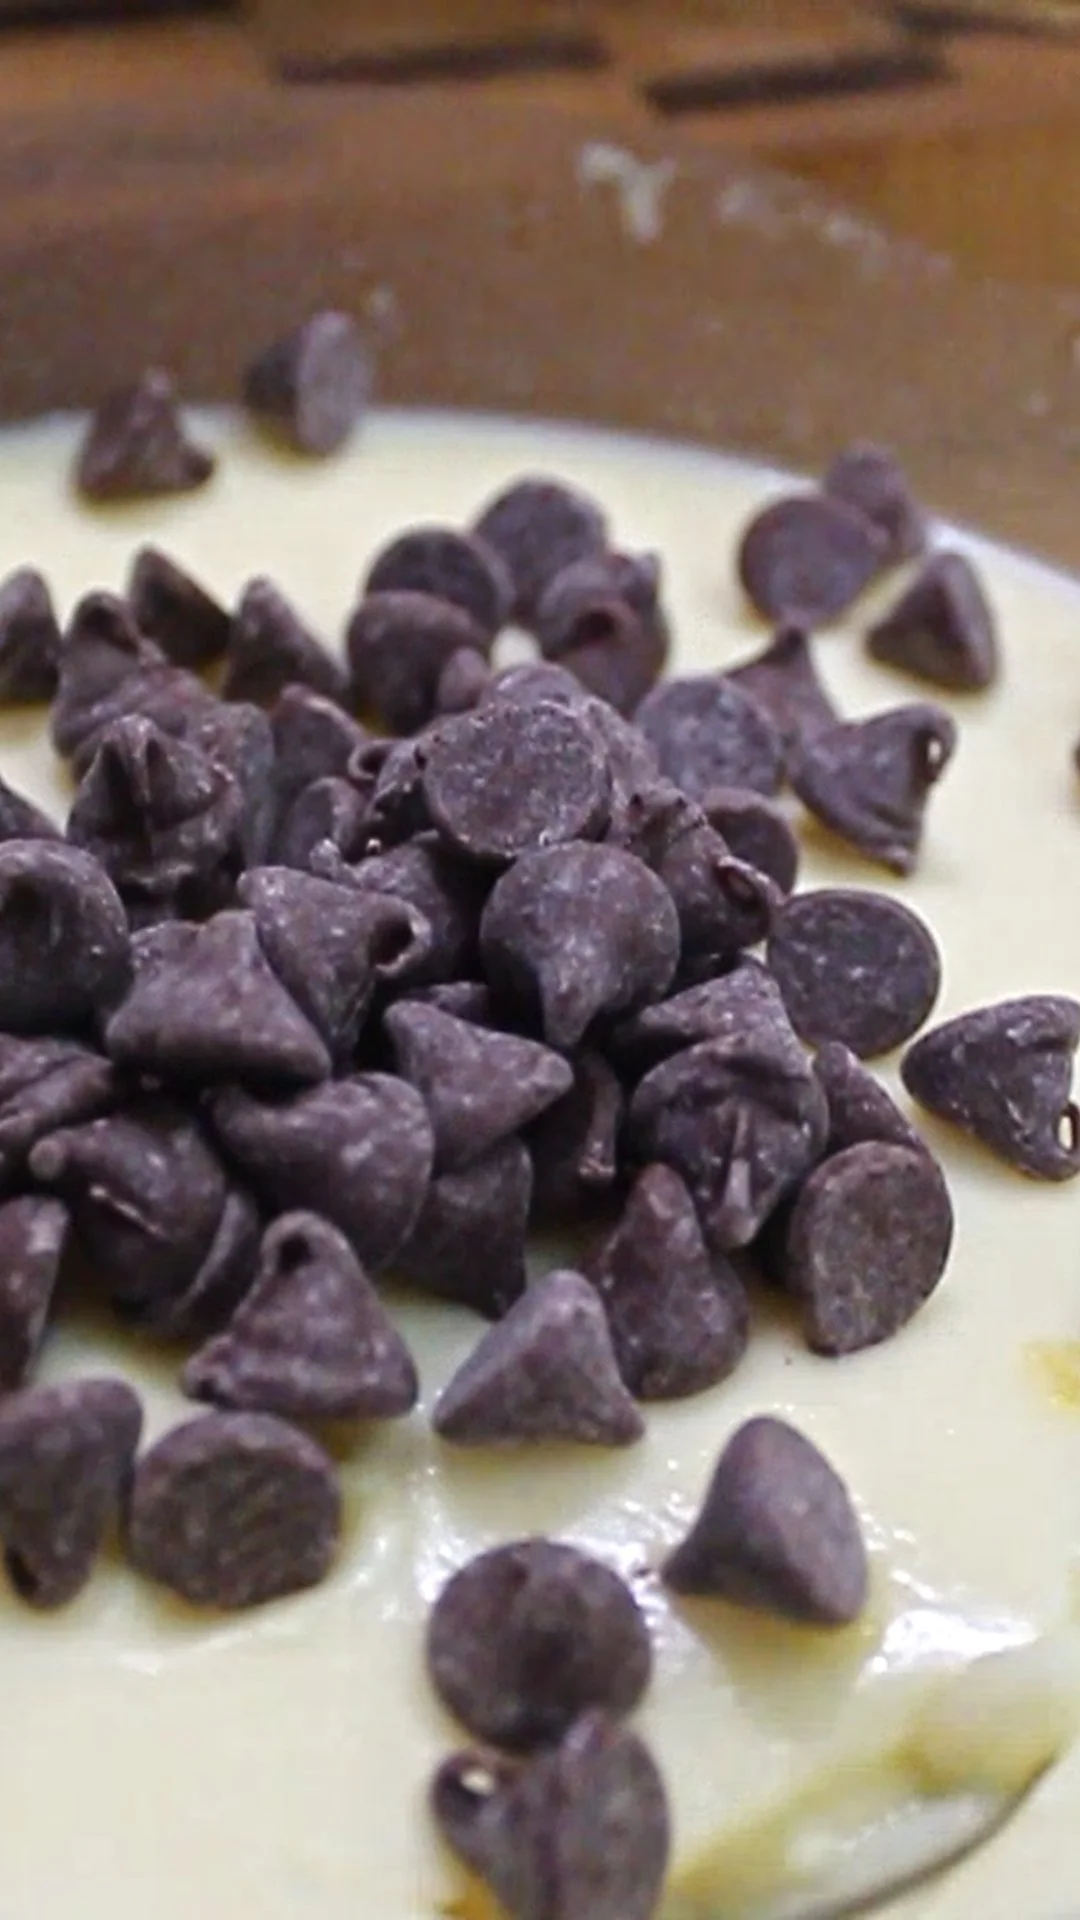
Repeat these steps till all are done, and then top with powdered sugar, or fill with whatever you would like and enjoy!!
Pumpkin Roll
Pumpkin recipes are not just for fall! Especially pumpkin rolls and they are easier to make than you think.
I’ve grown up eating pumpkin rolls every year around Thanksgiving and Christmas time. My mother still makes them for me every year, but I learned how to make them because I love having them all year long. They aren’t just good for the holidays. I strayed away from making them because they always seem more of a pain to make then it was worth, but I gave it a shot, and they were a lot easier to make then I thought, and so worth it!
-Cake Ingredients-
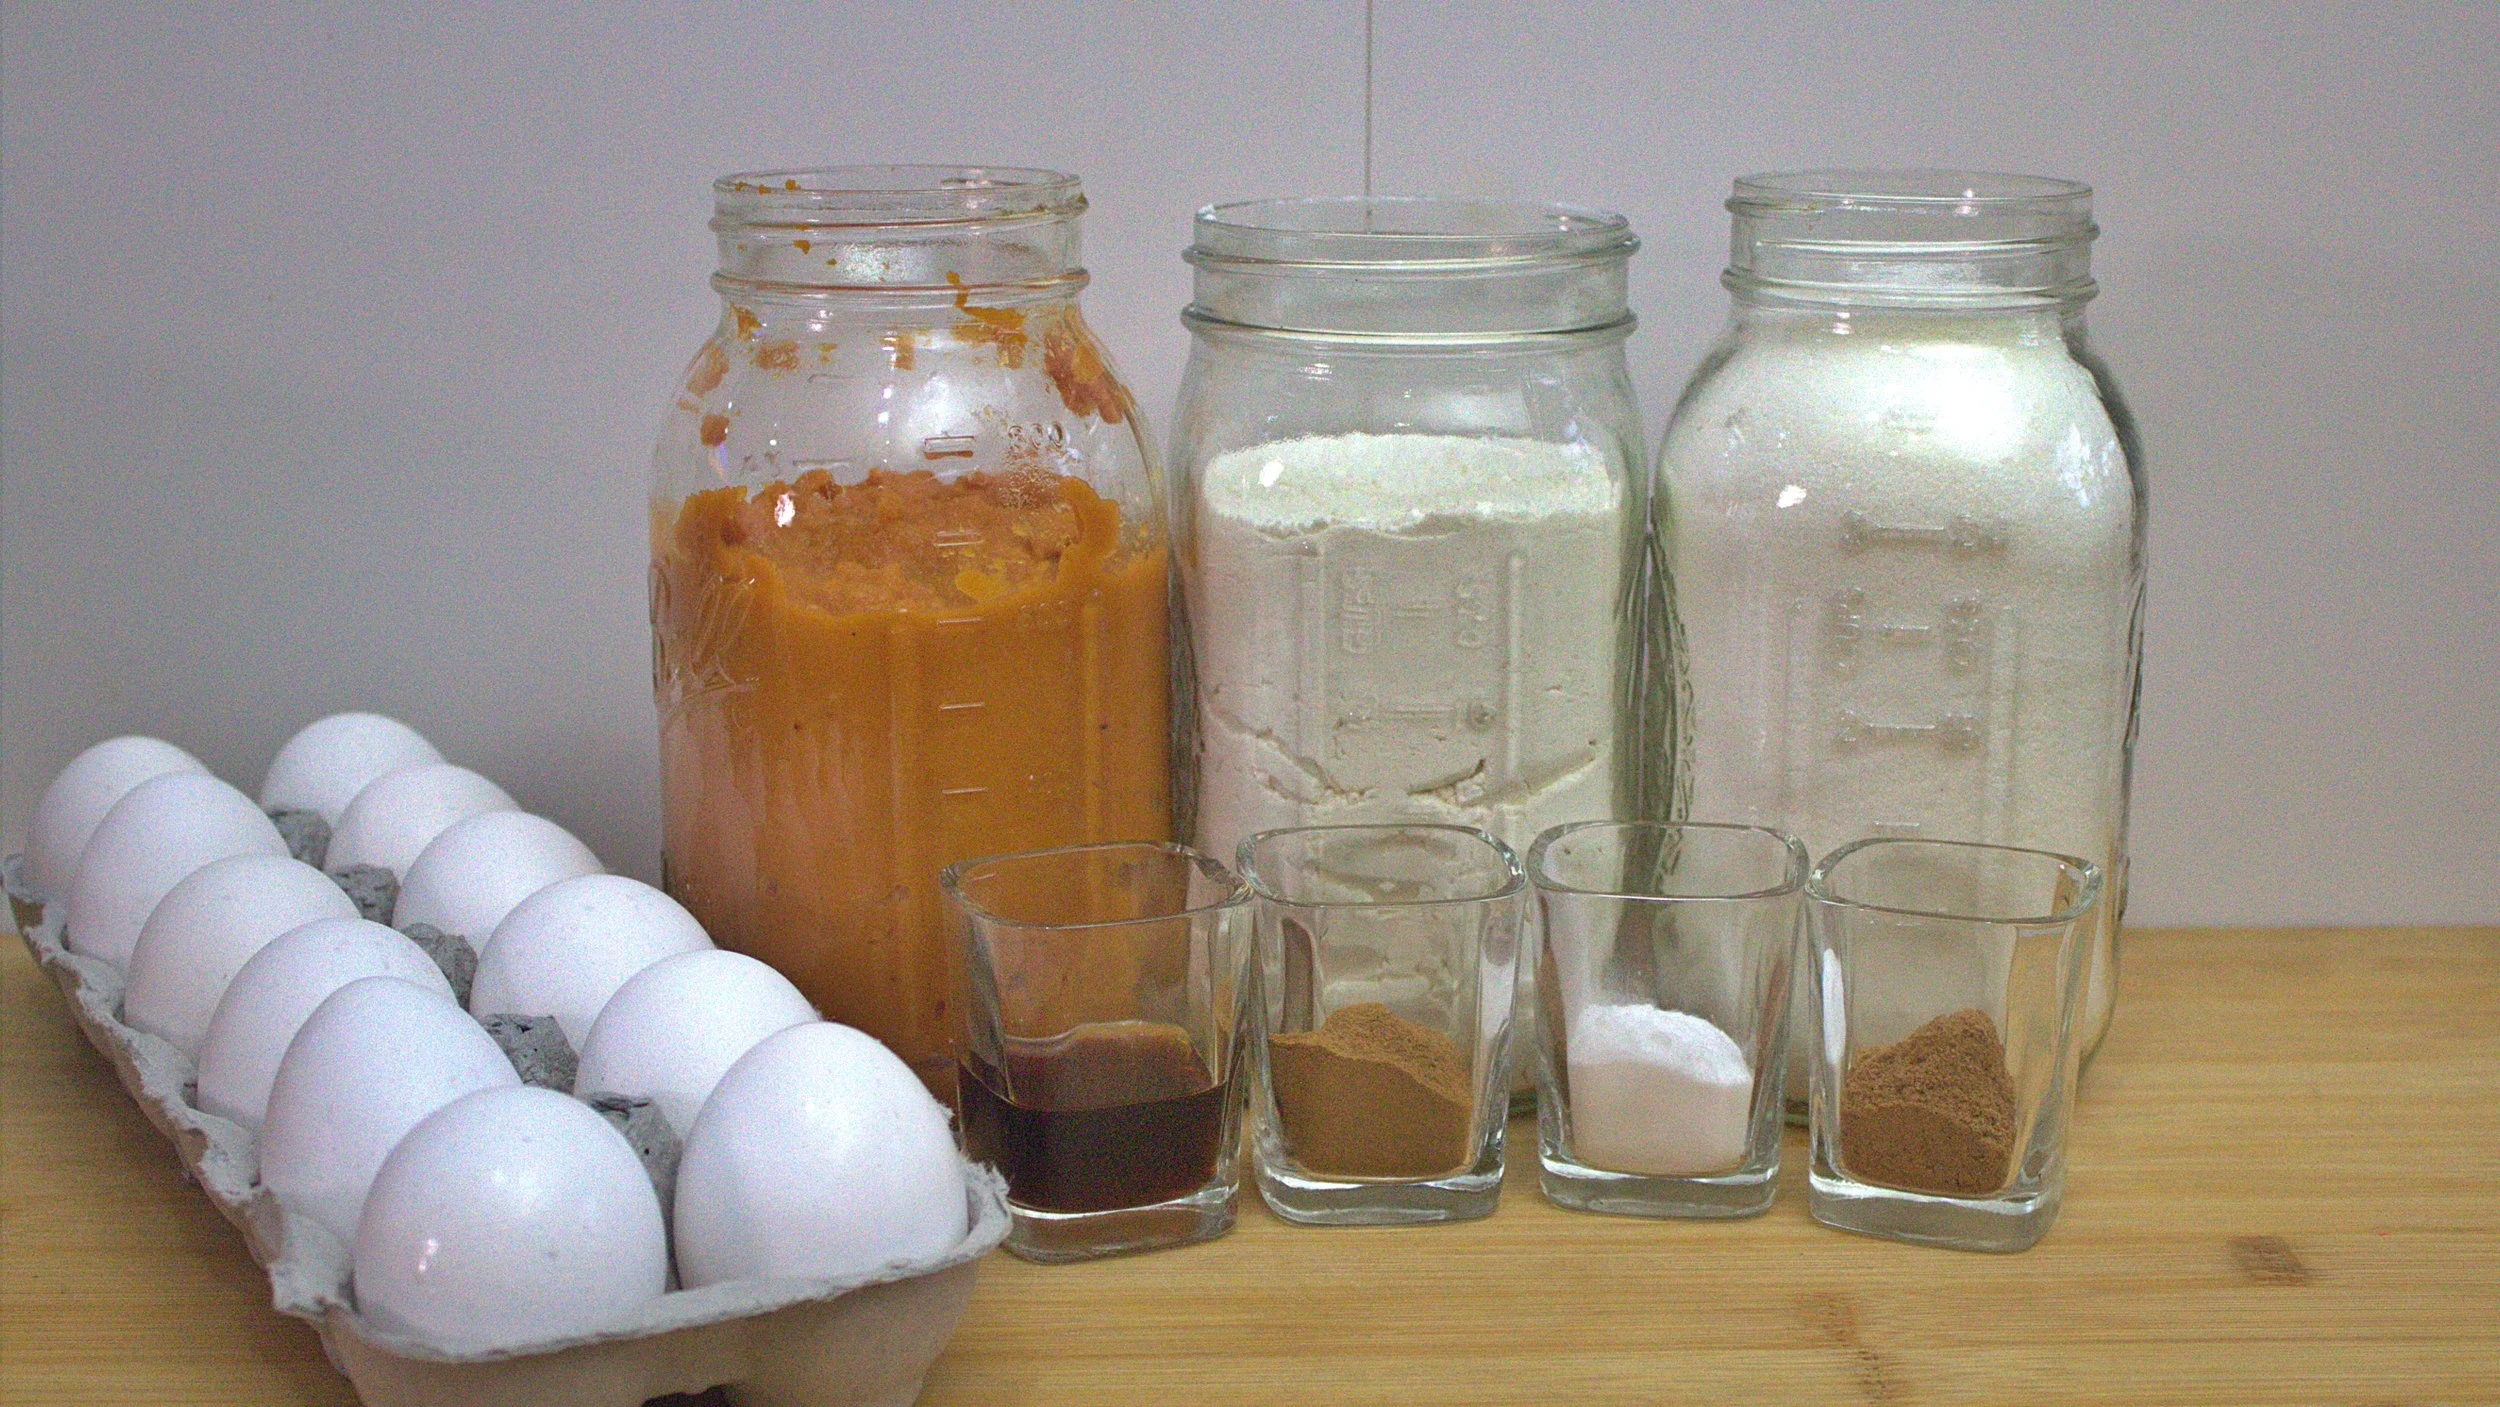
-3/4 cup all purpose flour
-1 tsp baking soda
-1 tsp ground cinnamon
-1/4 tsp nutmeg
-1 tsp pumpkin pie spice
-1 cup granulated sugar
-3 large eggs
2/3 cup canned pumpkin (or homemade pumpkin puree)
-1 tsp vanilla extract
-Filling Ingredients-
-8oz softened cream cheese
-2 Tbsp softened butter
-1 tsp vanilla extract
-1 cup powdered sugar
-1/2 Tbsp of pumpkin puree (optional)
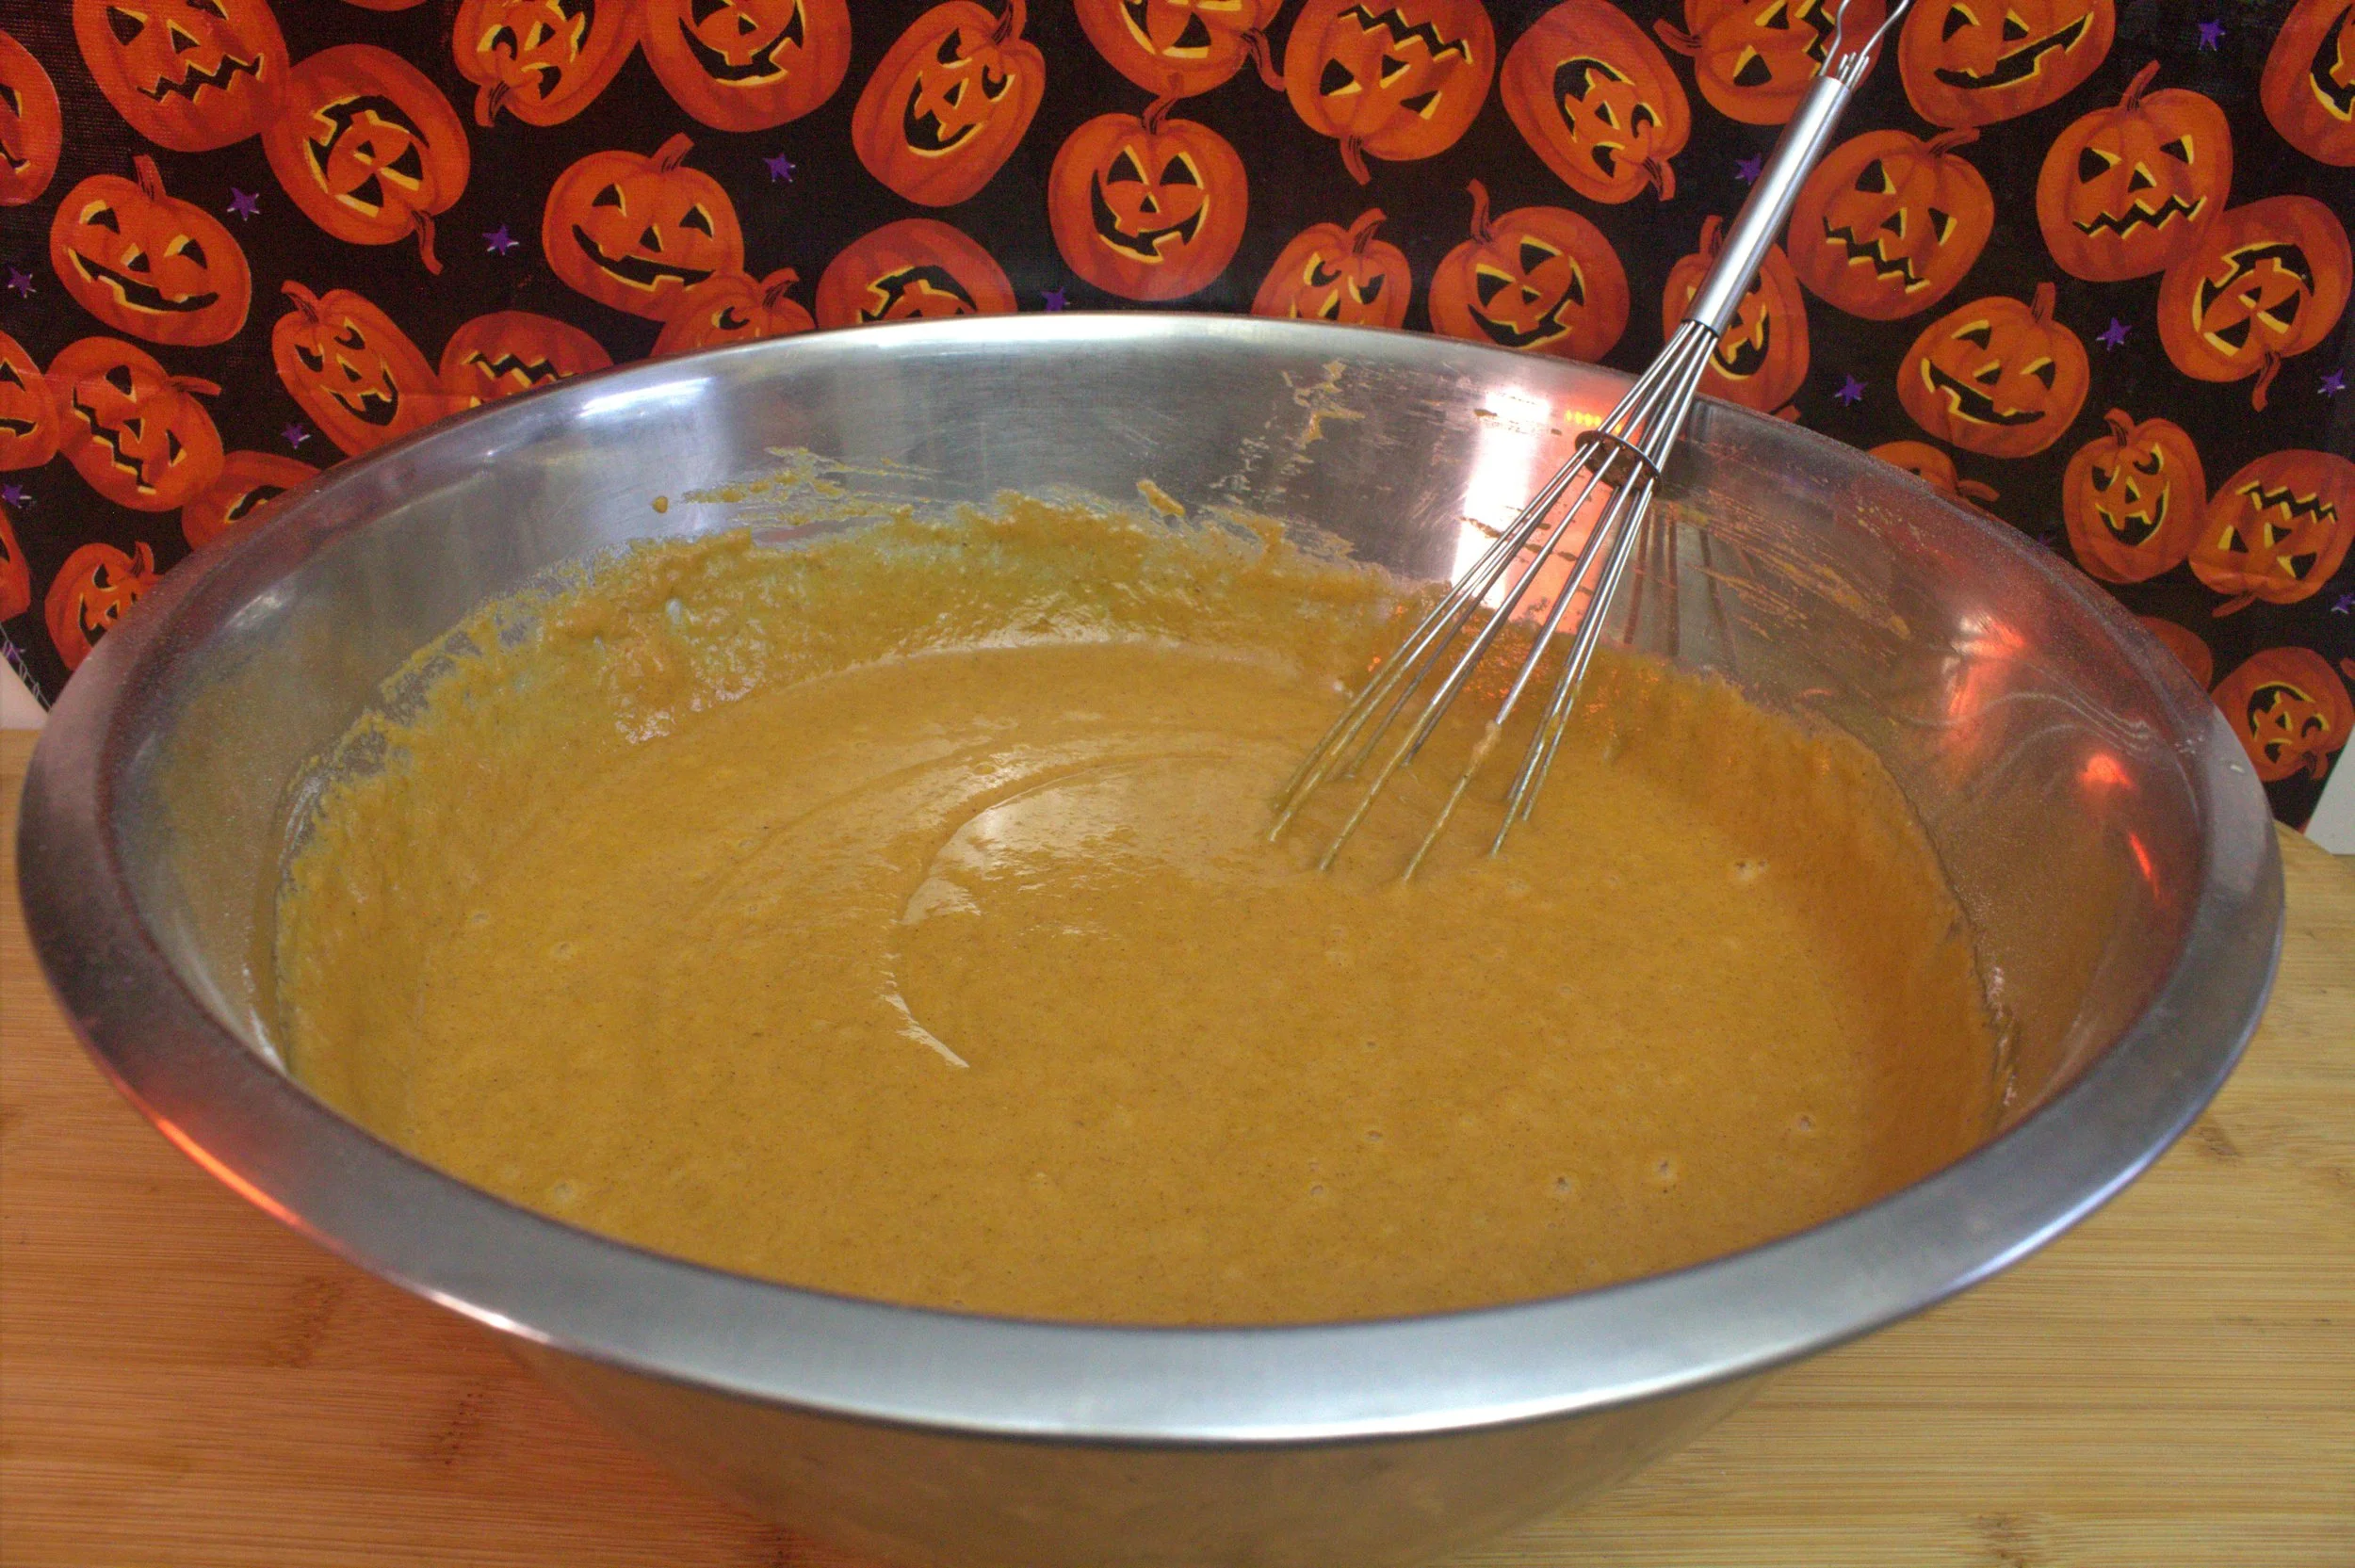
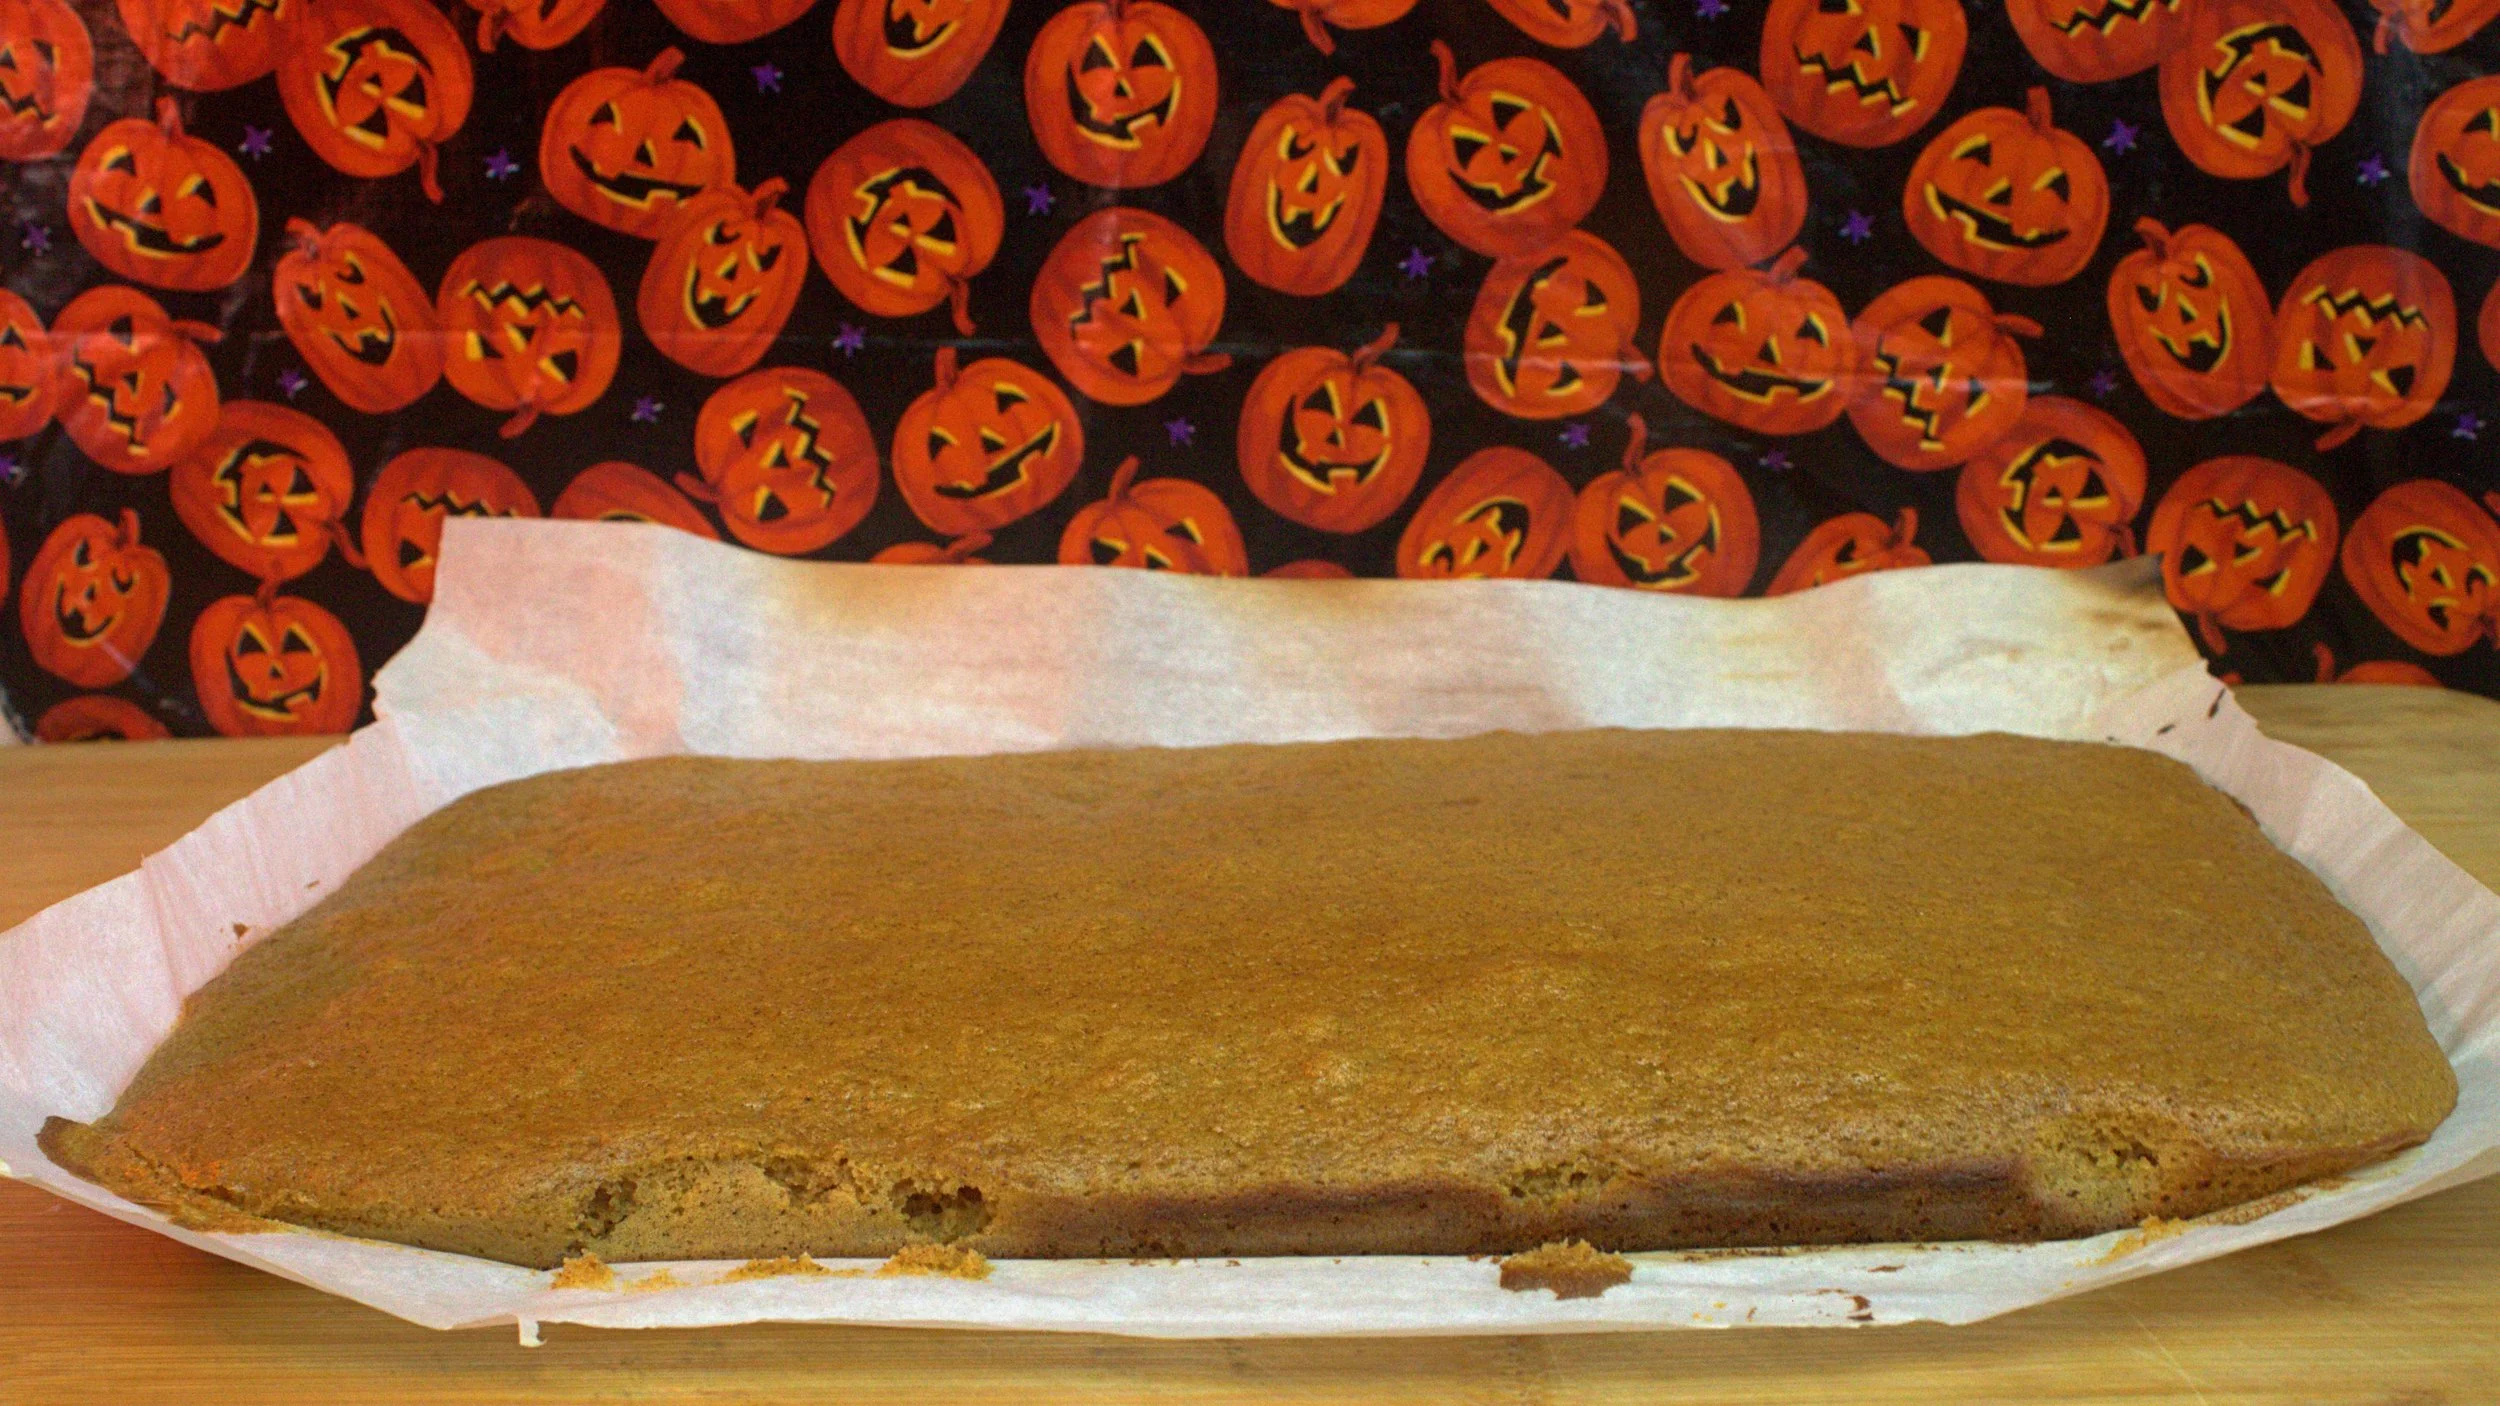
4. Combine the wet and dry ingredients and mix until smooth and no more dry batter is left.
5. Spread batter evenly on the prepared pan, and bake for 10-14 min or until a toothpick inserted comes out clean
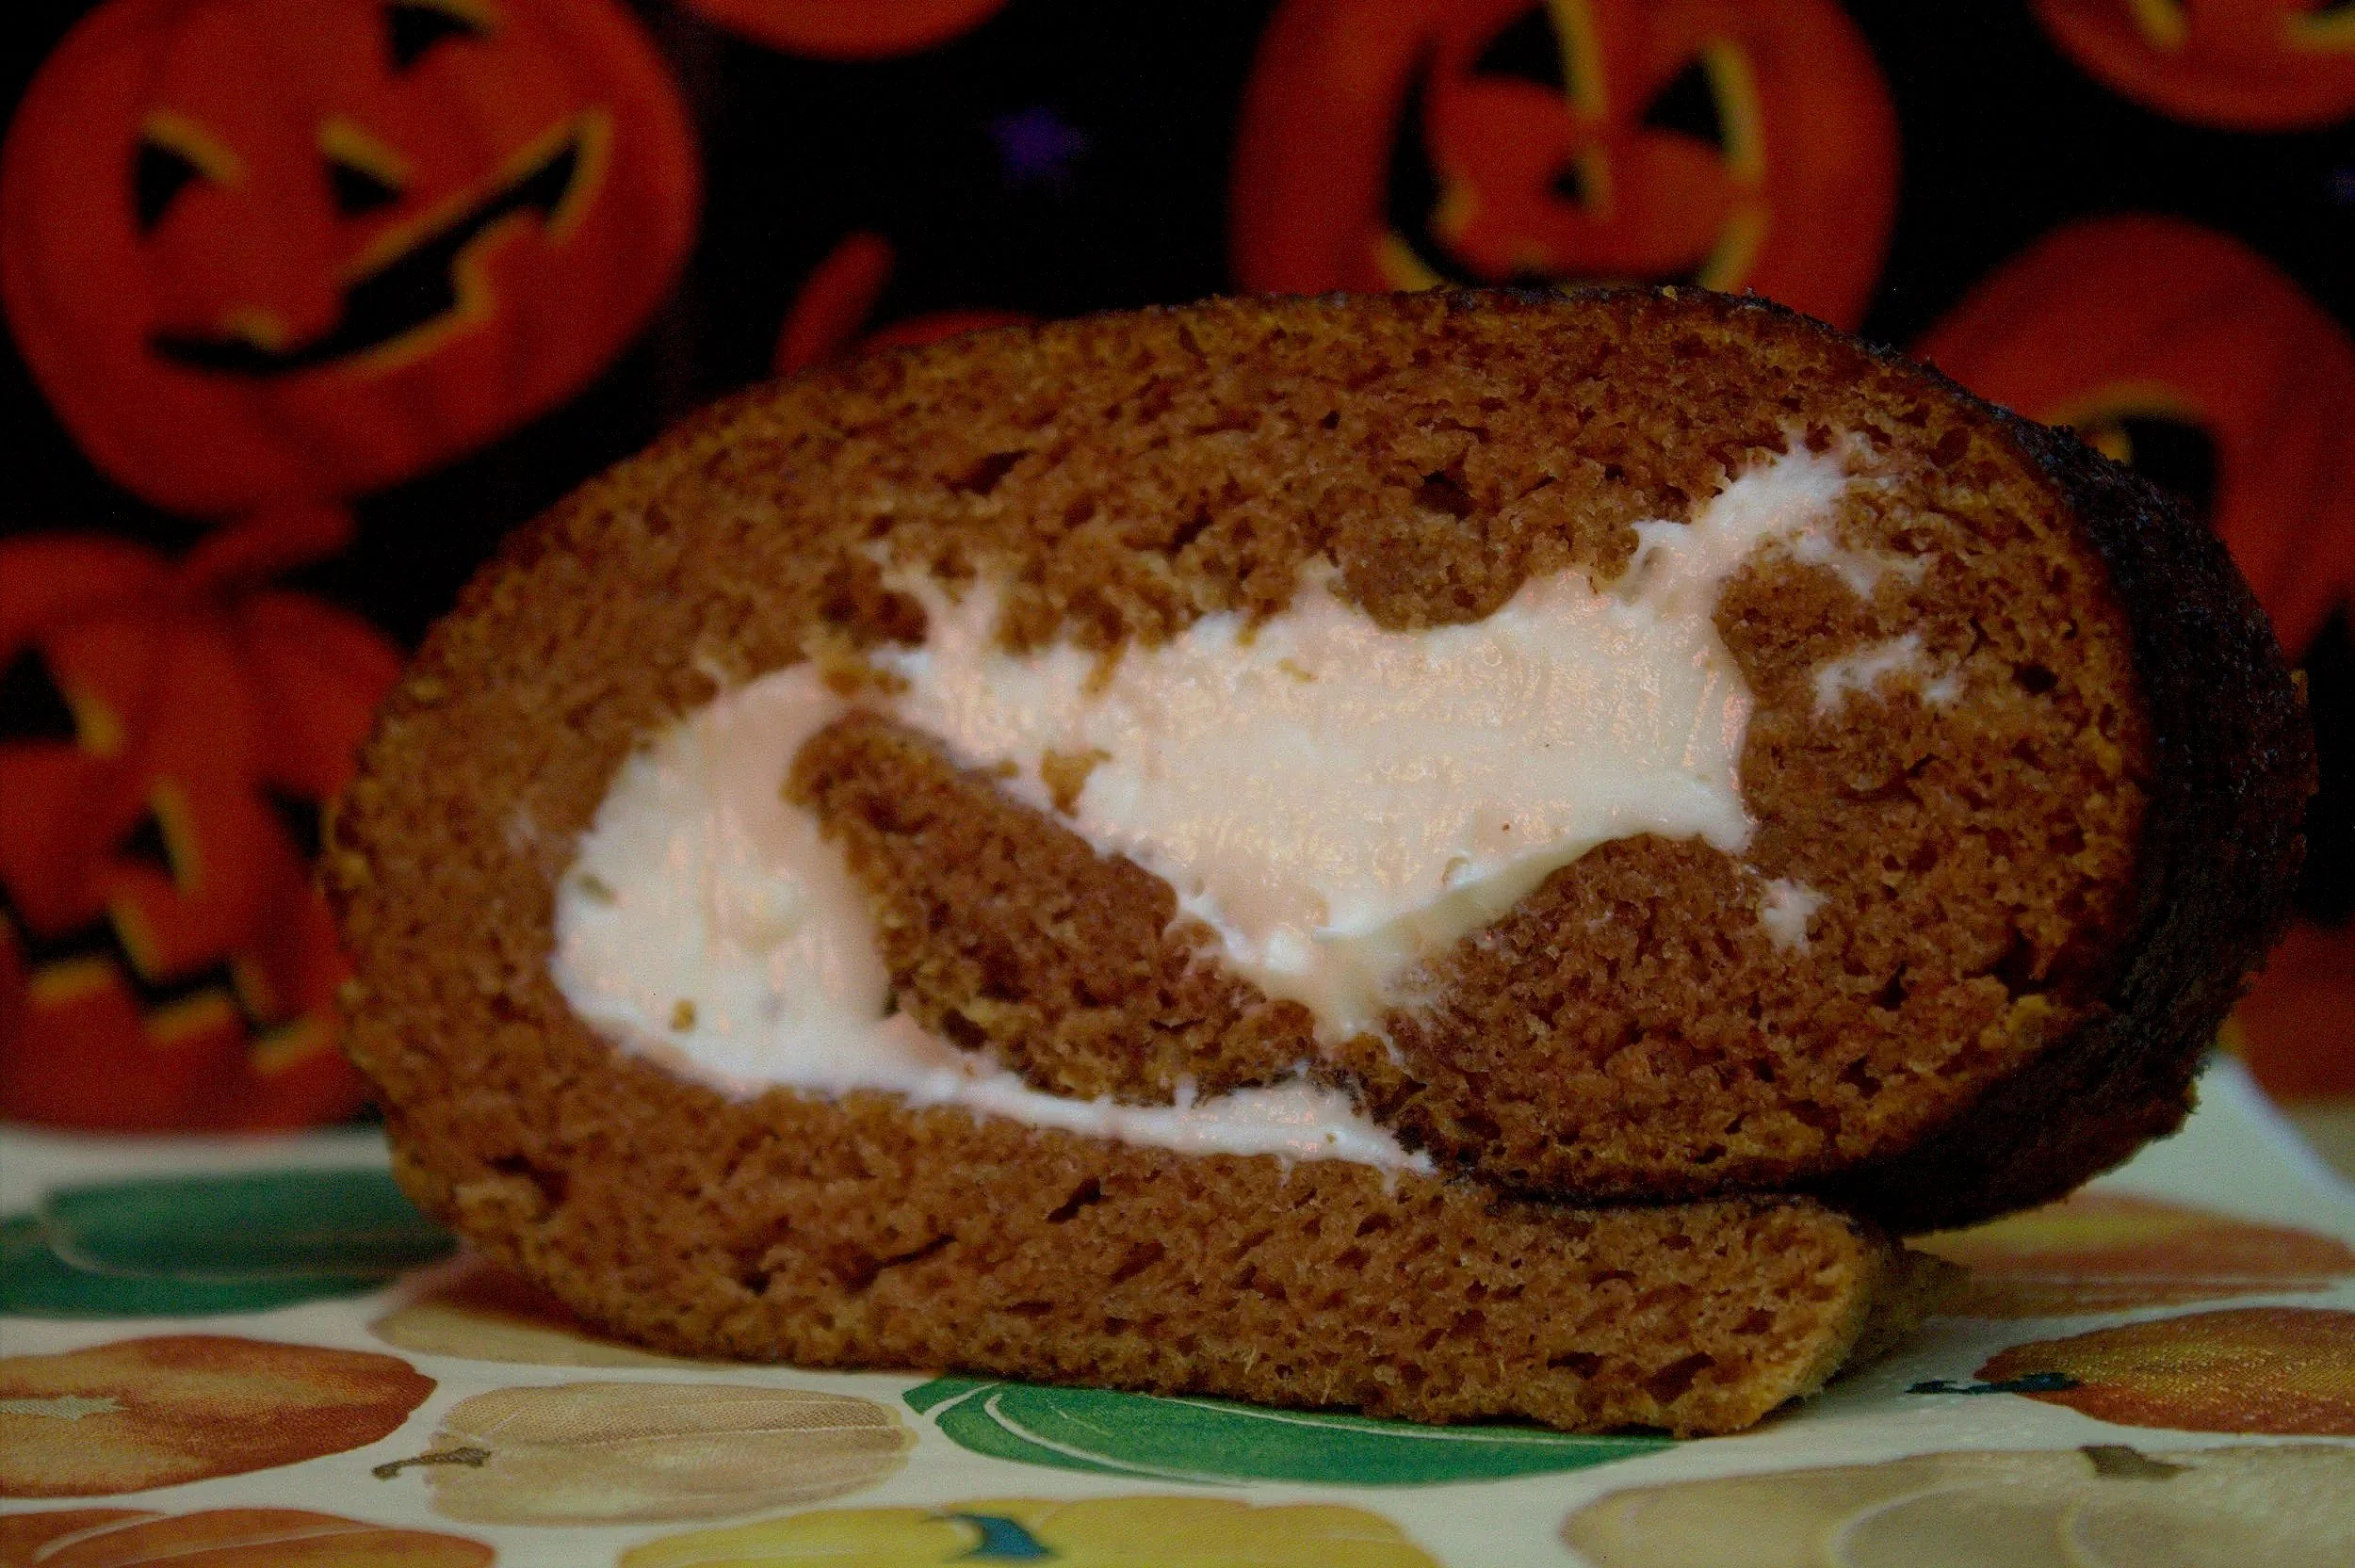
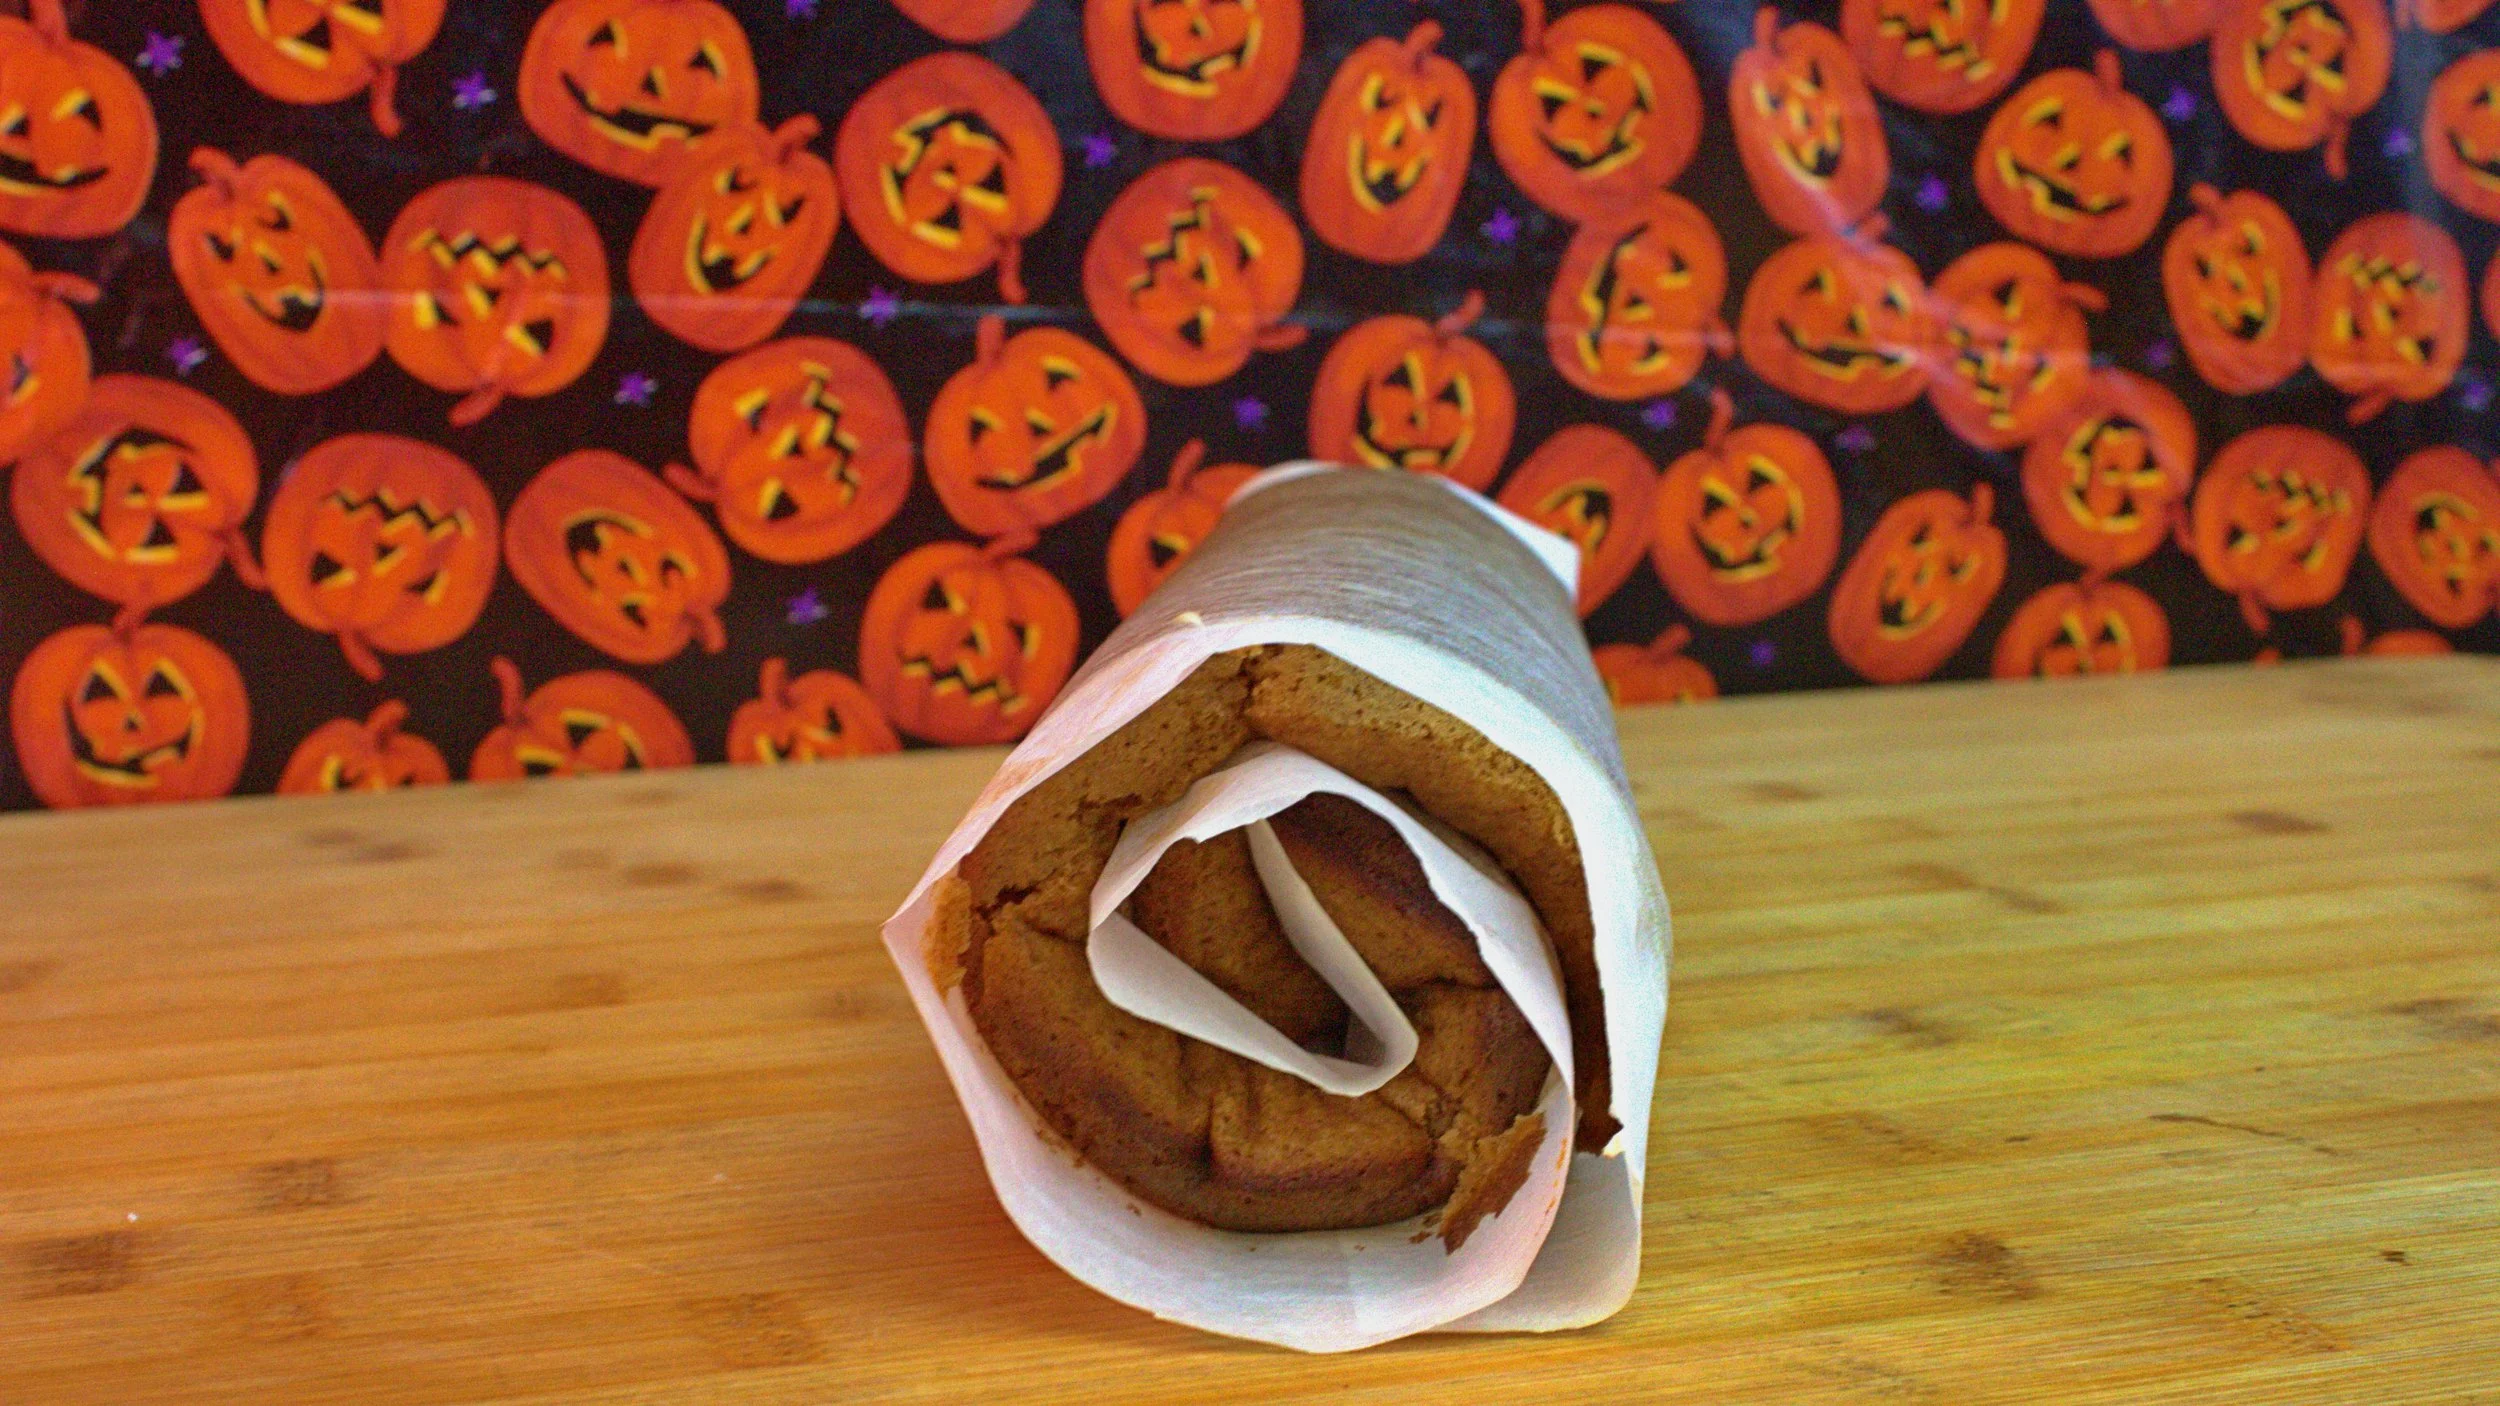
6. As soon as your cake is done you want to take it off the pan, parchment paper and all onto heat safe surface and immediately start rolling the cake with the parchment paper from the short end. Go slow and carefully to try and not crack it. Put on wire rack once rolled and allow it to completely cool.

- Directions -
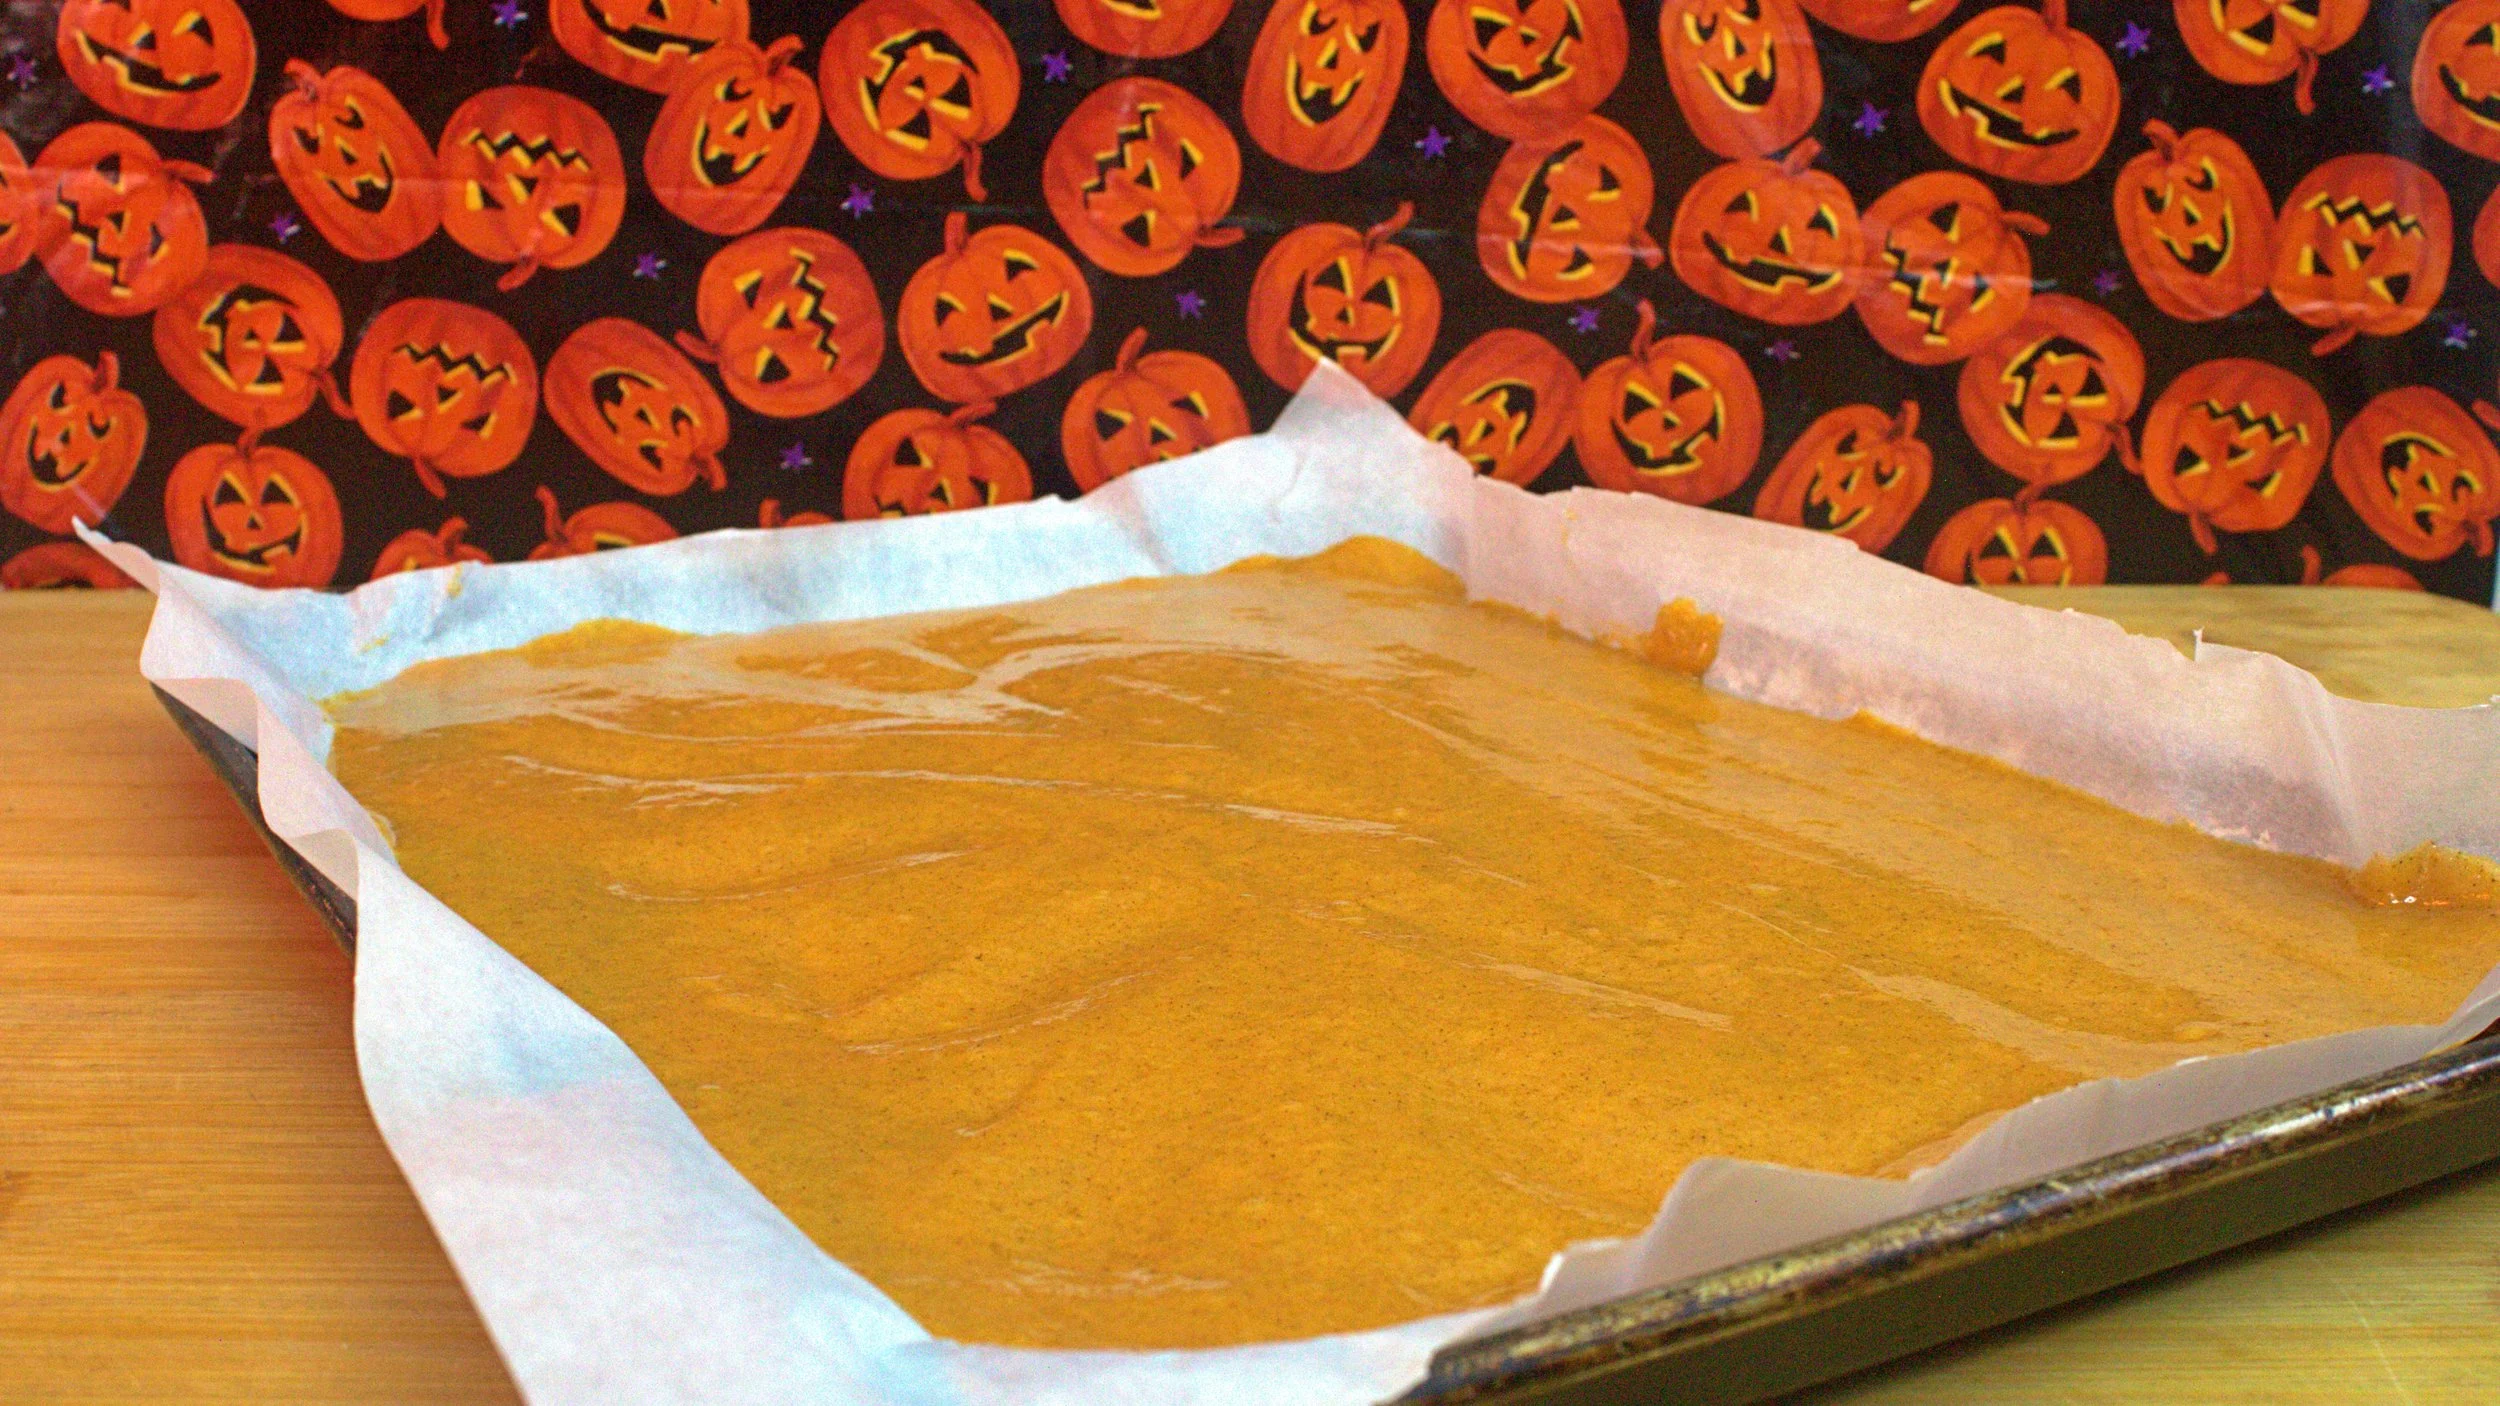
1. Line a 10×15 jelly roll tray or baking sheet that has an edge with parchment paper (you can lightly grease it before so the parchment sticks) and Preheat oven to 350º
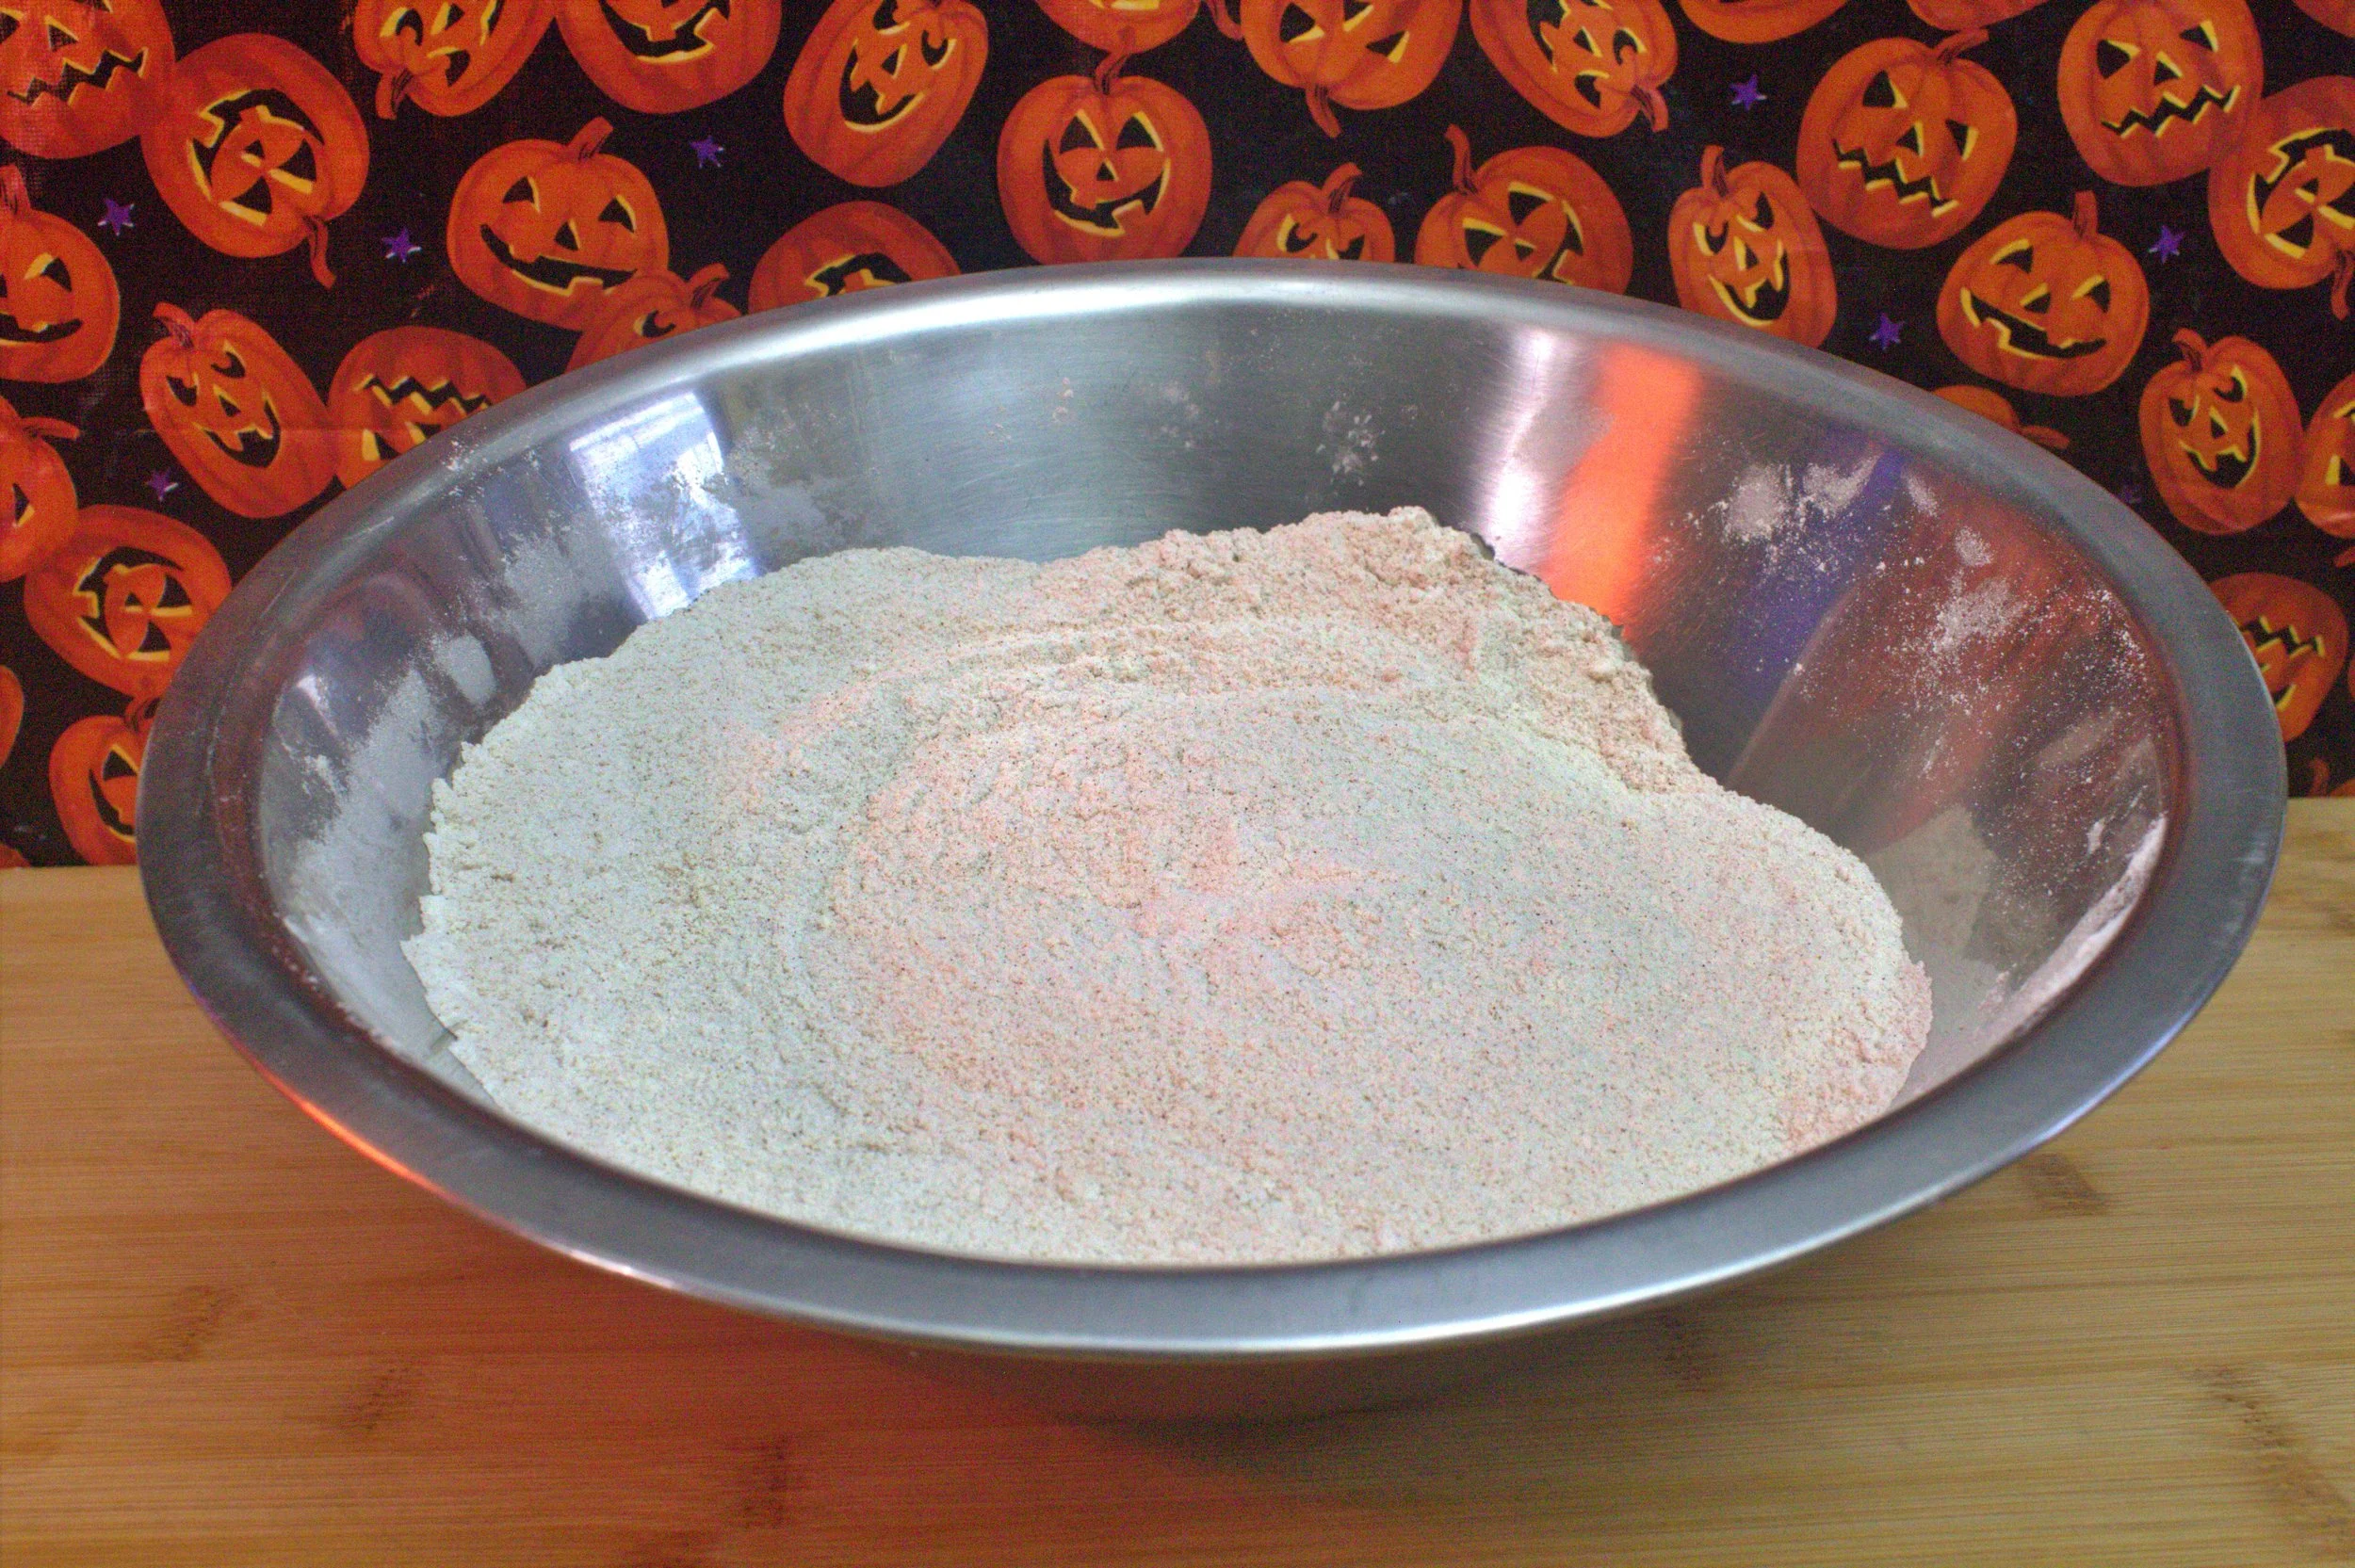
2. In a large bowl mix together the flour, baking soda, cinnamon, nutmeg, and pumpkin pie spice
3.In another bowl mix together the sugar, eggs, vanilla, and pumpkin puree
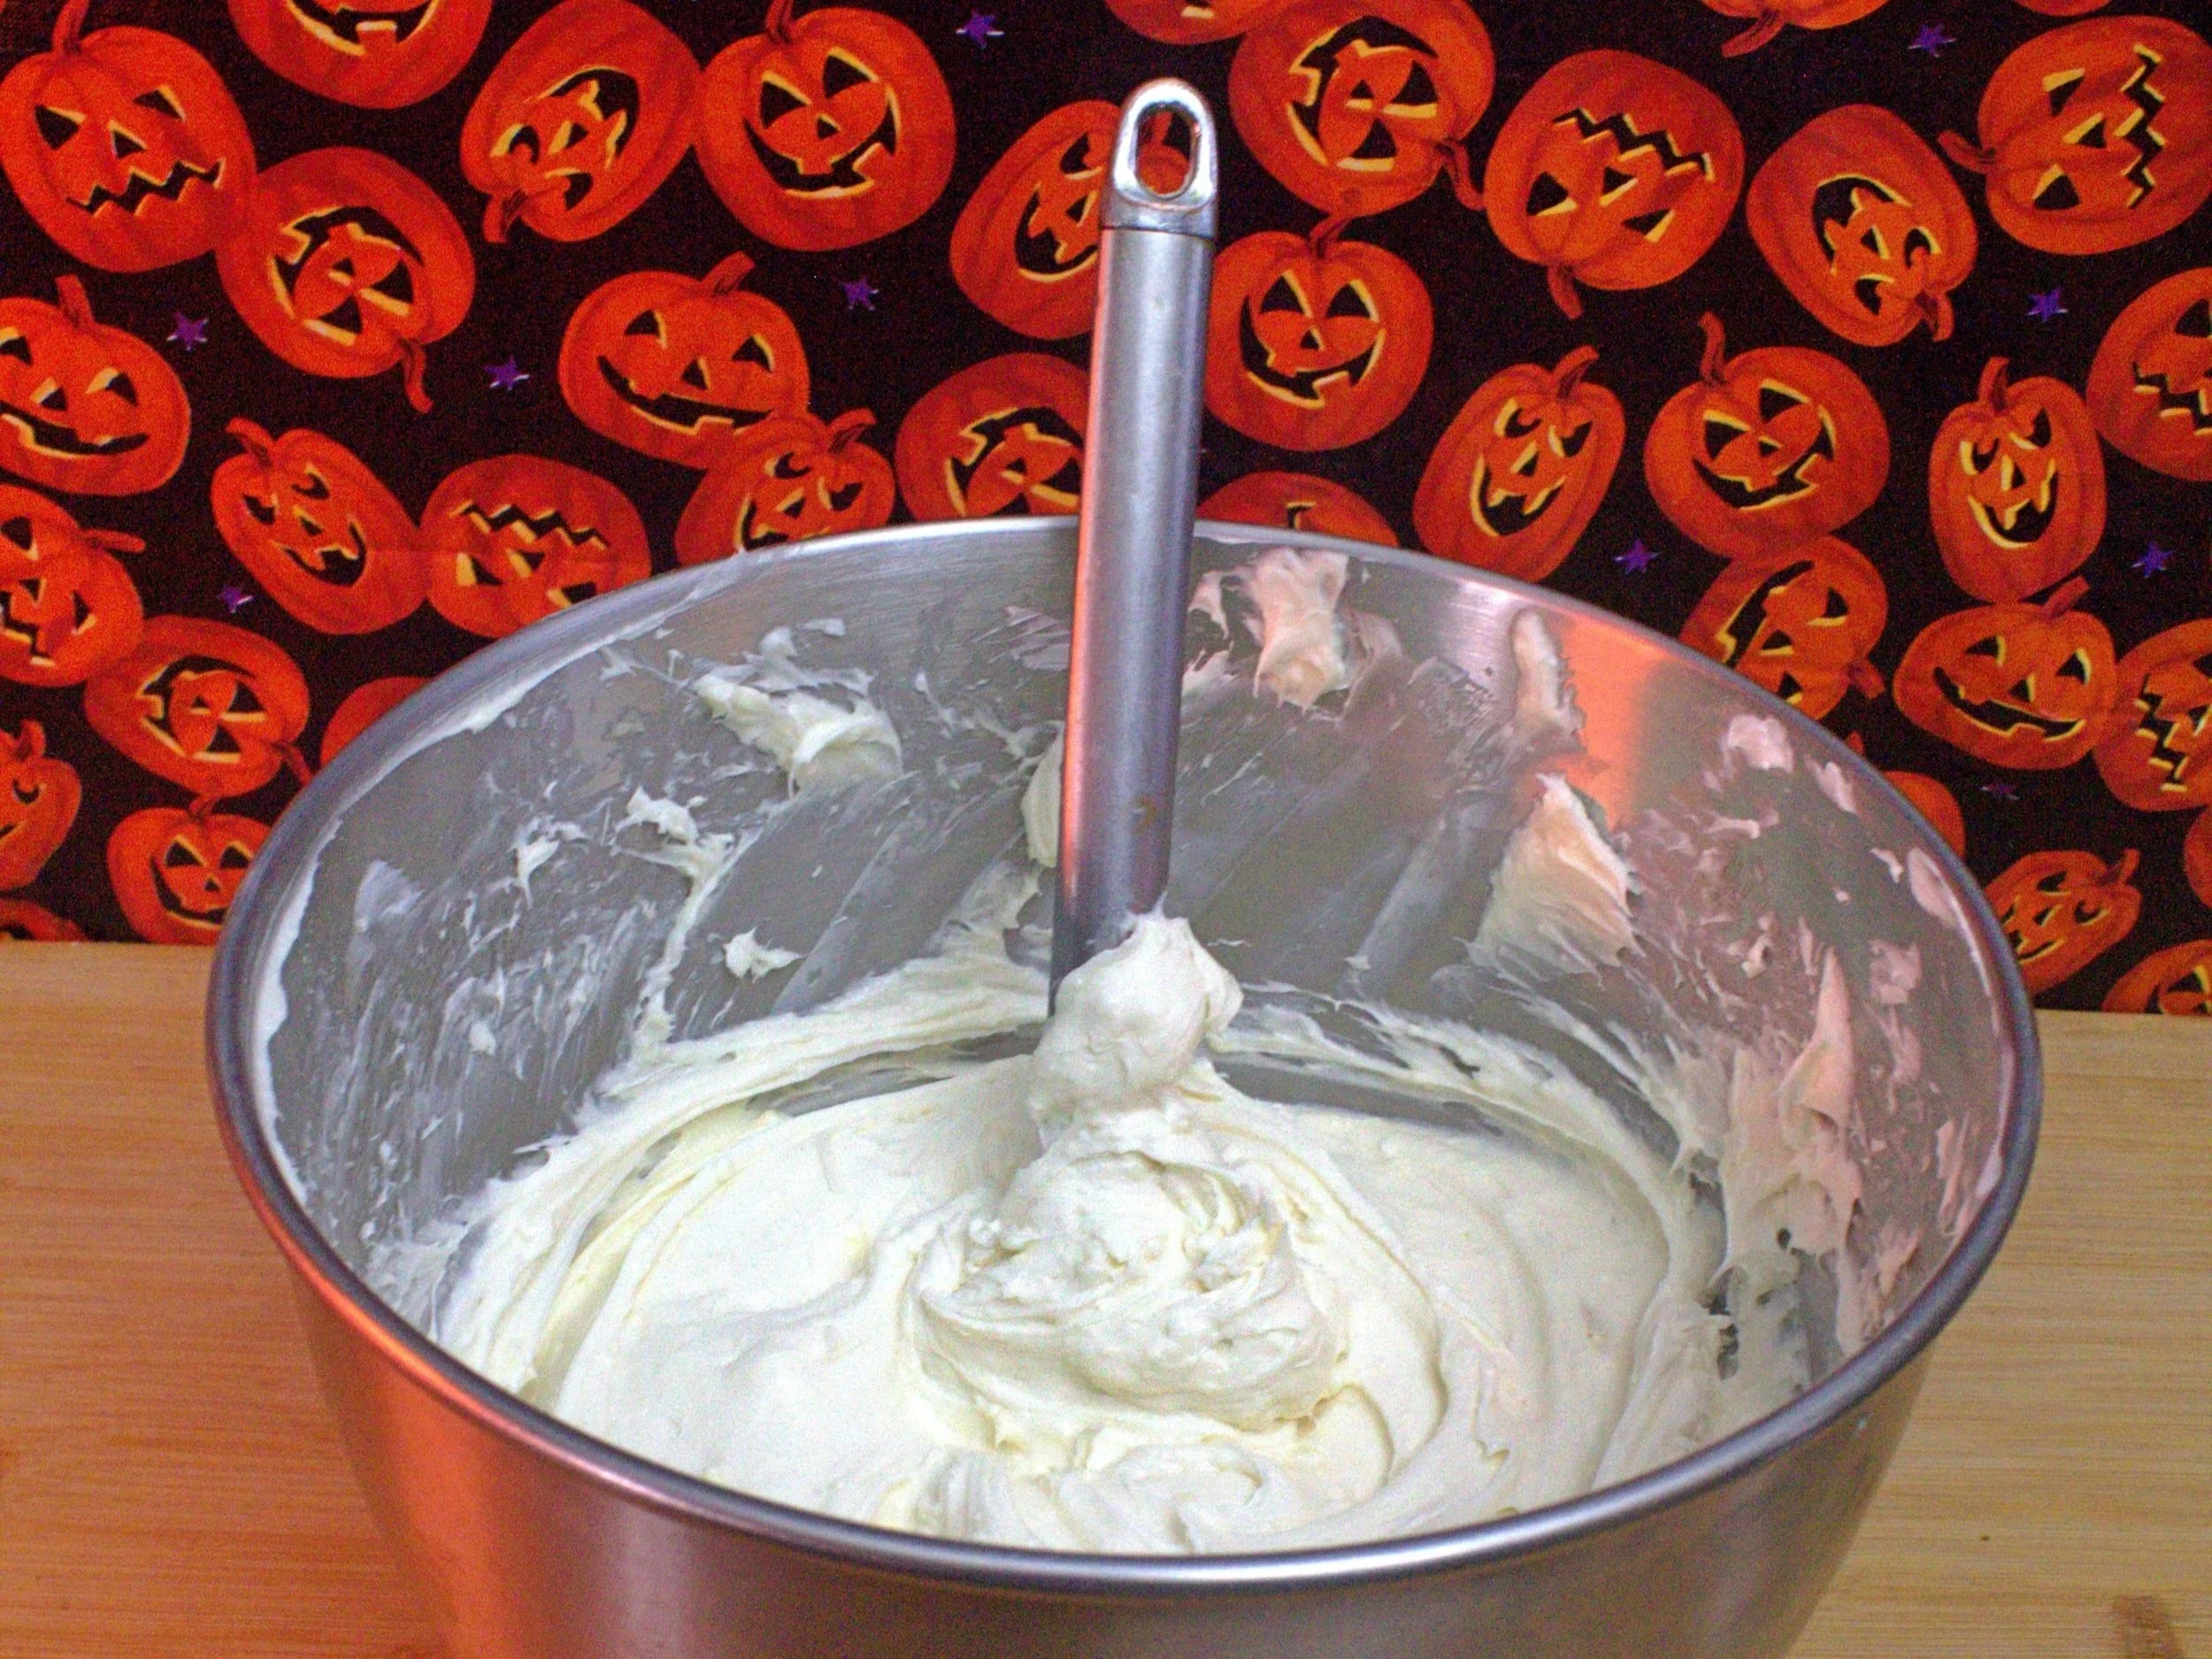
7. While your cake is cooling go ahead and mix your cream cheese, butter, vanilla, powdered sugar, and pumpkin puree together for your filling.
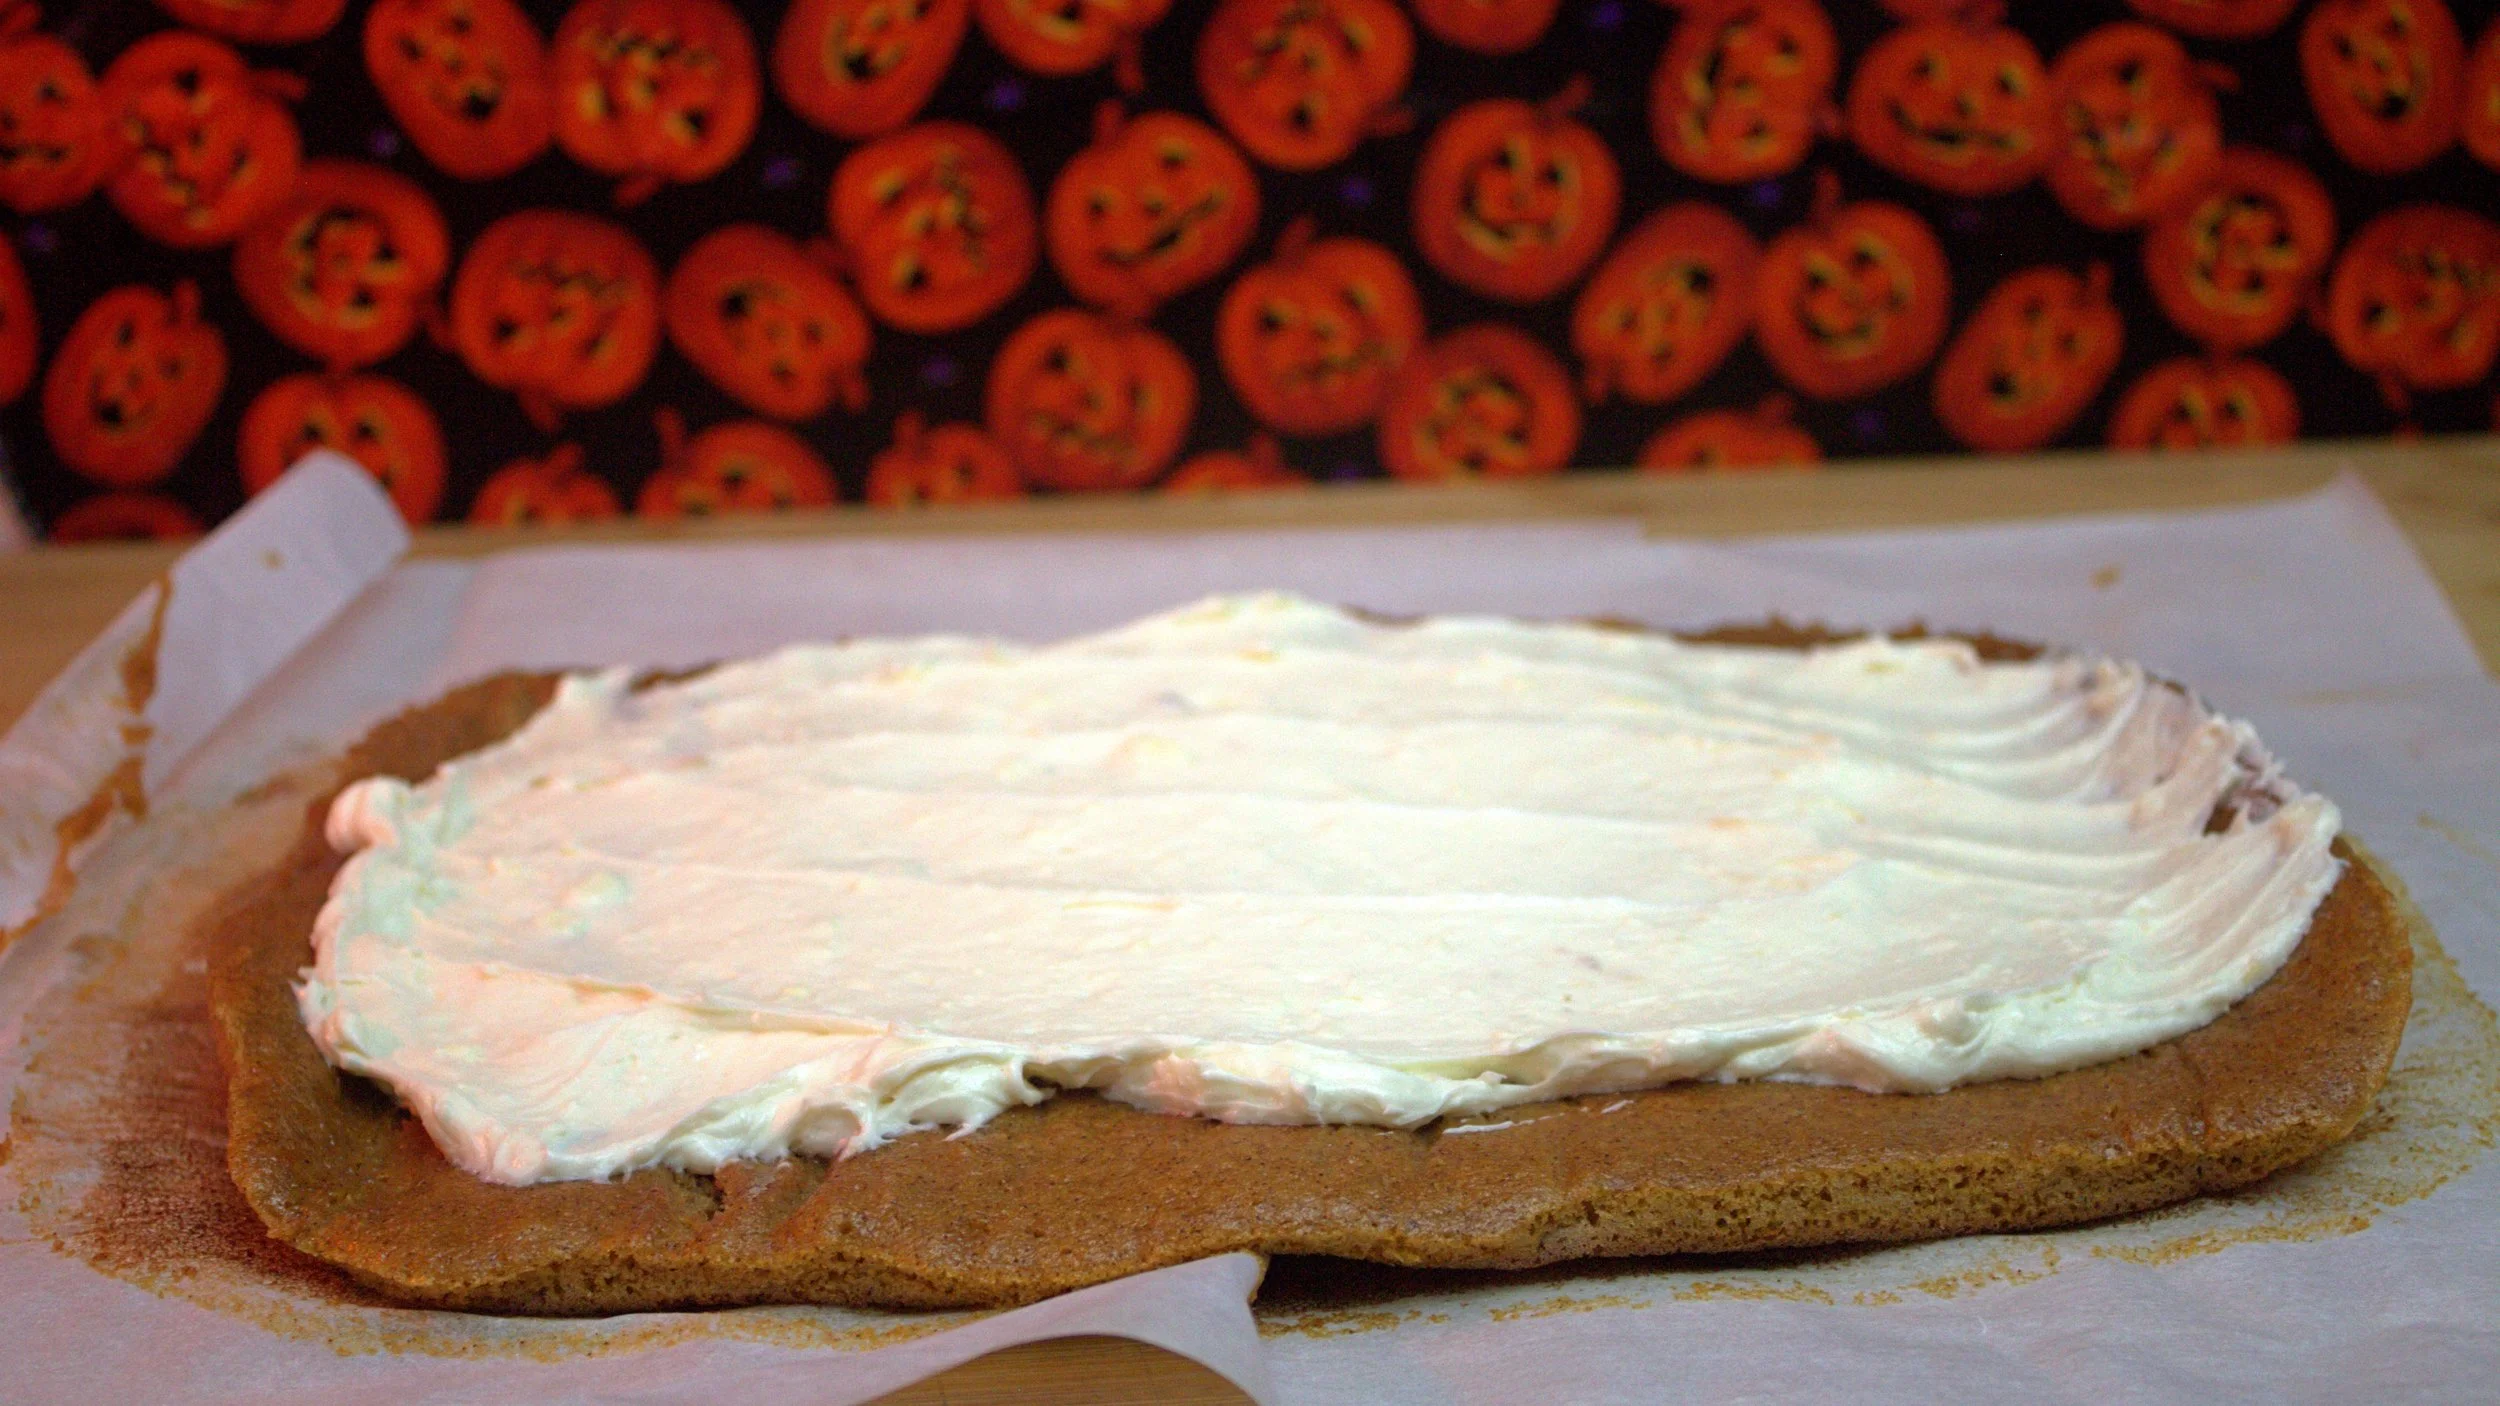
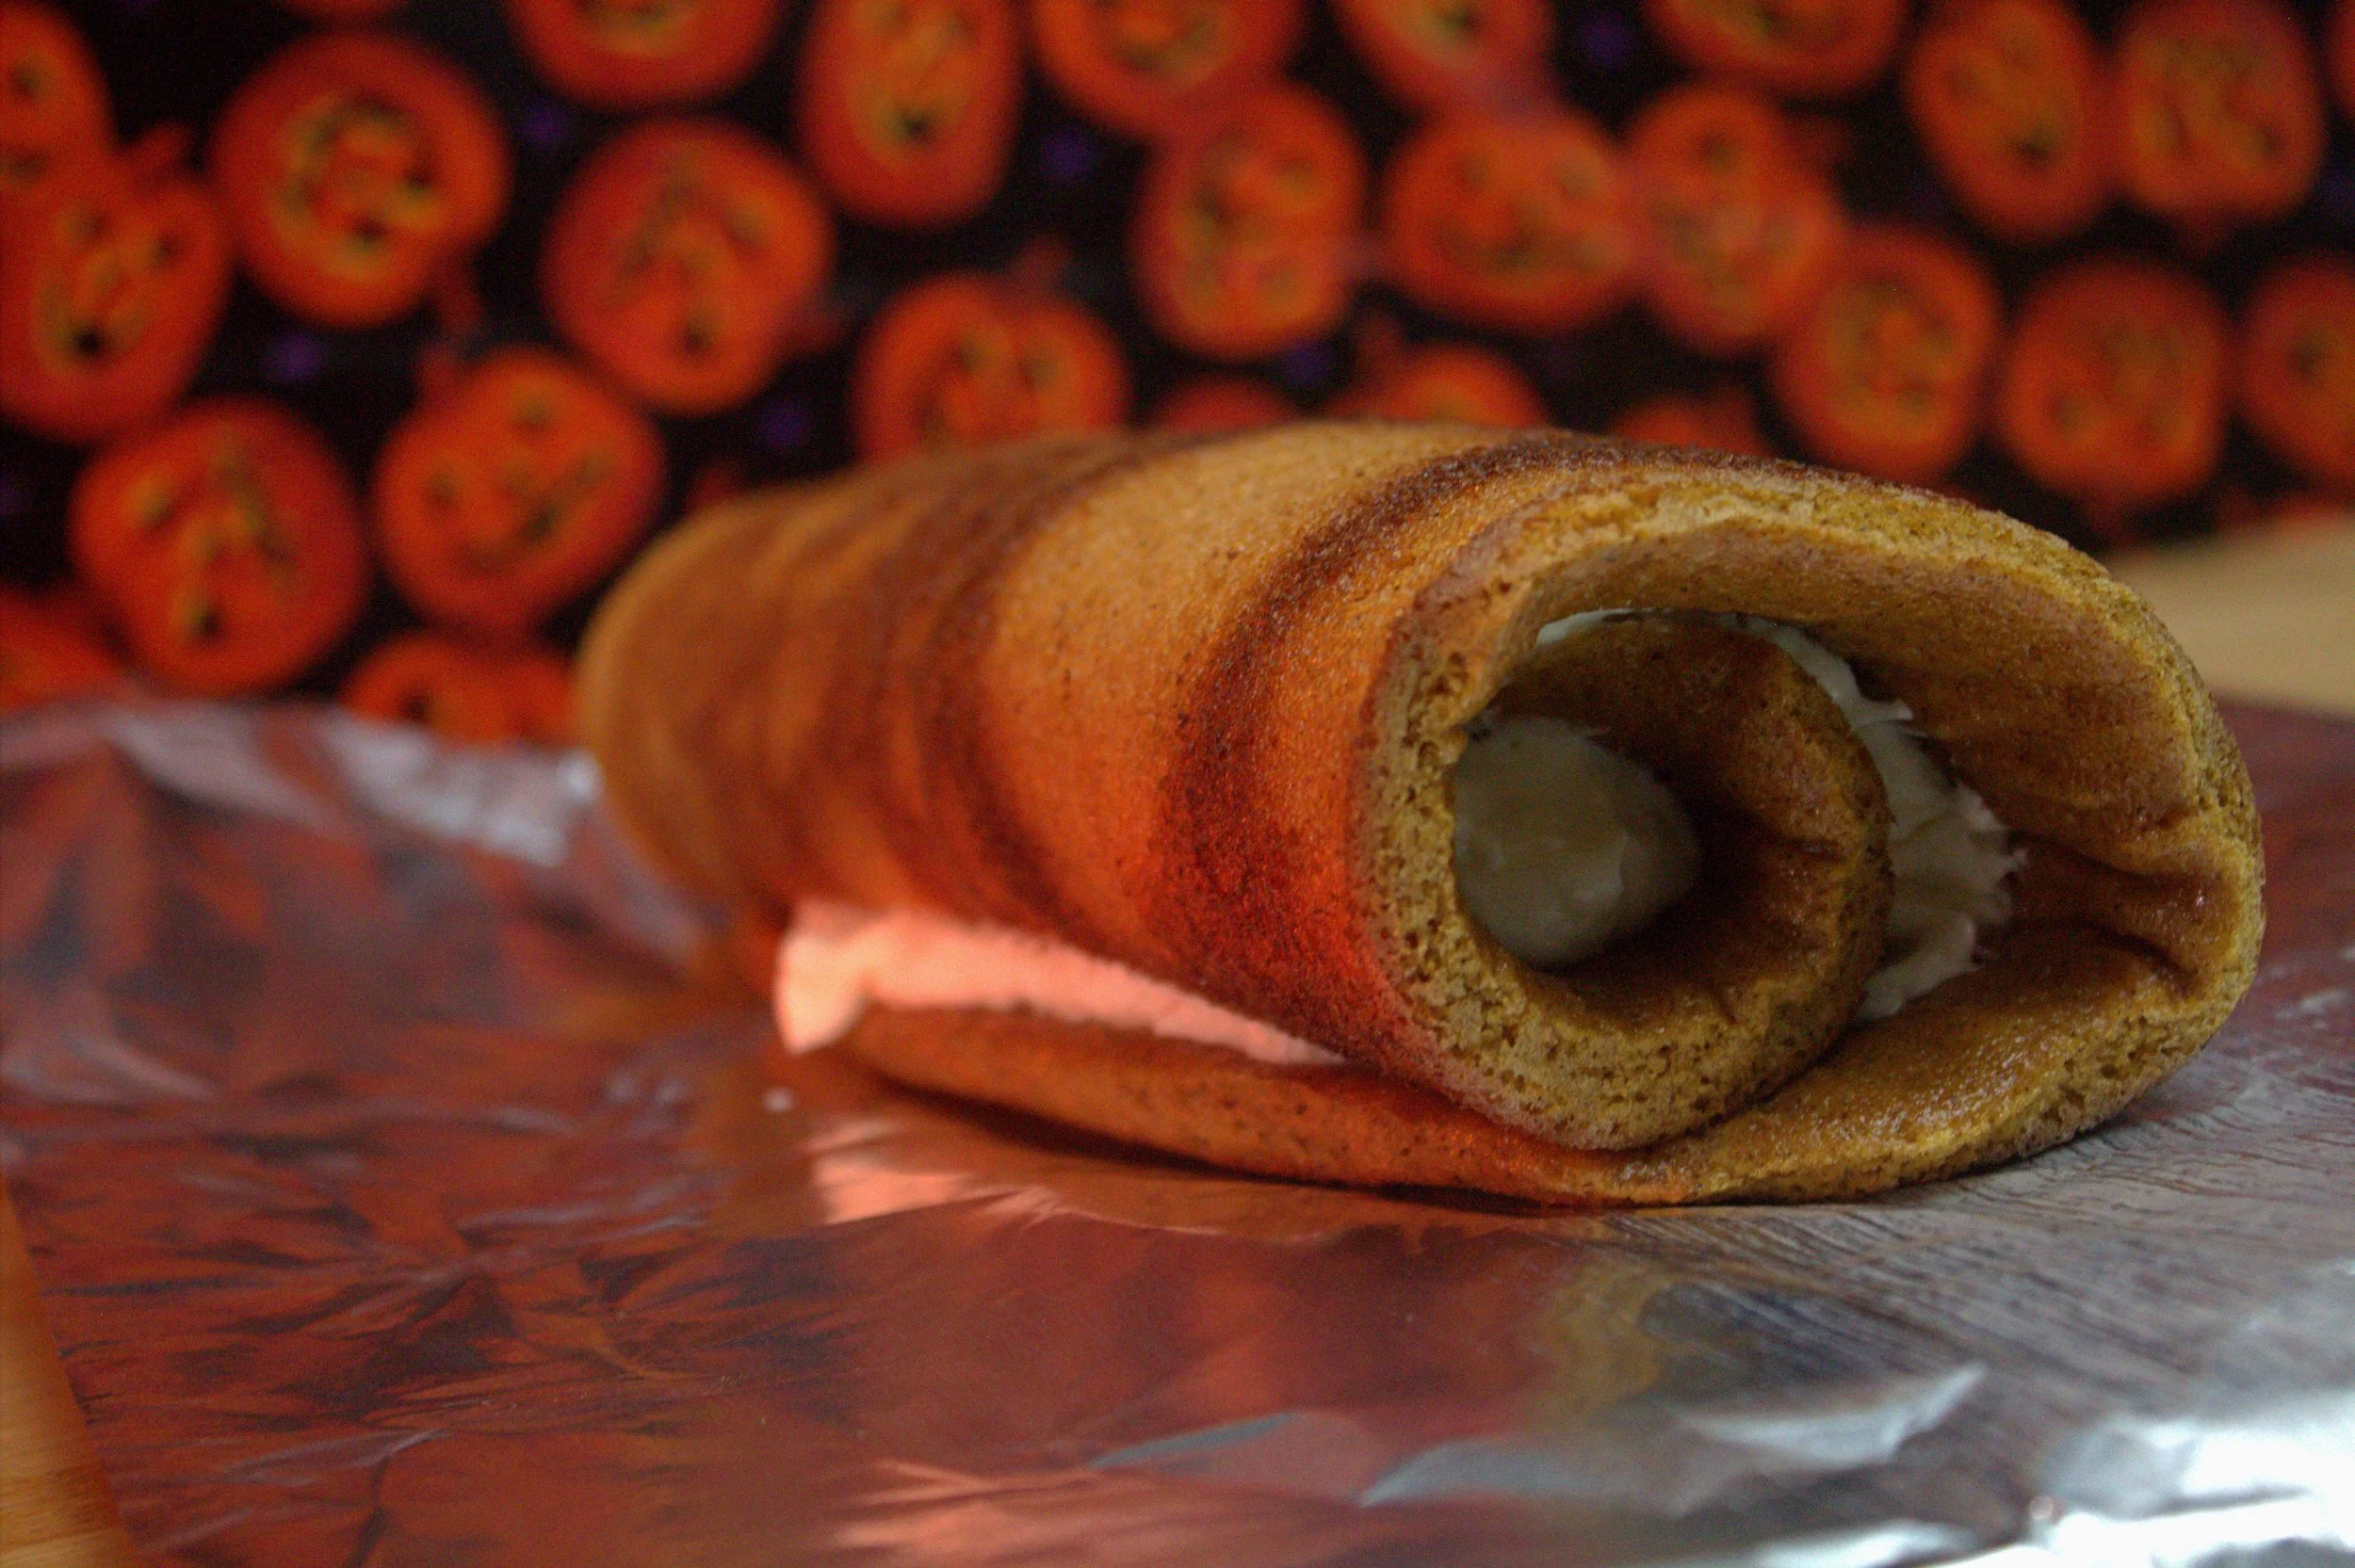
8. Once cake is cool, gently unroll and smooth out your filling on your cake leaving ½ inch to 1 inch border, after you spread it out you want to gently re roll your cake up but without the parchment paper this time. And then you can roll up in parchment paper and tinfoil or just plastic wrap and let cool for at least an hour. Once chilled you can dust top with powdered sugar and slice to serve. Enjoy!

peanut butter balls
Peanut butter balls are a very easy delicious snack or desert that everyone is sure to love, you can make them with or without the chocolate covered coating depending on how you're serving them!
I’m always looking for easy to make and cheap snacks for my kids and if I can make it into a desert too then even better! This recipe is so so easy to make and its delicious. I personally love peanut butter anything and these I can make for the whole family as a snack in 10 min or less, and they are easy enough and yummy enough to also dunk in chocolate and call it done for a desert too!
-Ingredients-
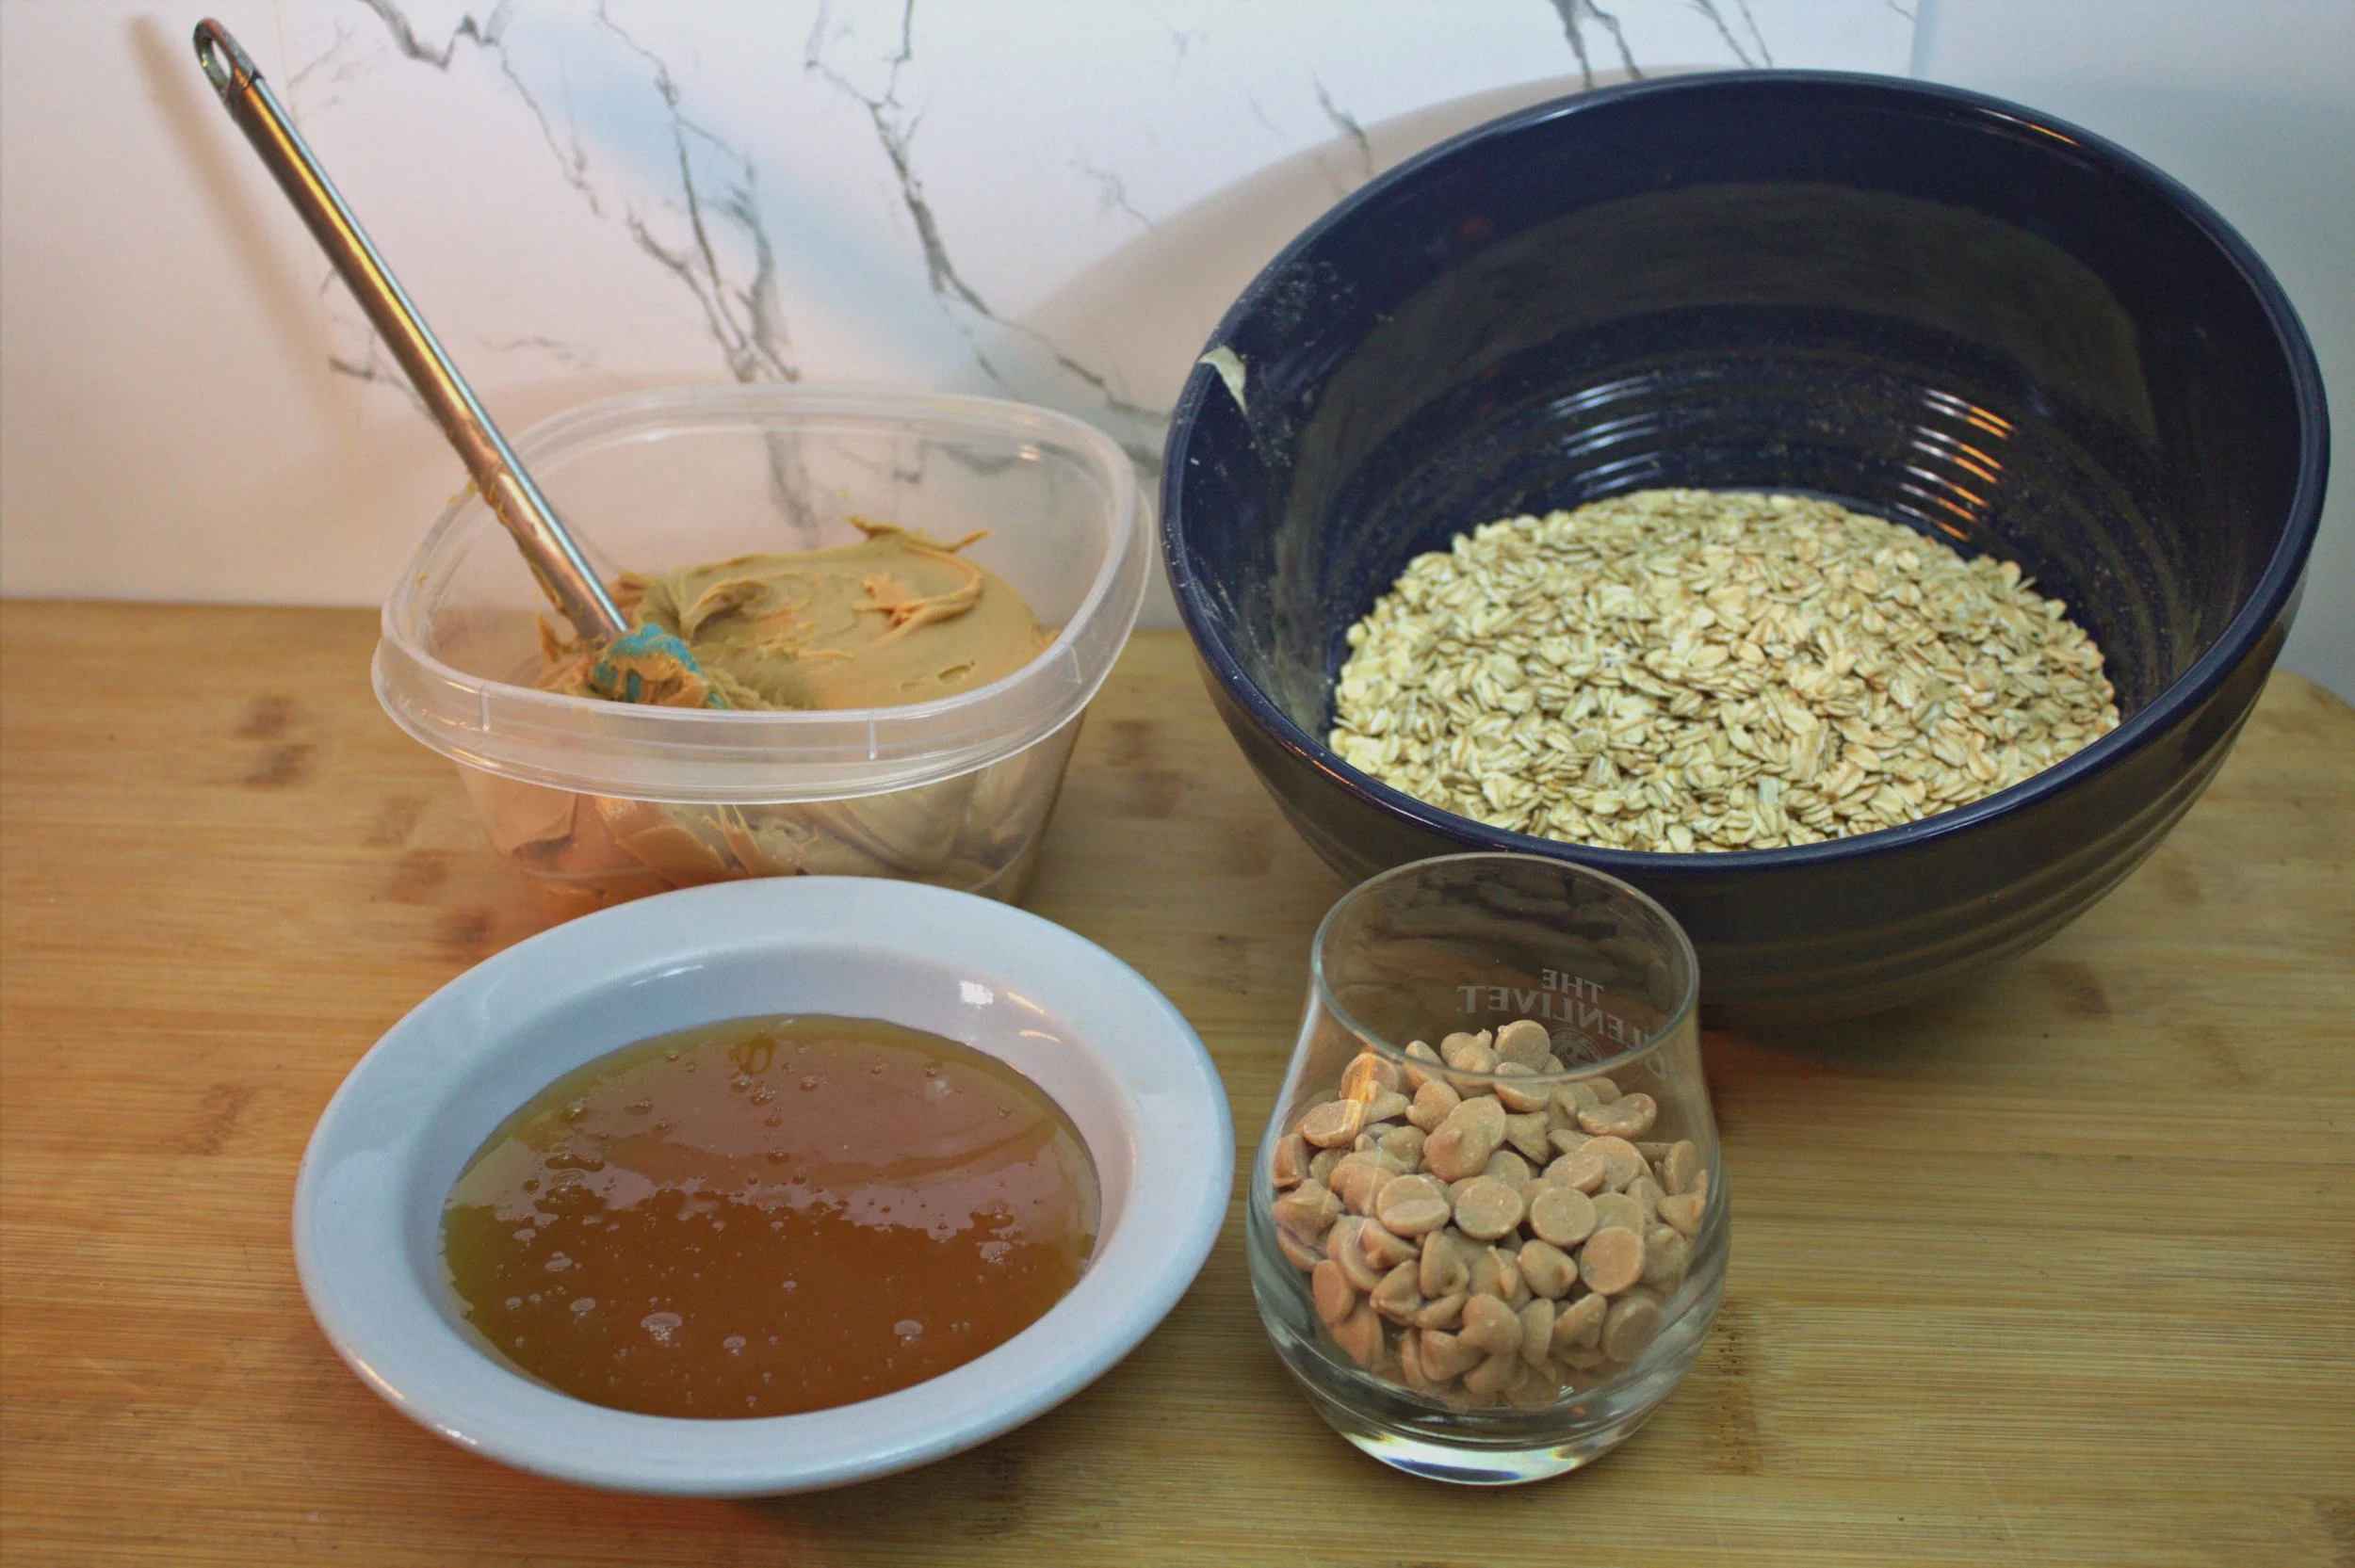
1 ½ cups peanut butter
1/3 cup honey
¾ cups oats
½ cup chocolate chips
3 cups of chocolate melted (if dipping in chocolate)
-Directions-
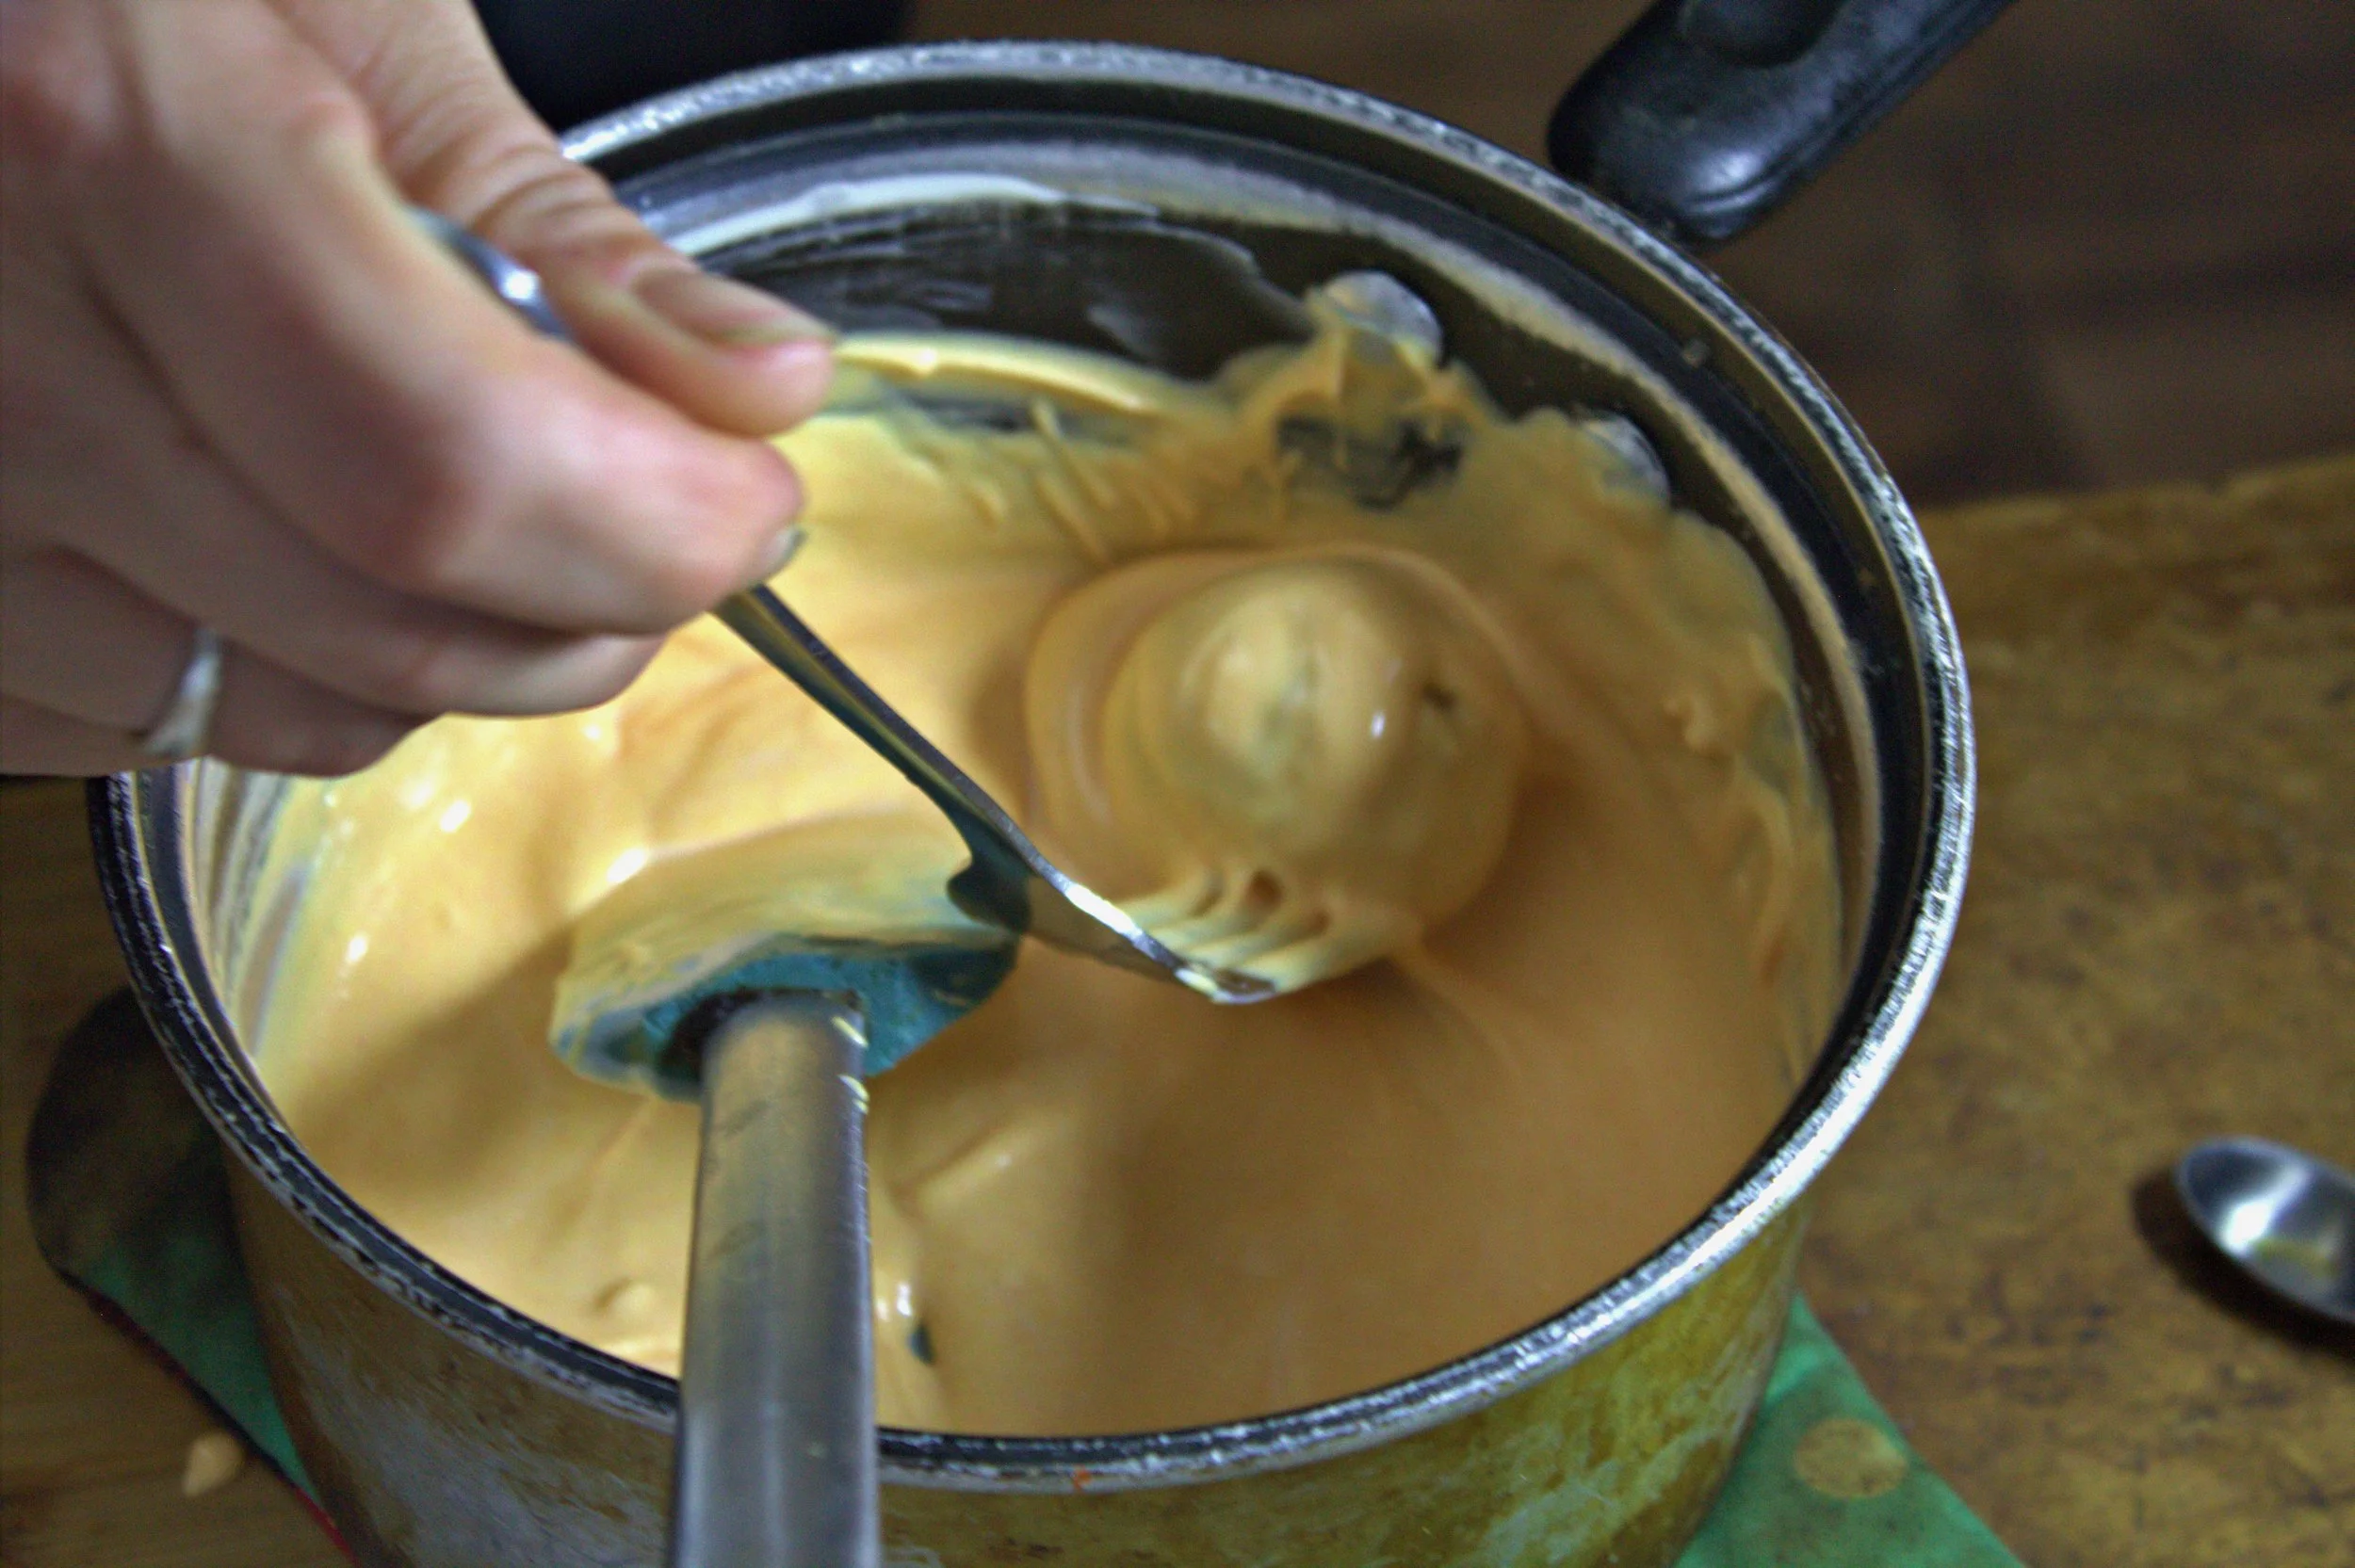
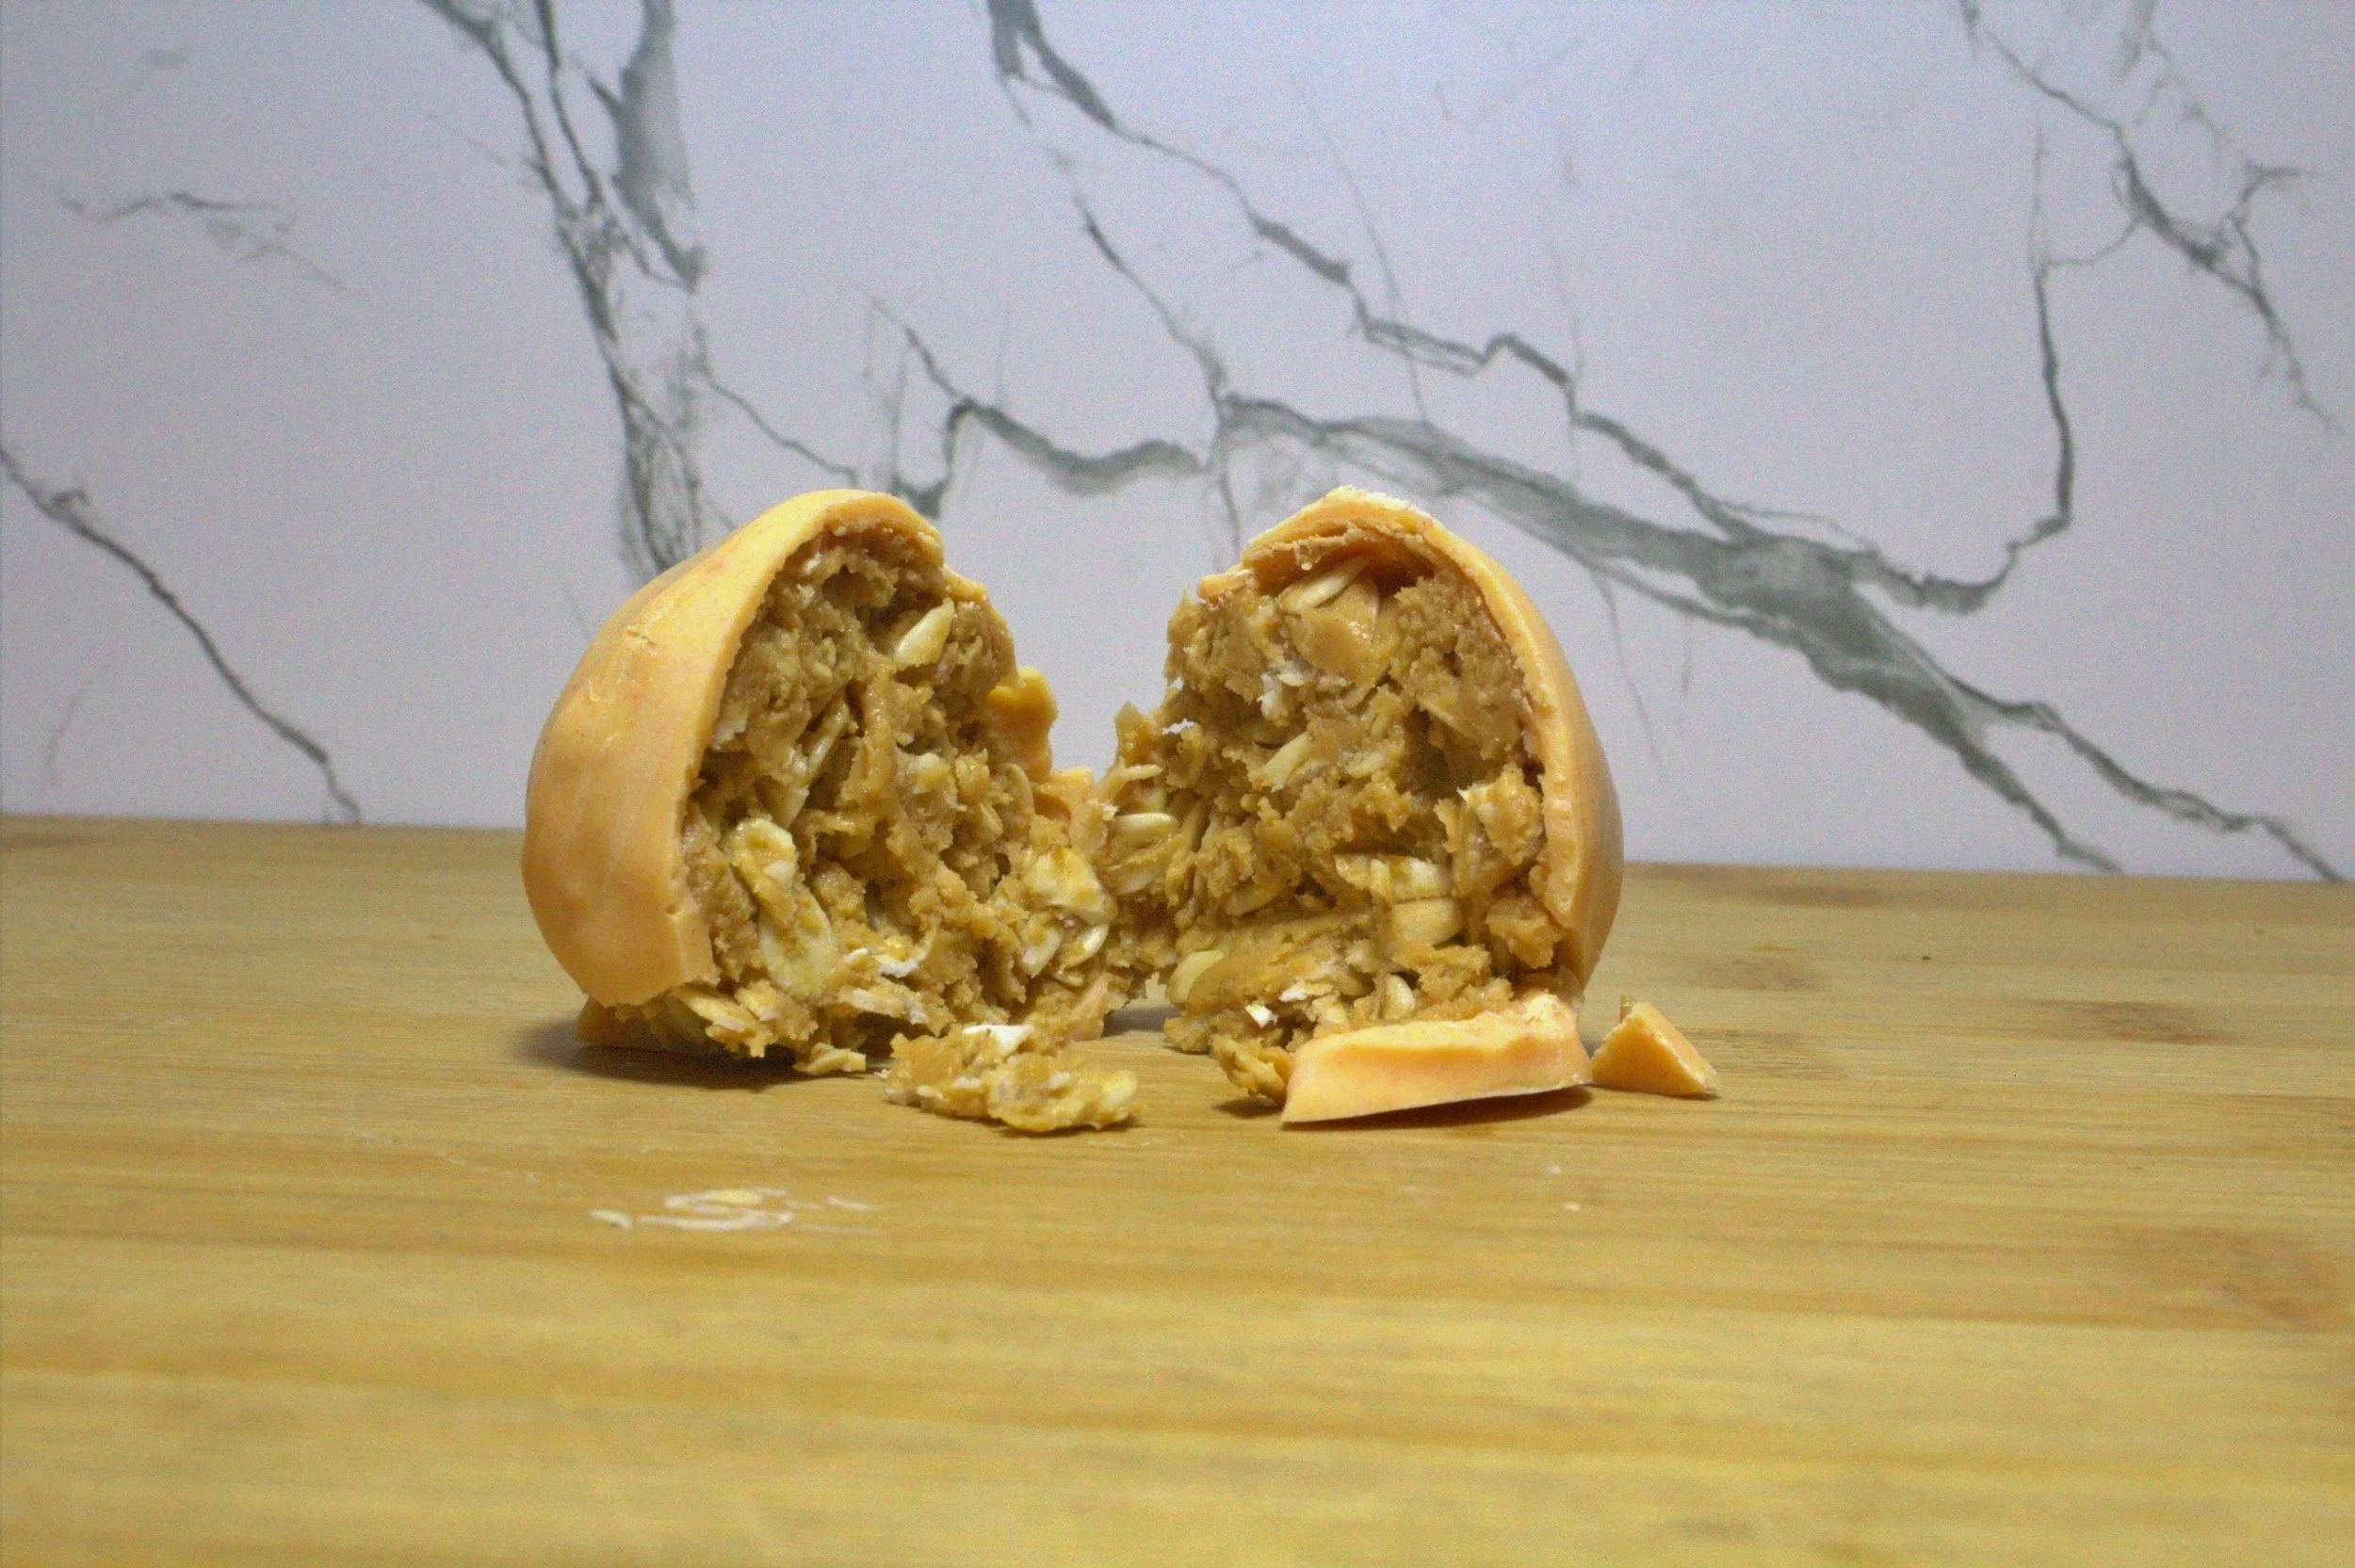
1. Mix together the peanut butter, honey, oats, and chocolate chips
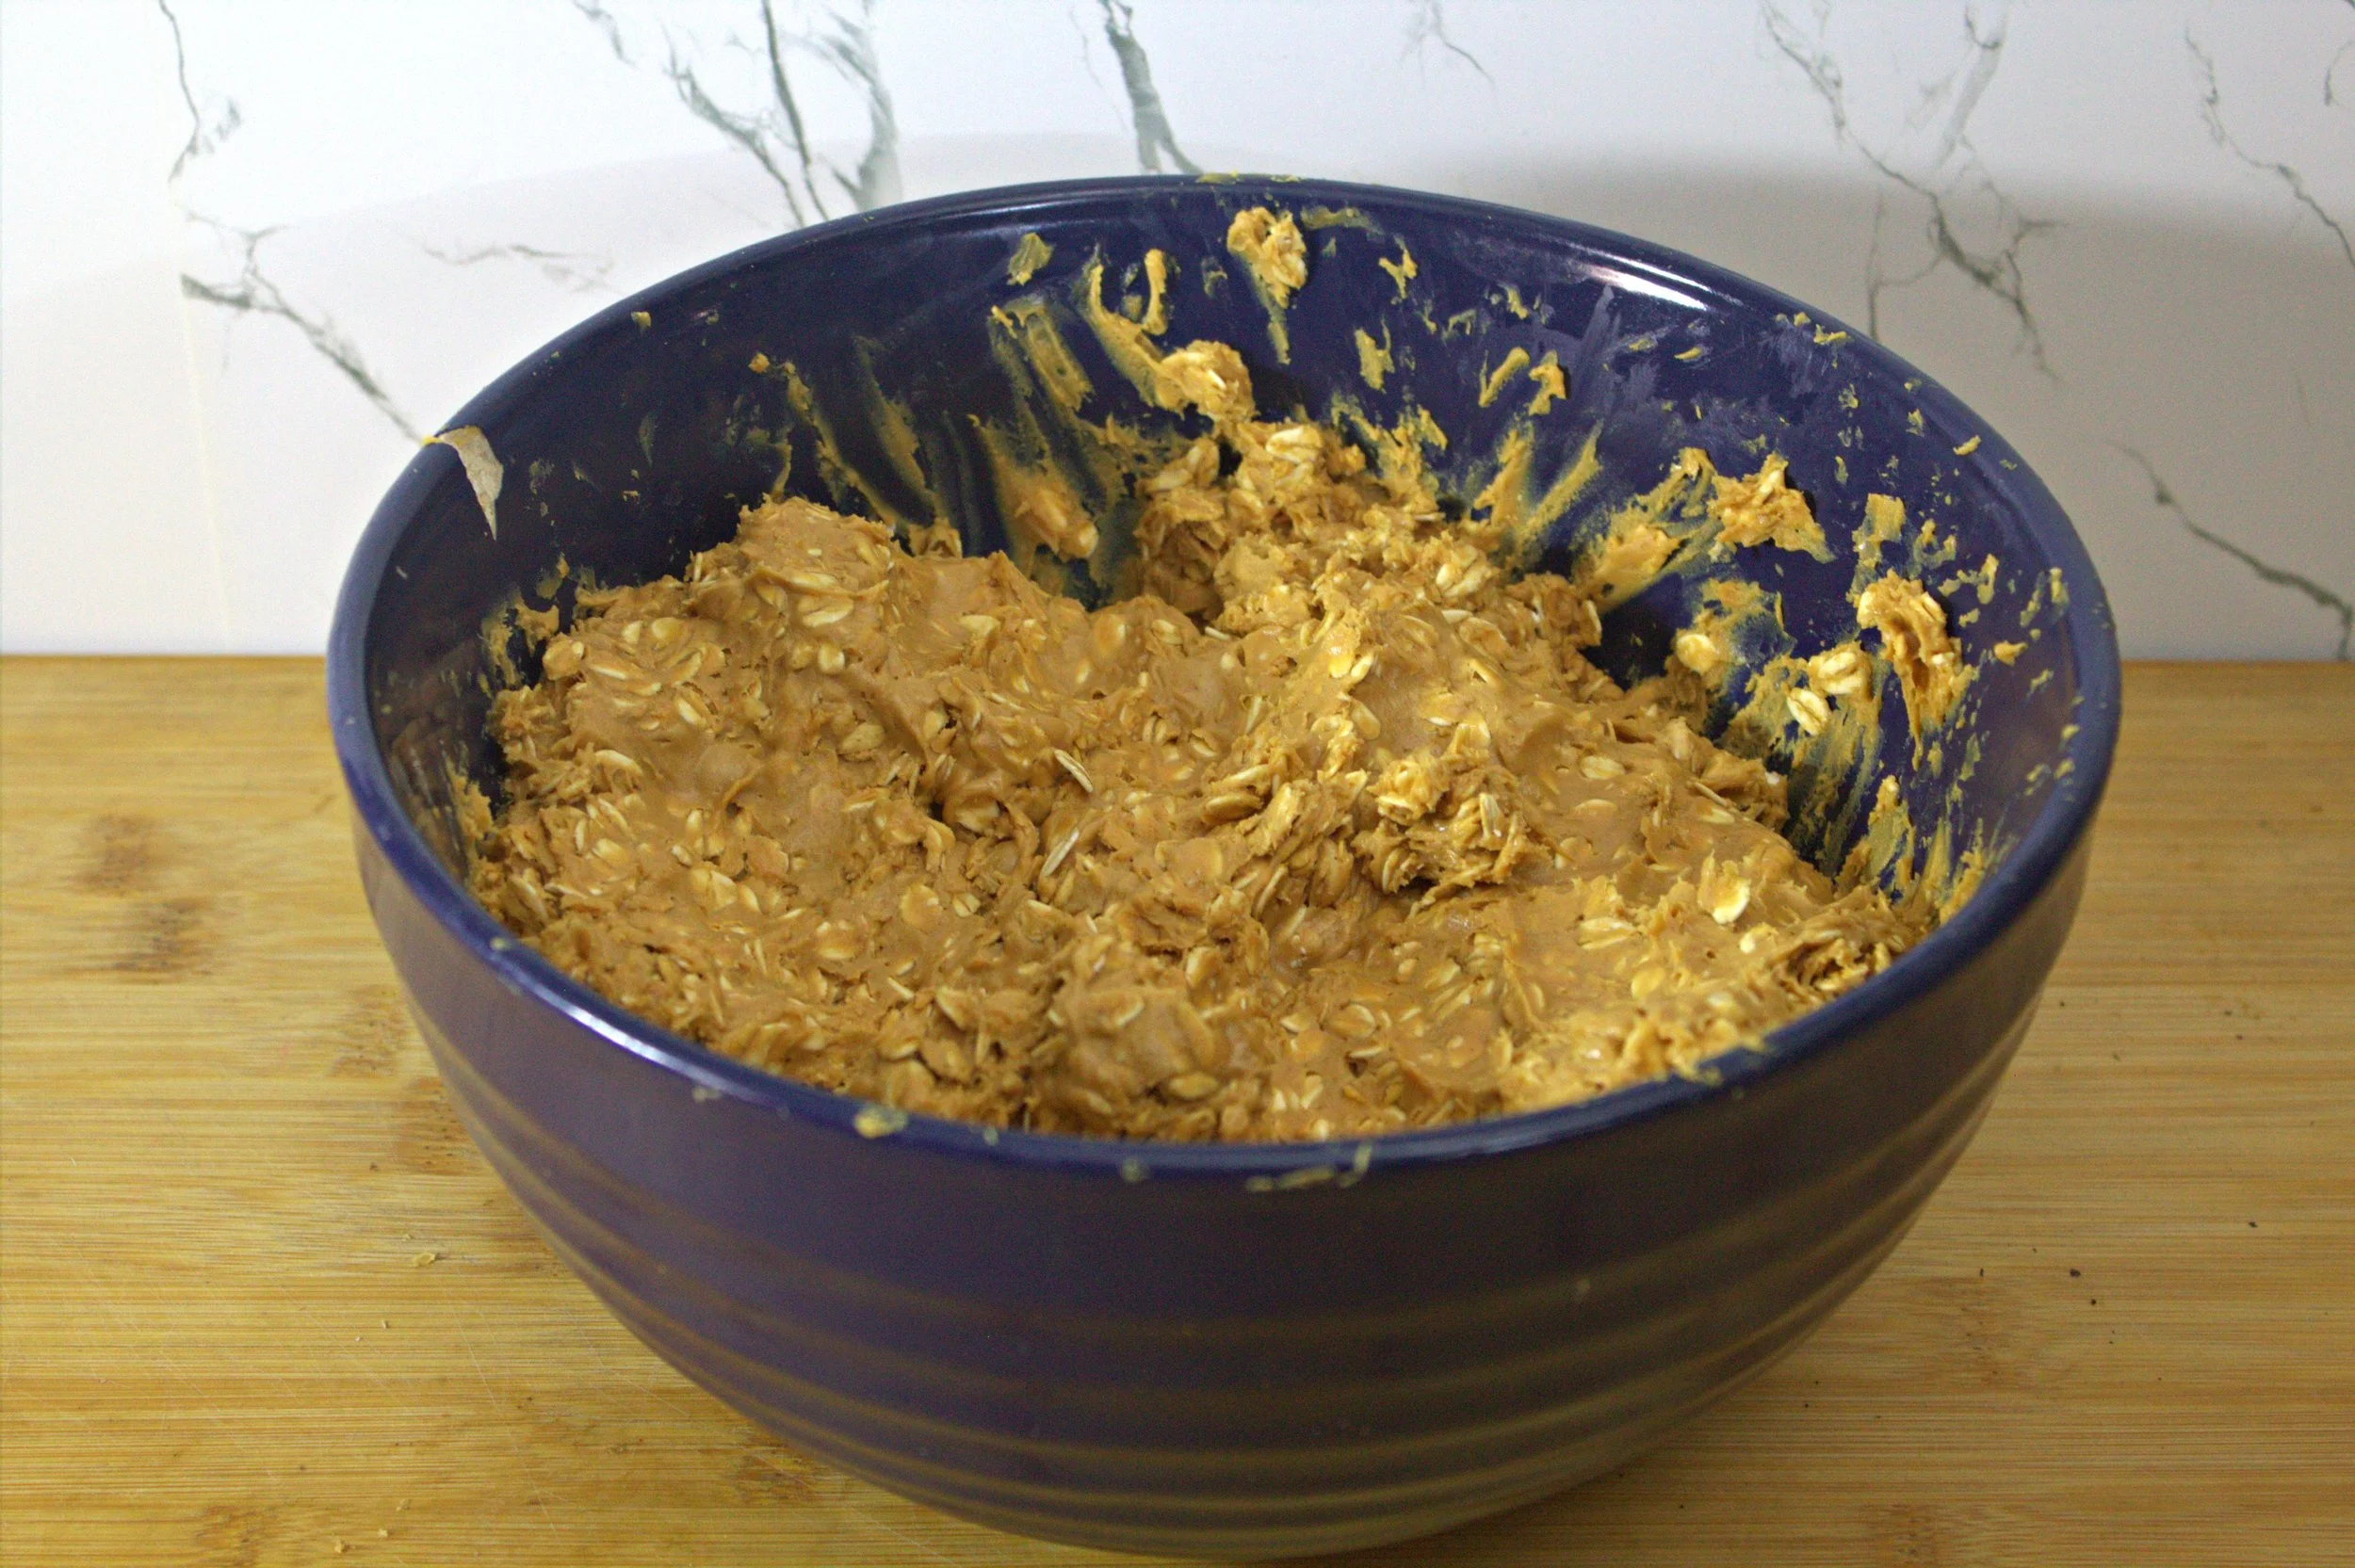
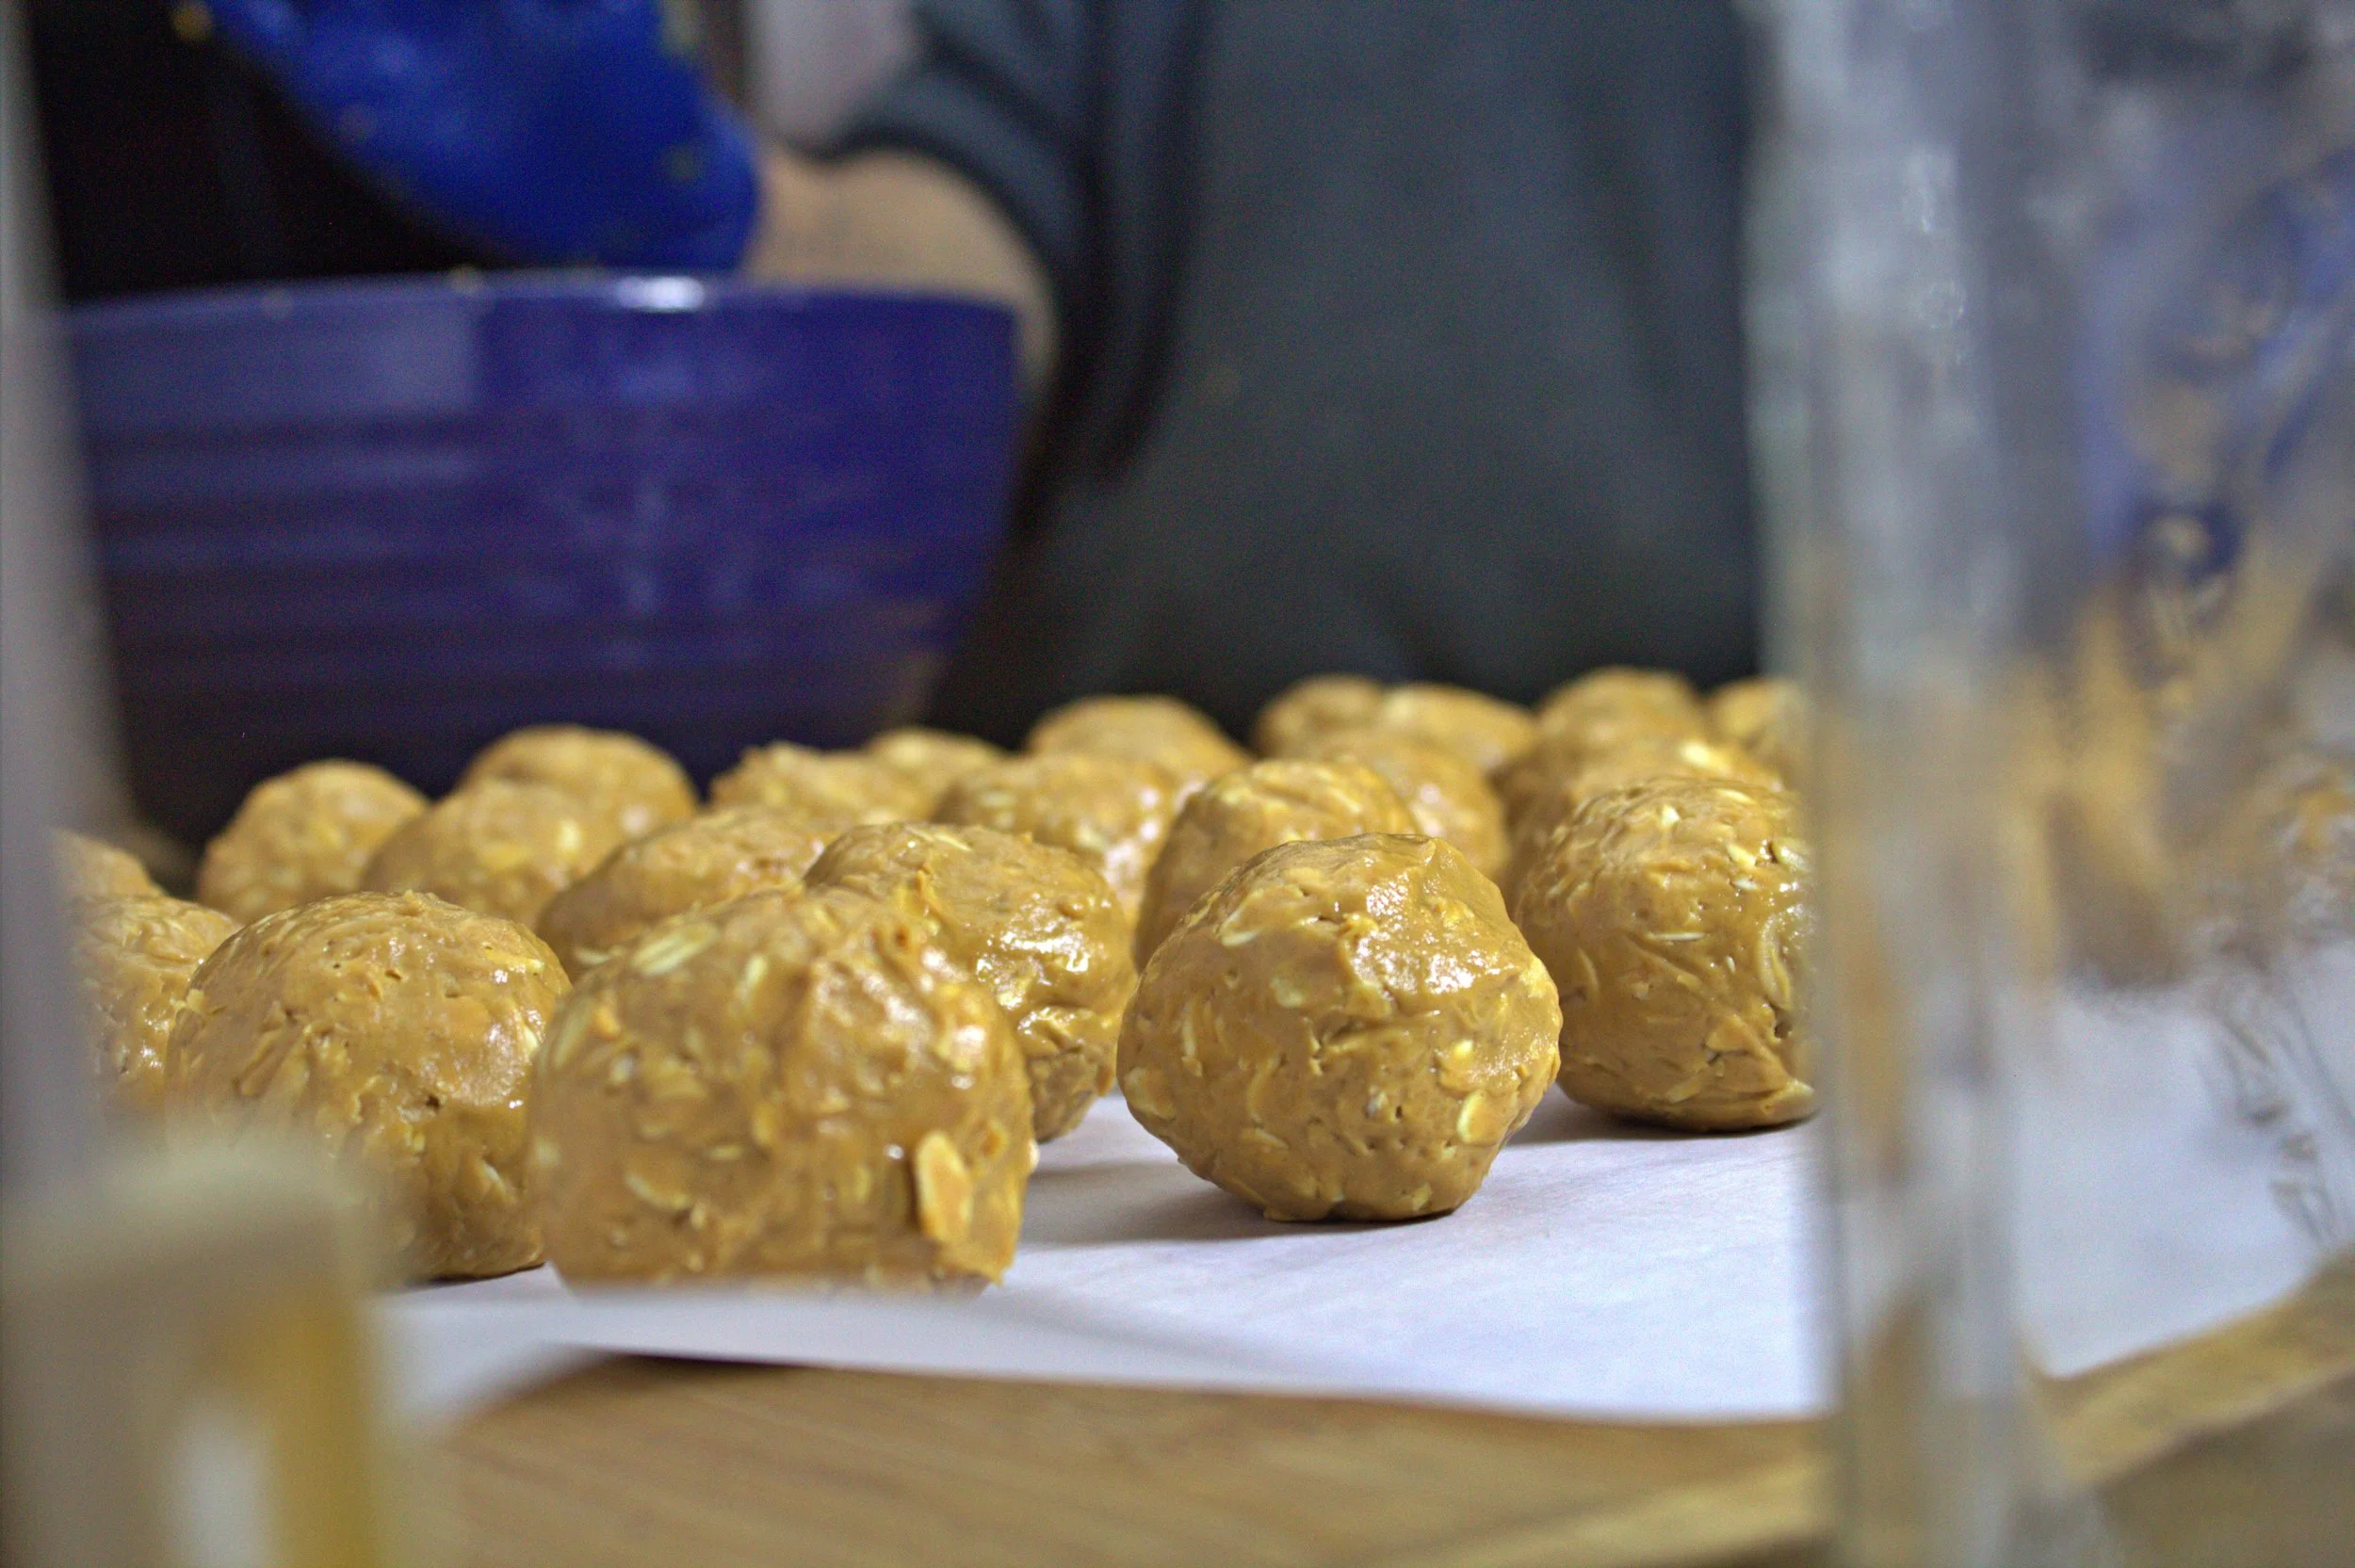
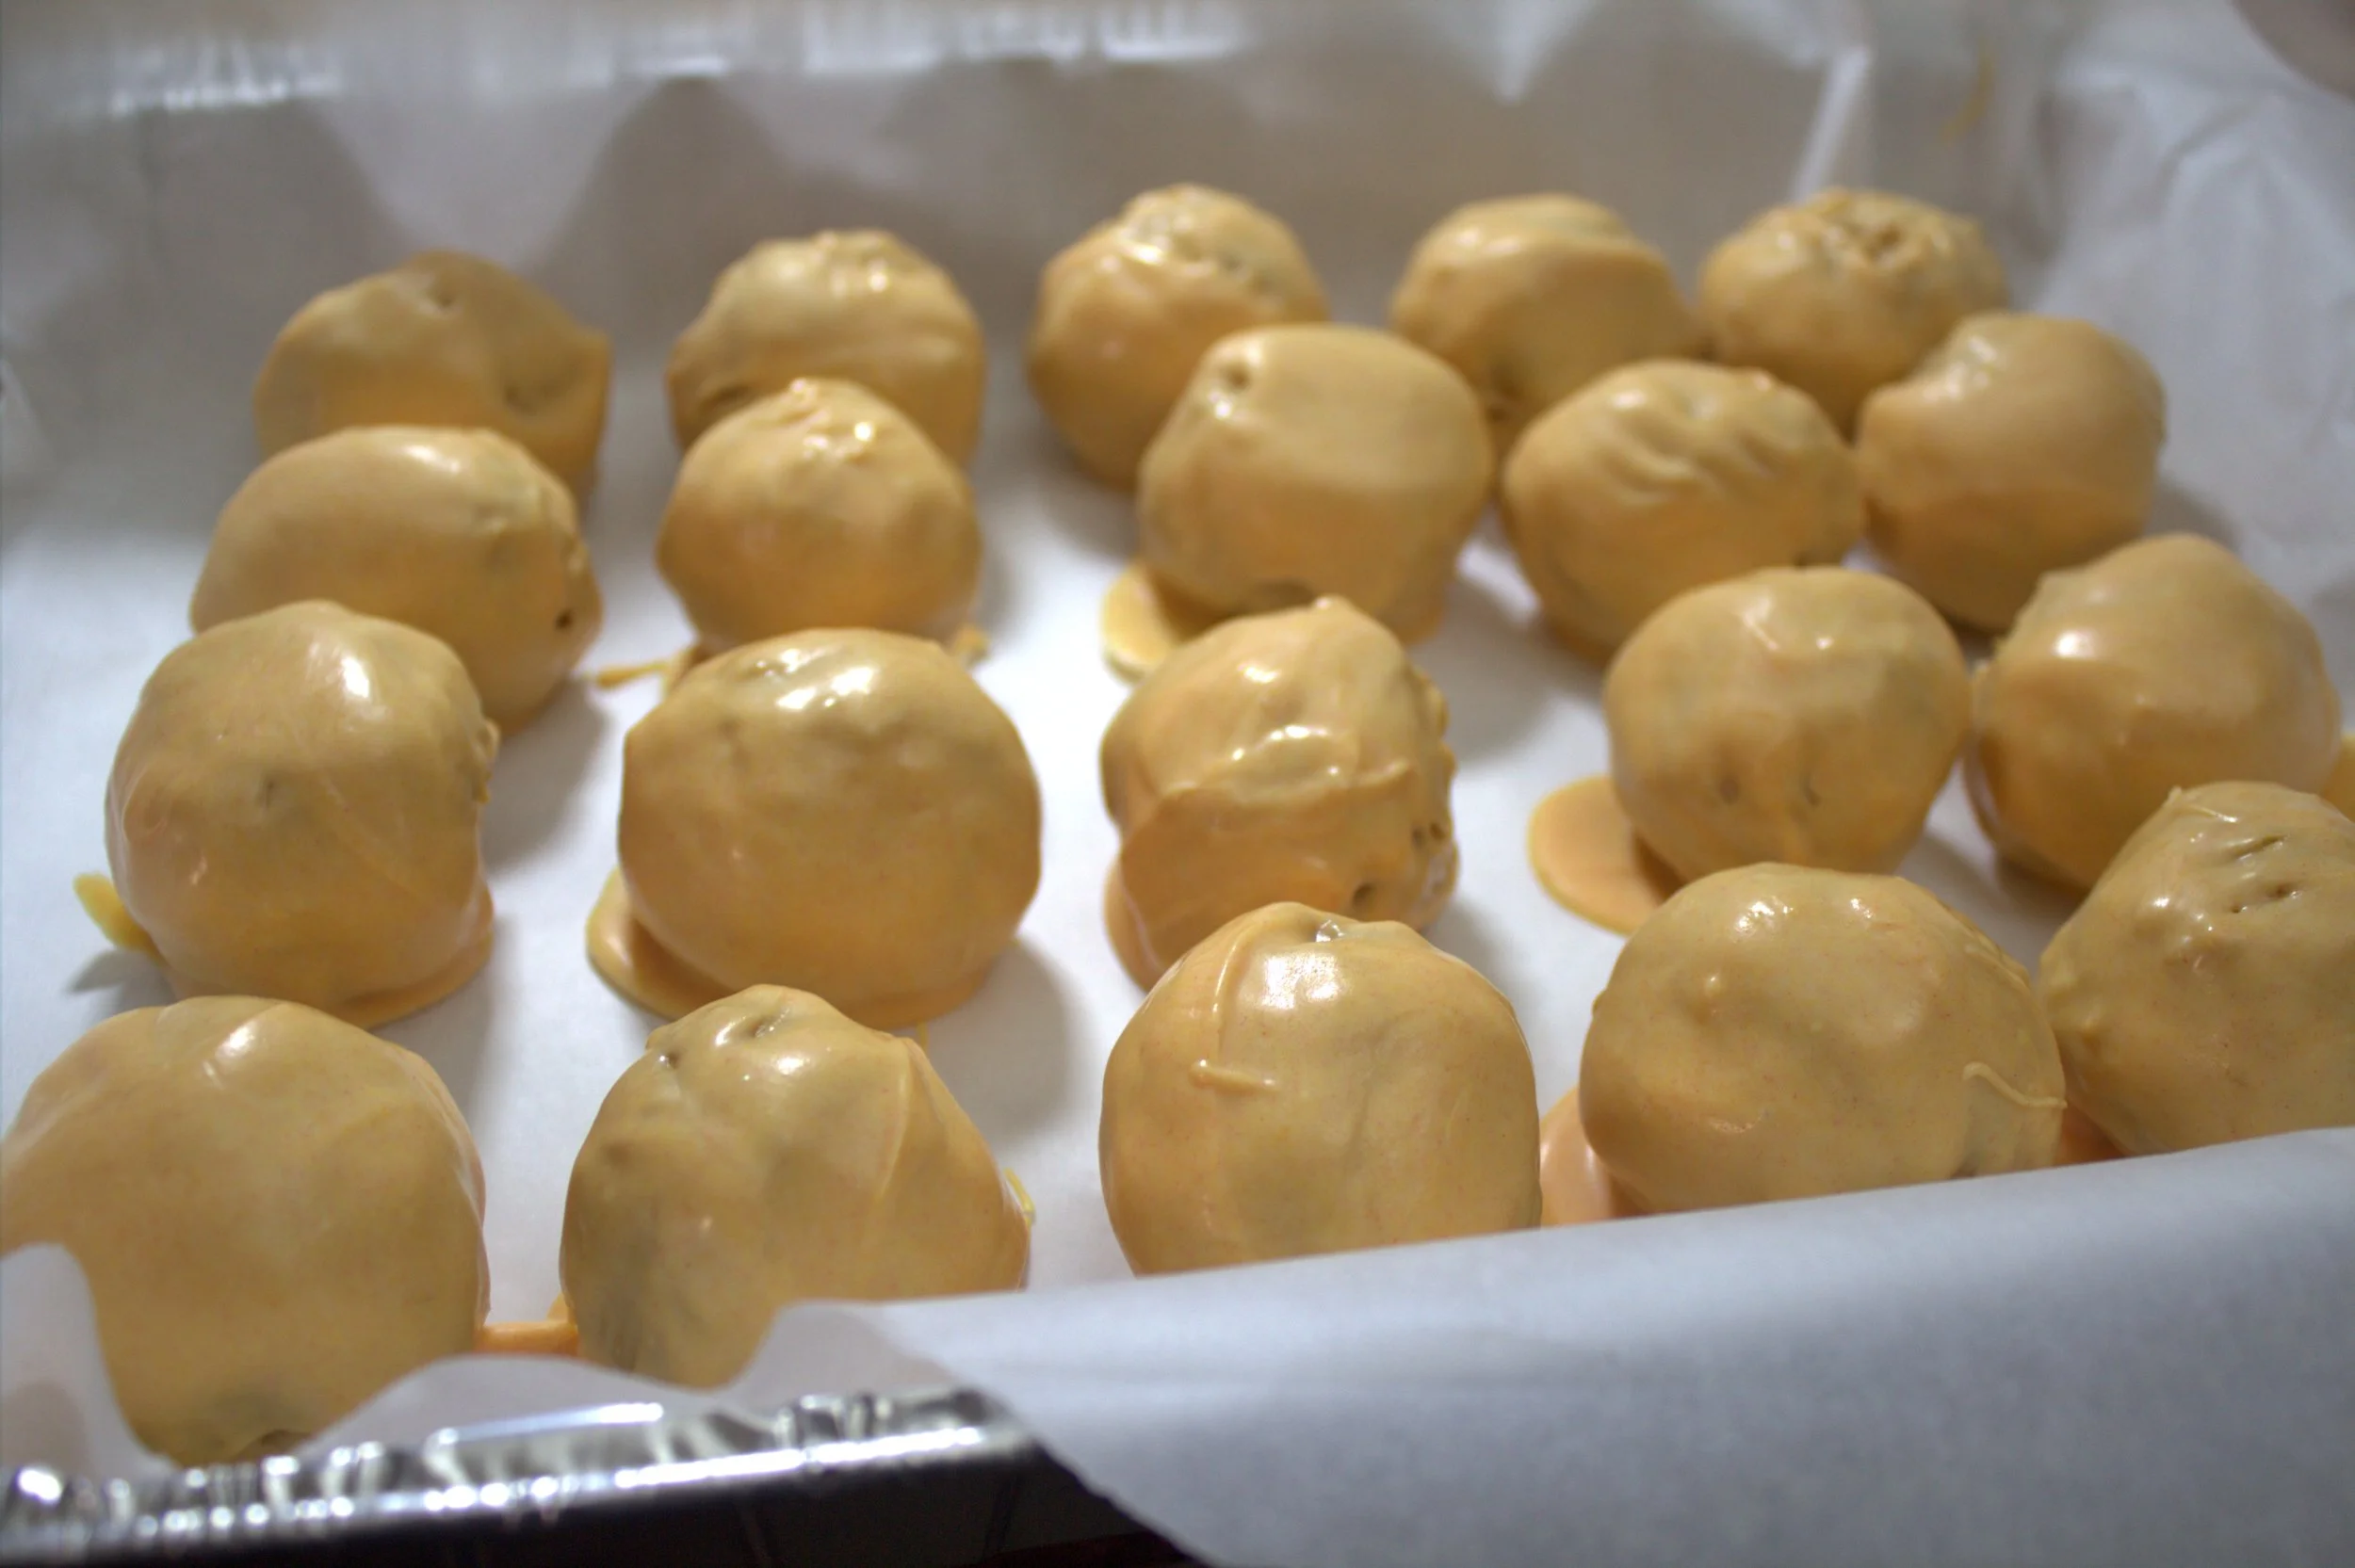
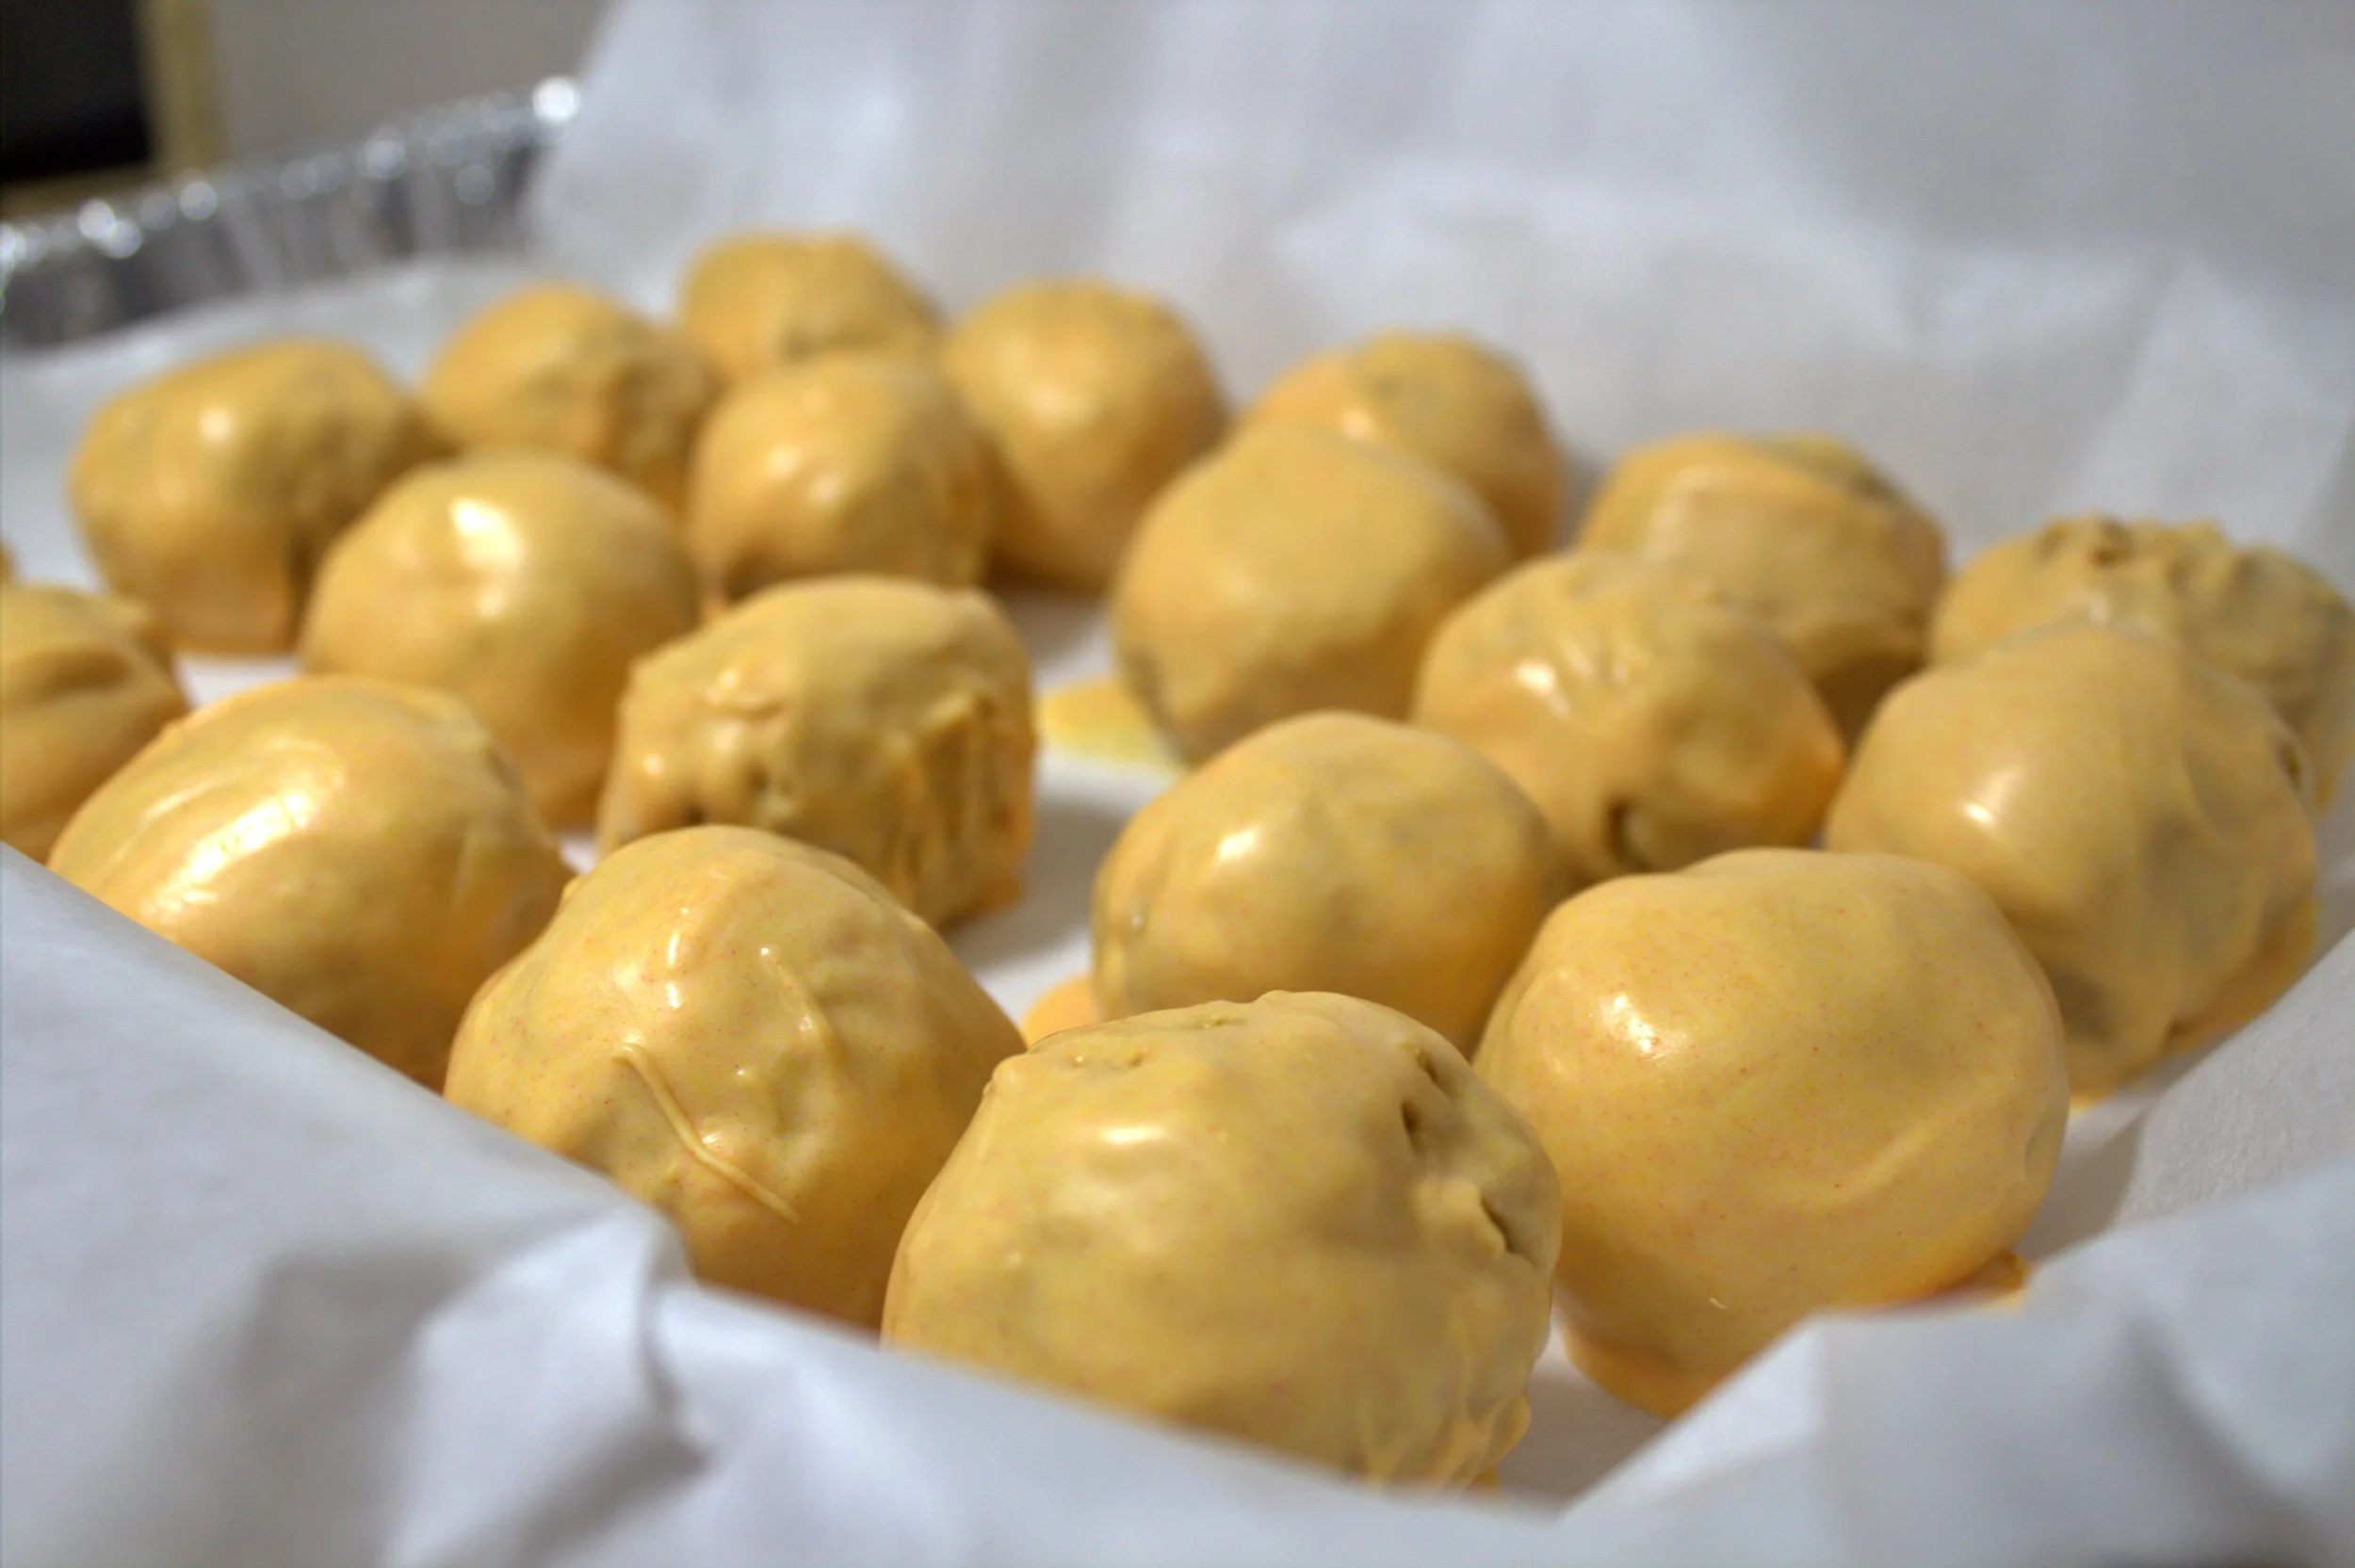
2. once well mixed divide into 12 and roll into small balls
3. if you are not using the melting chocolate then enjoy as is or refrigerate
4. if you are using melting chocolate then melt your chocolate according to package if you are using melting chocolate, if you are using chocolate chips or something other than melting chips take a medium size pan and put a cup of water in and heat to a boil, then take a smaller pan and put your chocolate in. take water off of heat and put pan with chocolate in the pan with water and stir till chocolate is melted and coat you peanut balls with chocolate and put on parchments paper to cool.